How Do I Increase My Bitcoin Withdrawal Limit On Cash App?

Are you looking to increase your Bitcoin withdrawal limit on Cash App? The good news is that Cash App offers you the opportunity to raise your withdrawal limit, be it on a weekly or daily basis. In this comprehensive guide, we’ll walk you through the steps to achieve this, ensuring that you can perform hassle-free and high-limit transactions. Let’s get started!


Understanding the Bitcoin Withdrawal Limit on Cash App

Yes, Cash App does have a Bitcoin withdrawal limit. However, it’s essential to know that this limit varies from one user to another. The withdrawal limit is not a one-size-fits-all restriction. Some users may enjoy higher withdrawal limits, while others might have more restricted access based on when they joined the payment app.

As per the Cash App policy, the maximum withdrawal limit stands at 2,000 BTC per day and $5,000 per week. While this may seem sufficient for many, some users might need higher limits to accommodate their transactions comfortably.


Increasing Your Cash App Bitcoin Withdrawal Limit


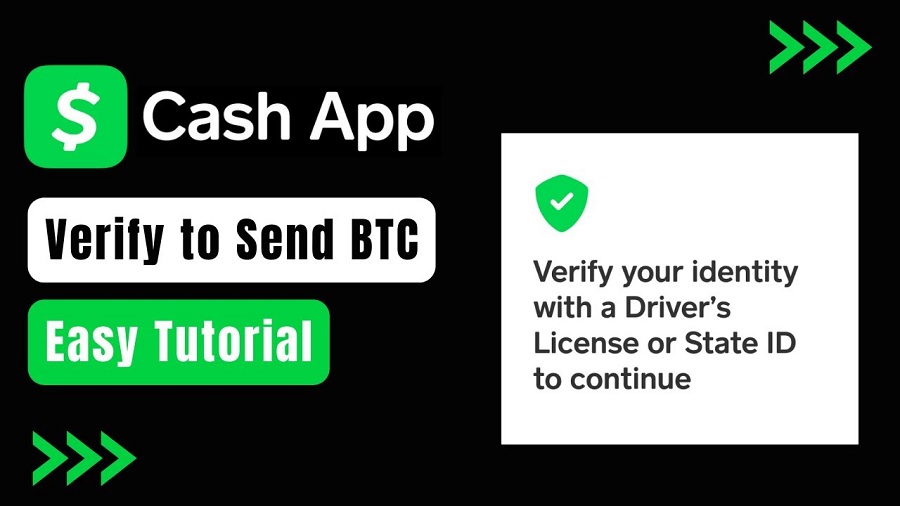
Method 1: Verification Process

The first and foremost step to increase your Bitcoin withdrawal limit on Cash App is to verify your identity (ID) and bank account information. Ensuring that your account is fully verified is crucial to gain access to higher withdrawal limits. Follow these simple steps:

·        Sign in to your Cash App account.

·        Tap the profile icon or the “Settings” option.

·        Select “Verification” and follow the prompts to verify your identity and bank account.

·        Upload any necessary documents as required during the verification process.


Method 2: Contact Cash App Support

If the verification process isn’t suitable for you, there’s another option available. You can reach out to the Cash App support team for assistance. The support team will guide you through the process of increasing your withdrawal limit. While this method might take a little longer to complete, it offers the advantage of higher withdrawal limits once approved. You could potentially withdraw up to $7,500 on a weekly basis.

·        Always ensure that you are using Cash App for legal purposes to avoid any potential issues.

·        Failing to comply with Cash App policies might result in a lower Bitcoin withdrawal limit or the deletion of your account.

·        Once you have raised your withdrawal limit, you can perform larger transactions with ease.


Step-by-Step Guide to Withdraw Bitcoin from Cash App

Once you have successfully increased your Bitcoin withdrawal limit on Cash App, follow these simple steps to withdraw your digital assets:

·        Sign in to your Cash App account.

·        Tap the “Banking” icon.

·        Enter the amount of Bitcoin you wish to withdraw, ensuring you have sufficient funds in your account.

·        Review the details and confirm the transaction.

The withdrawal process typically takes only a few minutes to complete. Afterward, you can rest assured that your Bitcoin will be safely transferred to your preferred wallet.


Benefits of Increasing Your Cash App Bitcoin Withdrawal Limit

Increasing your Bitcoin withdrawal limit on Cash App comes with several benefits:

·        Convenience: With higher withdrawal limits, you can perform more substantial transactions without splitting them into smaller amounts.

·        Time-Saving: A higher withdrawal limit means fewer transactions, saving you time and effort.

·        Avoiding Losses: Reaching the withdrawal limit might force you to wait a week before making another withdrawal. Increasing the limit helps you avoid such delays and make timely decisions.


Conclusion

Experiencing limitations while conducting transactions on Cash App can be frustrating. However, by following the methods outlined in this guide, you can successfully increase your bitcoin withdrawal limit on cash app and unlock the full potential of the payment app.

By verifying your account and contacting support if needed, you can enjoy higher withdrawal limits, making your financial activities more efficient and productive. Embrace the freedom to conduct substantial Bitcoin transactions on Cash App and elevate your financial journey.

0

How to Verify Bitcoin on Cash App: A Comprehensive Guide

Welcome to the ultimate guide on verifies Bitcoin on Cash App! As the popularity of cryptocurrencies, especially Bitcoin continues to soar, more and more people are exploring the world of digital assets through user-friendly platforms like Cash App. However, before diving into the exciting world of Bitcoin trading, completing the Cash App btc verification process is essential to ensure a safe and seamless experience. So, let’s begin and learn the steps, benefits, and everything else you need to know about verifying Bitcoin on Cash App.


Understanding Cash App and Bitcoin

You must know about Cash App and Bitcoin. Cash App is a popular mobile payment service created by Square Inc., designed to make sending and receiving money a breeze. Alongside its primary functions, Cash App lets users invest in stocks and trade cryptocurrencies, including the renowned Bitcoin.

Bitcoin, on the other hand, is a decentralized digital currency operating on blockchain technology. It empowers secure, borderless transactions without the need for intermediaries like banks. Its rising value has captured the attention of investors and enthusiasts worldwide.


Getting Started with Cash App Bitcoin Verification

To unlock the world of Bitcoin transactions on the Cash App, you must set up an account and complete the verification process. Here is a simple guide to get you started with Cash App Bitcoin verification:

·        Begin by downloading Cash App from the App Store or Google Play Store and installing it on your mobile device.

·        Sign up on Cash App using your email address or phone number and follow the easy on-screen instructions to create your account.

·        To purchase Bitcoin on Cash App, you must link a debit card, credit card, or bank account, ensuring smooth funding for future Bitcoin ventures.


Why Verifying Bitcoin on Cash App Matters?

Verifying your identity on Cash App is not just a formality; it is a vital step to guarantee security and adhere to regulations. Let’s explore the reasons why verification matters:

·        Verification adds extra protection, guarding your account against unauthorized access and potential fraud.

·        Cash App diligently follows regulatory guidelines to curb money laundering and illegal activities. Completing the verification process helps Cash App maintain a secure user environment.

·        Verification allows you to enjoy higher transaction limits, facilitating more substantial Bitcoin purchases and investments.


Benefits of Verifying Bitcoin on Cash App

Beyond meeting requirements, verifying your Bitcoin on Cash App comes with several perks:

·        Once verified, you can instantly purchase Bitcoin using your linked payment method, with no waiting involved.

·        Verified users can effortlessly send and receive Bitcoin to and from other Cash App users.

·        Verifying your account grants access to the Cash App Cash Card, a Visa debit card that lets you spend your Cash App balance at various merchants.


Documents Required for Bitcoin Verification on Cash App

To breeze through the Bitcoin verification process on Cash App, prepare the following identification documents:

·        A valid driver’s license, passport, or state ID should do the trick.

·        You will need to provide a clear selfie or a picture of yourself holding your photo ID to verify your identity.

·        Some users might need to submit a utility bill or bank statement to validate their address.


Can You Use Cash App for Bitcoin Transactions without Verification?

While some basic features of Cash App are accessible without verification, using Bitcoin services generally requires completing the verification process. Unverified users may encounter certain limitations, lower transaction caps, and restricted Bitcoin functionalities.


0

How to add money to your Cash App and use it with a Cash Card

To add money to your Cash App and utilize it with a Cash Card, you can follow a straightforward process. Firstly, ensure that you have linked a valid bank account or debit card from which funds can be transferred. Open the Cash App on your mobile device and tap on the “Balance” tab, followed by the “+ Add Cash” option. Enter the amount you wish to add and proceed by tapping “Add.” If prompted, enter your passcode or use your fingerprint for authorization purposes.

Once successfully added, the funds will reflect in your Cash App balance instantly and can be used via the associated Cash Card. This Visa debit card is customizable and offers numerous benefits like real-time notifications of transactions, boosts for discounts at select merchants, ATM withdrawals, direct deposits, and even contactless payments through Apple Pay or Google Pay. By following these steps diligently, you can efficiently manage your finances using Cash App’s seamless integration with their convenient Cash Card feature.


How to add money on Cash App from your bank account

To add money to your Cash App from your bank account, you can follow these steps:

Open the Cash App: Launch the Cash App on your mobile device. Make sure you have already created an account and linked your bank account to the app.

Tap on the profile icon: Look for the profile icon or your profile picture at the top-left corner of the app’s home screen. Tap on it to access your account settings.

Select “Cash & BTC”: In the account settings menu, you will see various options. Look for “Cash & BTC” and tap on it. This option allows you to manage your Cash App balance.

Tap on “Add Cash”: Within the “Cash & BTC” section, you will find an option called “Add Cash.” Tap on it to proceed.

Enter the amount: You will be prompted to enter the amount of money you want to add from your bank account to your Cash App balance. Type in the desired amount.

Tap on “Add”: After entering the amount, tap on the “Add” button to initiate the transfer from your bank account to your Cash App balance.

Select your bank: On the next screen, you will see a list of linked bank accounts (if you have multiple accounts linked). Choose the bank account from which you want to transfer money.

Verify your identity: Cash App may require you to verify your identity by providing additional information or by entering a PIN or password associated with your bank account.

Confirm the transfer: Review the details of the transfer, including the amount and bank account information. If everything looks correct, confirm the transfer to complete the process.

Please note that the exact steps and options within the Cash App may vary slightly depending on the app version and updates. If you encounter any difficulties or need further assistance, it’s recommended to refer to the Cash App’s official support resources or contact their customer support for guidance.


Where can I load my Cash App Card?

You can load your Cash App Card at various retail locations, known as Cash App Cash Load Partners. These partners include popular retailers such as Walmart, Walgreens, CVS, 7-Eleven, Dollar General, and many others.


To load your Cash App Card, you can visit one of these Cash App Cash Load Partners and ask the cashier to add funds to your Cash App Card. You will need to provide them with the necessary details, such as your Cash App Card number or barcode. The cashier will then process the transaction and add the requested amount to your Cash App Card.


It’s important to note that there may be fees associated with loading your Cash App Card at these retail locations. The fees can vary, so it’s recommended to check the Cash App website or app for the most up-to-date information on fees and participating Cash Load Partners in your area.


Since policies and partnerships may change, I recommend visiting the official Cash App website or checking within the app for the most accurate and recent information regarding loading your Cash App Card.

0

Money can be transferred from Apple Pay to the Cash app.

You wish to use Cash App to make a payment, but it’s now empty and the majority of your money is in Apple Cash.

You could have even tried using Apple Pay to send money directly to your Cash App account. If so, there’s a good possibility your attempt failed because there isn’t a direct transfer option available between these two payment platforms.

Don’t worry if Cash App declined your Apple Pay transfer before. Although you can’t transfer funds directly from Apple Wallet to Cash App—and vice versa—you can use an eligible debit card to serve as an intermediary.

However, note that not every linked card offers seamless transfers. Both Apple Pay Cash and Cash App have stringent transfer limits, so you might have trouble sending funds through specific bank accounts.


If you don’t want to waste your time on failed transfers, keep reading.

We reviewed dozens of tips and tricks on transferring funds between Apple Pay and Cash App to give you a comprehensive, easy-to-follow guide. That way, you can fund your Cash App account quickly without wasting money on transfer fees.


How To Transfer Money From Your Apple Pay To A Cash App Account

Follow this straightforward step-by-step guide on moving money from your Apple Pay wallet to your Cash App account.

Step 1: Open Your Cash App account and click on your balance at the bottom left of the screen.

Step 2: The app should direct you to My Cash.

Step 3: Next, you’ll see your available balance and the Add Cash and Cash Out buttons at the top of your screen.

Step 4: Scroll down to your Cash, Bitcoin, Chase Bank, and Credit Card buttons, then hit Cash.

Step 5: The app will prompt you to your Cash App Cash Card menu. Here, you’ll see your ABA routing number and account number. Take note of them.

Step 6: Exit Cash App and go to Settings.

Step 7: Scroll down to Wallet and Apple Pay, click the Apple Cash section, then tap Bank Account.

Step 8: You should see an Add Bank Account button. If not, you likely have an existing card linked, which you’ll need to remove.

Step 9: Next, you’ll get a prompt asking you to input your ABA routing and account numbers.

Step 10: Enter the necessary information and hit next. The bank that your Cash App Cash Card uses should now show up on your screen.

Step 11: Go back to the Apple Cash section and hit Transfer to Bank.

Step 12: Input the amount you want to transfer, select Instant or Regular Transfer, hit Transfer, then confirm the transaction with your Face ID, Passcode, or Touch ID.

Step 13: The money will reflect in your Cash App Cash Card balance after processing.


The Time It Takes To Transfer Money from Apple Pay To Cash App

You have two options when transferring money from your Apple Pay to Cash App account:


Regular Transfer

You can make multiple regular transfers for free as long as you don’t go over your transaction limits. However, each transaction will take 1 to 3 days.


Instant Transfer

You’ll receive your money in real-time, whether you’re sending money to a bank-issued debit card or your Cash App Cash Card.

The longest you’ll wait is 30 minutes. However, Apple Pay charges 1% on every instant transfer you make.


Apple Pay Transfer Limits

Note that you can only move $20,000 every week, and you can’t send more than $10,000 in one transfer. Your Apple Pay wallet limit refreshes after seven calendar days.

However, note that Apple Pay monitors users that frequently max out their accounts. Apple might freeze your funds and lock your account if it suspects you of illegal activities (i.e., money laundering).

0

Sending Money Made Easy: Exploring Apple Pay’s Money Transfer Feature

Apple Pay is a popular mobile payment and digital wallet service developed by Apple Inc. It allows users to make payments using their iPhone, Apple Watch, iPad, or Mac devices. In addition to its primary payment functionality, Apple Pay also offers a convenient money transfer feature that simplifies sending and receiving money between individuals. Let’s explore how Apple Pay’s money transfer feature works and its benefits.


Setting Up Apple Pay:

Before you can use the money transfer feature, you need to set up Apple Pay on your device. Here’s how:

·        IPhone: Open the Wallet app, tap the “+” button to add a card, and follow the prompts to add your debit or credit card. Alternatively, if your card is already linked to your iTunes account, you can go to “Settings” > “Wallet & Apple Pay” > “Add Card.”

·        Apple Watch: Open the Apple Watch app on your iPhone, tap “Wallet & Apple Pay,” and follow the prompts to add your card.

·        IPad: Go to “Settings” > “Wallet & Apple Pay” > “Add Card” and follow the steps to add your card.

·        Mac: Go to “System Preferences” > “Wallet & Apple Pay” and add your card.


Adding Money Transfer Apps:

To utilize the money transfer feature, you’ll need to have compatible money transfer apps installed on your device. Examples include Venmo, PayPal, Cash App, and others. Make sure you have these apps installed and set up with your desired payment accounts.


Sending Money with Apple Pay:

Once you’re Apple Pay and money transfer apps are set up, you can easily send money to using Apple Pay. Here’s how:

On iPhone: Open the Messages app and start a conversation with the person you want to send money to. Tap the Apple Pay icon (looks like a dollar sign) in the app drawer below the message field. Enter the desired amount, authenticate with Touch ID, Face ID, or your passcode, and tap “Send.” The recipient will receive a message indicating the money transfer.

On Apple Watch: Open the Messages app or select the person you want to send money to from your contacts. Tap the Apple Pay icon, select the desired amount, and double-click the side button to send the payment.

On iPad or Mac: You can send money using Apple Pay directly in the Messages app on iPad or the Messages or Safari app on Mac. The process is similar to the iPhone method mentioned above.


Receiving Money with Apple Pay:

If someone sends money through Apple Pay, you’ll receive a notification. Here’s how to accept the payment:

·        On iPhone: Open the notification or go to the Messages app. Tap the message with the payment, and then tap “Accept.” The money will be added to your Apple Cash card or transferred to your linked bank account, depending on your settings.

·        On Apple Watch: When you receive a payment notification, open the notification, scroll down, and tap “Accept” to complete the transaction.

·        On iPad or Mac: You can accept money through the Messages app on iPad or Mac by following the prompts in the message.


Managing Money in Apple Cash:

Apple Pay’s money transfer feature utilizes an optional virtual payment card called Apple Cash. It allows you to store money received through Apple Pay or make payments directly from the card. You can use the Apple Cash card for purchases, transfer the funds to your bank account, or send money to other people.

To manage your Apple Cash card, you can:

·        Add money to your Apple Cash card from your linked bank account.

·        Transfer money from your Apple Cash card to your bank account.

·        Check your Apple Cash balance in the Wallet app or by asking Siri.

·        View transaction history and statements in the Wallet


FAQ

Q: How can I send money through Apple Pay?

A: To send money to Apple Pay, follow these steps:

·        Make sure you have Apple Pay set up on your device and have compatible money transfer apps installed.

·        Open the Messages app and start a conversation with the person you want to send money to.

·        Tap the Apple Pay icon (looks like a dollar sign) in the app drawer below the message field.

·        Enter the desired amount you want to send.

·        Authenticate the payment using Touch ID, Face ID, or your device’s passcode.

·        Tap “Send” to complete the transaction.


Q: Can I send money through Apple Pay on devices other than the iPhone?

A: Yes, you can send money with Apple Pay on devices like Apple Watch, iPad, and Mac. The process may vary slightly depending on the device, but you can generally use the Messages app or other compatible apps to initiate the money transfer.


Q: Do I need to have a specific bank account linked to Apple Pay to send money?

A: No, you don’t need a specific bank account. Apple Pay allows you to link various debit or credit cards to your account. When you send money, it can be deducted from any linked card you choose.


Q: Can I send money internationally using Apple Pay?

A: The availability of international money transfers through Apple Pay depends on the supported money transfer apps in your region. Some apps may offer international transfers, but it’s important to check the capabilities of the specific money transfer app you’re using.


Q: Are there any fees associated with sending money through Apple Pay?

A: Apple Pay itself doesn’t charge any fees for sending money. However, some money transfer apps may have their own fees or transaction charges. It’s advisable to review the terms and conditions of the specific money transfer app you’re using to understand any associated fees.


Q: Can I cancel a money transfer made through Apple Pay?

A: Once a payment is sent through Apple Pay, it’s generally not possible to cancel or reverse it. It’s essential to review the details of the payment carefully before confirming the transaction.


Q: How long does it take for the recipient to receive the money?

A: The time it takes for the recipient to receive the money can vary depending on the money transfer app used. In many cases, the transfer is typically completed instantly or within a few minutes. However, it’s advisable to check the specific money transfer app for more precise information on transfer times.


Q: Is it necessary for the recipient to have an Apple device to receive money through Apple Pay?

A: No, the recipient doesn’t need to have an Apple device to receive money sent through Apple Pay. The recipient can receive funds using the supported money transfer app on their own device or via other payment methods provided by the money transfer service.


Q: Are there any transaction limits when sending money through Apple Pay?

A: Transaction limits may vary depending on the money transfer app you’re using. Some apps impose daily or weekly limits on the amount you can send. It’s advisable to review the terms and conditions of the specific money transfer app for information on transaction limits.


0

How to Send Money through Apple Pay: The Easy and Convenient Way

In this fast-paced digital world, we often find ourselves looking for quick and hassle-free ways to transfer money. And what better way to do it than through Apple Pay! With just a few taps on your phone, you can instantly send money to friends and family without the need for cash or checks. In this blog post, we’ll guide you step-by-step on how to use Apple Pay for sending money – making your life easier and more convenient than ever before! So sit back, relax, and let’s get started!


Sending Money with Apple Pay

Assuming you have an iPhone with Apple Pay set up and your friend has an iPhone with Apple Pay set up, sending money is easy. Here’s how:

·        Open the Messages app and start a new conversation or tap on an existing one.

·        Tap on the Apple Pay button . If you don’t see the Apple Pay button, tap on the More button and then tap on Apple Pay.

·        Enter the amount of money you want to send and tap Send.

·        You’ll be asked to confirm the payment with Face ID, Touch ID, or your passcode.

That’s it! The money will automatically be sent to your friend and will appear in their Apple Wallet app.


Pros and Cons of Using Apple Pay for Money Transactions

Apple Pay is a convenient tool that can be used to send money to friends and family. It is important to weigh the pros and cons of using Apple Pay before using it for any transactions.


The Pros of Using Apple Pay:

·        Apple Pay is extremely convenient. There is no need to carry around cash or checks when you can use your iPhone or Apple Watch to pay for goods and services.

·        Apple Pay is secure. When you use Apple Pay, your credit card information is not shared with the merchant. This helps to prevent fraud and keeps your information safe.

·        Apple Pay is fast. Transactions are completed quickly, so you won’t have to wait in line at the register.


The Cons of Using Apple Pay:

·        Some merchants do not accept Apple Pay as a form of payment. Before using Apple Pay, make sure that the merchant you are patronizing accepts it.

·        There is a small fee associated with using Apple Pay for transactions. The fee is typically around $0.15 per transaction, but this can add up if you use Apple Pay frequently.


Security and Privacy Settings for Sending Money Through Apple Pay

When you send money through Apple Pay, your security and privacy settings will be the same as when you use Apple Pay to make purchases. Your credit or debit card number will not be stored on your device or shared with the merchant. Instead, a unique Device Account Number will be assigned, encrypted, and securely stored in the Secure Element on your device. Each transaction will be authorized with a one-time unique dynamic security code.


Alternatives to Apple Pay for Money Transactions

There are a few alternatives to Apple Pay for money transactions. One option is to use a credit or debit card with Apple Pay. Another option is to use a mobile payment service like PayPal, Venmo, or Square Cash. You could always send money through email or text message.


Conclusion

Sending money through Apple Pay is a convenient and secure way to send funds to friends, family, and businesses. It only takes a few taps of your finger or digits on the screen to do this and you can feel confident knowing that all transfers are protected by industry-leading security measures. Whether you’re paying someone back for dinner or transferring money overseas, Apple Pay makes it easy to transfer funds without ever having to leave your home

0

Can I request a Cash app refund without a bank?

If you’re using Cash App and you don’t have a linked bank account, it may still be possible to request a cash app refund. Here are a few things you can try:

Contact the recipient: If you made a payment to someone and need a refund, try reaching out to the recipient directly and explain the situation. They may be willing to refund your payment or work out a resolution.
Cash App customer support: You can reach out to Cash App’s customer support team through the app or by visiting their website. Explain your situation and request a cash app refund. They may be able to assist you or provide guidance on how to proceed.
Use the Cash App balance: If you have funds available in your Cash App balance, you can try requesting a refund directly from Cash App. Within the app, navigate to the payment in question, tap on it, and select the “Refund” option if available. This would refund the funds back to your Cash App balance.
 

Keep in mind that the availability and success of these options may vary depending on the specific circumstances and policies of Cash App. It’s always recommended to refer to the official Cash App website or contact their customer support directly for the most accurate and up-to-date information regarding refunds and alternative options for those without a linked bank account.


How can I create a dispute to get a cash app refund?


To create a dispute and request a Cash App refund, you can follow these general steps:

Open the Cash App: Launch the Cash App on your mobile device. Make sure you have the latest version of the app installed.
Access the Activity tab: Tap on the “Activity” or “Transactions” tab within the Cash App. This will display a list of your recent transactions.
Locate the transaction: Find the specific transaction for which you want to initiate a dispute and request a refund.
Tap on the transaction: Select the transaction to open its details and view more information.
Choose the “…” or “…” button: Look for an option, usually represented by three dots or lines, which allows you to access additional actions or settings for the transaction.
Select the “Dispute” or “Need Help” option: Within the additional actions or settings menu, look for an option related to dispute or requesting help.
Provide details and submit: Follow the prompts and provide relevant details regarding the reason for the dispute and your request for a refund. Be as specific and clear as possible to support your case.
Submit the dispute: Once you’ve provided all the necessary information, review it for accuracy, and submit the dispute request.
Follow up with Cash App: After submitting the dispute, monitor your Cash App notifications or emails for any updates or requests for further information from Cash App’s support team.
 

It’s important to note that the specific steps and options within the Cash App may have changed since my knowledge cutoff in September 2021. Therefore, it’s recommended to refer to the official Cash App website or contact their customer support directly for the most accurate and up-to-date information on how to create a dispute and request a refund.

0

Top Places to Load Your Apple Pay Card for Easy Payments

If you’re looking for the top places to load your Apple Pay card, there are several options available that can make your payments incredibly easy. The first is to use the Wallet app on your iPhone and link it to a debit or credit card, which enables you to add money directly from your bank account. Additionally, some banks and credit unions allow customers to add money via their banking apps or website. Furthermore, many retailers and vendors now accept Apple Pay as a payment method, so it’s worth checking before making any purchases. You can also add funds through PayPal, Venmo, or other money transfer apps that link up with Apple Pay. Ultimately, finding the best place to load your Apple Pay card will depend on what methods are most convenient for you and where you plan on using it most frequently.


How To Add Money To Apple Pay

Adding money to your Apple Pay card is easy and can be done in a few different ways. Here are the top places to load your Apple Pay card for easy payments:

1. Your bank’s app: Most major banks offer the ability to add your credit or debit card to Apple Pay right from their app. simply open up the app, sign in, and look for the option to add a new card. Once you’ve found it, follow the prompts to add your card information and start using it with Apple Pay.

2. The Wallet app: The Wallet app on your iPhone is another great place to add credit and debit cards to use with Apple Pay. Simply open the app, tap on the “+” sign in the top right corner, and follow the prompts to add a new card. You can also use the Wallet app to view your current balance, transactions history, and more.

3. In-store: Many stores now accept Apple Pay as a form of payment, so you can easily add money to your card while you’re out shopping. To do this, simply hold your iPhone near the contactless reader at checkout and follow the prompts on your screen to complete the transaction.

4. Online: You can also use Apple Pay to make purchases online wherever it’s accepted. To do this, simply look for the Apple Pay logo or “Buy with Apple Pay” button at checkout and follow the prompts on your screen to complete the transaction.


Where To Load Your Apple Pay Card

If you’re looking for a place to load your Apple Pay card so you can start using it for easy payments, there are a few options available to you. You can load your card at any Apple Store, online through the Apple Pay website, or through select banks and credit unions.

Apple Stores: You can add money to your Apple Pay card at any Apple Store by using the self-checkout machines. To do this, simply select the “Apple Pay” option at the checkout and follow the prompts to add money to your card. Online: You can also add money to your Apple Pay card online through the Apple Pay website. To do this, simply log in to your account and click on the “Add Money” button. Banks and Credit Unions: You can also load your Apple Pay card at select banks and credit unions. To find a location near you, simply visit the Apple Pay website and use the “Find a Location” tool.


In Store Locations for Adding Money to Apple Pay

There are plenty of locations to load your Apple Pay card so you can make easy payments. Here are some of the most popular places to add money to Apple Pay card:

1. Walmart – You can use the self-checkout lanes at Walmart to add money to your Apple Pay card. Just scan your card at the scanner and then enter the amount of money you want to add.

2. CVS – CVS Pharmacy locations let you add money to your Apple Pay card at the register. Just tell the cashier how much you want to add and they will take care of it for you.

3. 7-Eleven – 7-Eleven stores have special machines where you can swipe your Apple Pay card and then enter the amount of money you want to add. The machine will dispense a receipt that you can use to confirm the transaction.

4. Bank of America – If you have a Bank of America account, you can add money to your Apple Pay card at any ATM location. Just insert your card into the ATM and follow the prompts on the screen.

5. Starbucks – Starbucks locations let you reload your Apple Pay card using their app. Just open up the app, select “Add Money” and then choose how much you want to load onto your card.


Conclusion

We hope this article has been helpful in showing you the top places to load your Apple Pay card for easy payments. With so many options now available, it’s never been easier to use your Apple Pay card to pay for goods and services online. From shopping at online retailers such as Amazon or from purchasing tickets directly from an event website using Apple Pay, there are plenty of ways that you can take advantage of the convenience and security offered by loading your Apple Pay Card.

0

How To Activate Cash App Card: Two Ways – QR Or Manually.

Ordering a cash card on the cash app is one of the primary steps for users after setting up an account. Since a cash card is an essential requirement for using the cash app, you must gather information on how to order a cash card, activate the cash app card, and use methods. The three basic things are considered regarding cash cards – ordering a card>activating it> and Using it.


The cash app provides two ways how to activate a cash card – one is; using QR, and the second is; without QR or manually. While using the QR method, one must use the cash app installed on the Phone, whereas you can put the details (card number, CVV) if you use a desktop or PC to activate a cash card.

First thing first, let’s start with:


How To Order Cash App Card? 

First, press’ Cash Card’ displayed on the home screen after opening up the cash app.
Then after, click the ‘Get Cash Card’ option.
Further, you should press ‘Continue.’
And then continue with the remaining steps.
 

Requirements To Order A Card – 

If you want to benefit from a cash card, which is using a cash app balance, specifically, you need to ensure that you fulfill the criteria of applying for the card. Here’s what you should be/have for ordering cash card:

Your account must be verified (you can do so by providing details: SSN, DOB)
The actual age to use the cash app (being a verified user) is 18 years, so you must be.
The card’s arrival takes place within 10 business days of applying. You must provide a valid address and be available.
After you receive a card, you will need a guide to activate it. Follow the steps to do so. But before that, you must know that you can activate a cash card using a QR code (which comes with the card’s arrival) or manually without QR. The choice is yours.

We will discuss both methods, so be patient and continue reading.


Activate Cash App Card –

Describe ways to activate a cash card.

Activating card with QR code (on Phone):

Using the given QR method is considered easy, as it requires scanning the Code (received by mail along with the new card), and your card will become ready to be used. Check below.

First hand, open the app and choose the ‘Cash Card’ tab found on the home screen.
Next, press ‘Activate Cash Card.’
Then, click ‘OK’ while you are asked to use the camera.
After that, using your device’s camera, scan the given Code for activation purposes.
As soon as you scan the Code, the card will be activated.
 

Manually or without a QR code:

When no code is available, or you decide not to use QR, you can enter the details with the given procedure.

Log in to the cash app account and tap the ‘cash card’ tab.
Then after, press ‘activate cash card’ (as you did in the previous method)
Here, click ‘Use CVV Instead.’
After clicking ‘use CVV instead,’ a section will open to enter details: Cvv code, Card Expiration date.
Enter details, and continue with the steps. 
 

How To Activate Cash App Card On PC: Online Steps!

Yes, you have the option to activate a cash card online using the official cash app site. For that, you should:

Sign in to cash.app
From the left side, choose the ‘Balance’ tab.
Further, press ‘Activate.’ 
Continue with the remaining steps.
 

Other Cash Card Functions You Should Know – 

Your cash card has multiple functions that you should know as a user. Also, you can customize the card as per your interest for a minimum charge of $5.

You must also be familiar with the card limits you get. Here is everything you should know about the cash app card.


Transaction Limit: Cash Card

Since a cash card is an extension of the cash app balance, it has the same transaction limit for cash app verified users – you can send $7500 per transaction; and $15000 monthly.

However, this limit includes all your transactions made via cash card:

In-store Payment
Withdrawals from ATM
Online transfer to someone, and more.
 
Cash App Customization

If you want to stand out from the crowd regarding cash card design, you need to customize it as the option for it is available. Customization includes changing colour, design, embedding names (or anything), and more. Check how you can re-design your cash card with the small fee included.

Launch the app and choose the ‘Cash Card’ icon.
Further, tap the ‘Design a New Card’ section.
After that, select your preference.
Opt for the Design screen to show Username on it (choice).
Next, click the ‘Tap to customize’ option.
After that, provide a sign, an emoji, a number, or anything you like.
And press the ‘Done’ icon.
A preview is given: choose ‘Next’ if you like the design.
Next, complete address verification
And then, press ‘next’ and tap ‘confirm order.’
Finally, the process ends as you tap ‘done.’
 

FAQs:

Do you have to activate your Cash App card?

After receiving your ordered cash card, you should perform the ‘activate cash card’ process. This is a needed step, as you won’t be able to use your card without it. Follow the steps to activate the card given in the blog.


Why can’t I activate my cash card?

Sometimes you cannot activate a cash card just because of the wrong details put in while using the ‘CVV instead’ method. In this case, you should review the mentioned details and make changes. Moreover, if it still exists, consider connecting to the cash app support.


What’s the number to activate your cash APP card?

Although activating a cash card is an easy and online process, you can make your way to find help from cash app representatives by dialing its official helpline number.


Conclusion:-

Using cash apps is beneficial for financial security and financial advancements. It is an essential app spread over the USA and UK, providing bank-like features for business and personal usage. The cash card is one well-known feature of the cash app, which we have discussed in this blog. We understood How To Activate Cash App Card through QR Code or Manually. Check out more about card features you may use for your benefits.

0

A Quick and Easy Way to Add Cash to your Apple Account Using Apple Pay

Are you tired of constantly running out of funds on your Apple account? Fret no more, because we’ve got the solution for you! Introducing a quick and easy way to add cash to your Apple account using none other than Apple Pay. Whether you’re looking to purchase that new app or upgrade your music subscription, this hassle-free method will have you up and running in just a few clicks. So sit back, relax, and let us guide you through the steps to boost your balance with ease.


How to Add Money to Your Apple Account with Apple Pay

Apple Pay is a great way to add cash to your Apple Pay account. You can use Apple Pay to add money to your account using a credit or debit card, or by using a bank transfer. Here’s how to add money to your Apple account with Apple Pay:

1.     Open the Wallet app on your iPhone.

2.     Tap on the Apple Pay button.

3.     Tap on the Add Money button.

4.     Enter the amount of money you want to add to your account.

5.     Tap on the Add Money button again.

6.     Select your payment method and enter your payment information.

7.     Tap on the Add Money button one last time.

8.     Your money will be added to your account instantly!


Benefits of Adding Money to Your Apple Account

When you add money to your Apple account using Apple Pay, you can enjoy a number of benefits. For one, you can use the funds in your account to make purchases at any store that accepts Apple Pay. In addition, the funds in your account are FDIC-insured, so you can rest assured knowing that your money is safe. Adding money to your Apple account using Apple Pay is a quick and easy way to make sure you have access to funds when you need them.


Step by Step Guide on How to Add Cash to Your Apple Account

Assuming you already have an Apple ID, adding cash to your account is quick and easy using Apple Pay. Here’s a step-by-step guide:

1.     Open the settings app on your iPhone or iPad

2.     Tap on your name at the top of the screen

3.     Select ‘Apple ID, iCloud, iTunes & App Store’

4.     Tap on ‘iTunes & App Store’

5.     Scroll down and tap on ‘Apple ID’

6.     Select ‘View Apple ID’

7.     Enter your password when prompted

8.     Scroll down and tap on ‘Add Funds to Apple ID’ under the ‘Purchase History’ section

9.     Enter the amount of money you want to add to your account (there is a minimum of $10)

10.                        Tap on ‘Add’ in the top right corner of the screen

11.                        You will be redirected to Apple Pay where you can confirm the payment with Face ID, Touch ID, or passcode


Alternatives to Adding Money to Your Apple Account

If you’re looking for alternatives to adding money to your Apple Pay account, there are a few options available. You can use a credit or debit card, PayPal, or even purchase an iTunes gift card.

If you’re using a credit or debit card, simply add the card to your Apple account and you’ll be able to use it for purchases. If you’re using PayPal, you can add money to your account by linking your PayPal account to your Apple ID. If you’d prefer to use an iTunes gift card, simply purchase one from a retailer and then redeem it on your Apple account.


Conclusion

Adding cash to your Apple Account is quick and easy with Apple Pay. With a few simple steps, you can add money directly to your Apple account in just seconds. This process also provides an added layer of security, allowing you to safely store and transfer funds without the hassle of sharing your financial information.


0