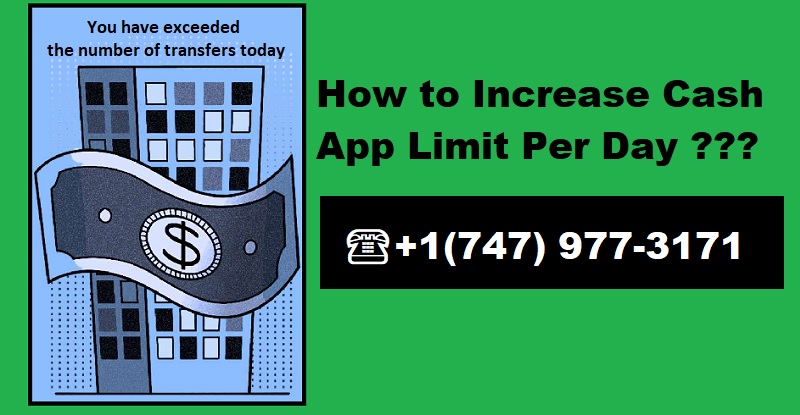
How to Increase Cash App Sending Limit After Verification?

Cash App, one of the most popular peer-to-peer payment platforms, offers users a straightforward way to send and receive money. However, like many financial platforms, it has built-in limits to protect users and ensure compliance with financial regulations. The sending limit on Cash App can sometimes feel restrictive, especially for verified users who wish to send larger amounts. This article will guide you through everything you need to know about increasing your Cash App sending limit after verification, exploring the weekly limits, limit resets, and how to maximize your Cash App usage for higher sending amounts.


What is the Sending Limit on Cash App?

Before diving into how to increase your Cash App limit, it’s essential to understand the standard limits Cash App sets for all users:

Unverified Cash App Users: If you haven’t verified your identity, your sending limit will be capped at $250 per week and a receiving limit of $1,000 per month.
Verified Cash App Users: After completing identity verification, Cash App raises your sending limit to $7,500 per week and removes any cap on how much you can receive.
These limits are designed to ensure a secure environment for all users, but for those who need to send more substantial sums, following these steps can help maximize your usage.


How to Increase Cash App Sending Limit from $2,500 to $7,500

Step 1: Complete the Verification Process

The initial step to raising your Cash App sending limit is completing the platform’s identity verification process. Here’s how to do it:

1.     Open the Cash App on your mobile device.

2.     Tap the profile icon in the upper right corner.

3.     Select Personal and then choose to enter your full name, date of birth, and the last four digits of your Social Security number.

4.     Once you’ve submitted this information, Cash App will review and verify your identity.

Once verified, your Cash App weekly sending limit will increase from $2,500 to $7,500, giving you more freedom to send larger amounts.


Step 2: Confirm Your Account’s Verification Status

After providing the required information, you should confirm that your account is fully verified. A verified account will display higher limits on the account settings page. If your status isn’t updated immediately, allow a few business days for Cash App to process the verification.

Cash App Weekly Limit Details

Understanding the Cash App weekly limit helps users plan transactions effectively. Once verified, your Cash App sending limit operates on a weekly reset cycle, which may vary based on the day your limit was last reached. Here’s how it works:

Weekly Limit: For verified users, the $7,500 weekly limit renews every seven days from the date of the last substantial transfer.
Sending Limit Reset: Cash App does not reset limits on a fixed weekday for all users. The reset depends on when you last made a significant transaction reaching or nearing the limit. Track your transactions and be mindful of this rolling timeframe.
 

How to Change the Sending Limit on Cash App

If the $7,500 limit still feels restrictive, consider these strategies to work around the restriction:

1.     Split Larger Transfers: When sending larger amounts, consider breaking down the transaction over a few days or within the weekly reset period.

2.     Leverage Bank Transfers for Larger Amounts: Instead of sending funds to another Cash App user, you may opt for a bank transfer, as Cash App does not apply the same limits to transactions sent to linked bank accounts.

While these methods do not change the limit directly, they offer flexibility in managing larger transfers effectively.


Increasing Cash App Weekly Limit Beyond $7,500

Currently, $7,500 per week is the highest available limit on Cash App after verification. However, there are a few indirect ways to expand your transaction capabilities on the platform:

Contact Cash App Support: Reach out to Cash App’s support team through the app to inquire about increasing your sending limit. While this may not always yield an immediate increase, support representatives can guide you on any additional steps or future updates that may offer higher limits.
Explore Cash App Business Accounts: If your transactions are for business purposes, consider applying for a Cash App for Business account. This option may have distinct limits and features designed for business use.
 

Cash App Weekly Limit Reset Process

Cash App operates on a rolling weekly limit, meaning your Cash App weekly limit resets based on when you last reached it. Here’s how to manage and monitor the reset:

1.     Track Transaction Dates: Since the reset doesn’t occur on a specific day, track the date and time of each significant transaction. Knowing this will give you an estimated reset window.

2.     Set Alerts for Large Transfers: If you’re frequently nearing the limit, use Cash App’s notification features to stay aware of any upcoming resets, allowing you to plan accordingly.

3.     Limit Management Tools: Cash App has built-in tools to check your remaining limit within the app’s settings.


Cash App Weekly Limit Withdrawal

While weekly limits apply primarily to sending funds, users often wonder if similar restrictions exist on withdrawals. Here’s how the limits work concerning withdrawals:

Standard Bank Transfers: Cash App does not impose weekly limits on transferring funds to your bank account, though transaction fees may apply if you choose an instant transfer.
ATM Withdrawals for Cash App Card Users: The Cash App Card has a $1,000 withdrawal limit per day and a $1,000 limit per transaction. If you use the Cash App Card frequently, make sure to account for this cap when planning your withdrawals.
 

Tips for Maximizing Cash App’s Sending Limit

If you’re looking to make the most of your Cash App sending capabilities, here are some strategies to enhance your experience:

1.     Schedule Transactions Carefully: Since Cash App uses a rolling limit, strategically scheduling larger transactions can help you manage the reset more effectively.

2.     Set Up Bank Links for Greater Flexibility: Linking a bank account can increase flexibility for higher transactions without relying solely on Cash App-to-Cash App transfers.

3.     Keep Your Account Secure: Higher limits often come with security scrutiny, so ensure your account remains in good standing to avoid interruptions.


How Long Does It Take for Cash App Limits to Reset?

The limit reset timing on Cash App follows a rolling seven-day period, which resets exactly one week after your last substantial transaction that reached or approached the sending cap. While Cash App does not offer a universal reset day, this setup allows each user to manage their limit based on their unique activity.


FAQs

How Can I Confirm My Cash App Limit?

Once verified, visit the app’s account settings to check your active limits. If your verification was recent, allow a few business days for the updated limits to appear.


Can I Increase My Sending Limit Beyond $7,500?

While $7,500 per week is Cash App’s maximum for personal accounts, Cash App Business accounts may offer different options. You can also contact Cash App support for further guidance on potential limit adjustments.


How Do I Track My Cash App Weekly Limit?

You can view your transaction history in the app’s activity section, showing a record of recent payments and any applicable limits.


Does Cash App Have a Monthly Sending Limit?

Cash App sets limits primarily on a weekly basis. However, if your account activity exceeds regular patterns, you may encounter further verification checks.


What If My Verification is Delayed?

If you experience delays in verification, double-check the accuracy of the information provided and contact support if it takes longer than the stated processing time.

0

What is the Venmo Max Transfer Per Day and How to Increase It?

Venmo is a popular peer-to-peer app that allows users to transfer money quickly between accounts or pay family members and friends for purchases. Venmo limits the amount that can be transferred from one account to another or used for purchases. Venmo payment limit are based on several factors, including the type of transaction and whether an account has been verified. The default settings of most companies are the limits, and they can only be changed upon request or identity verification.

Some limits can be temporarily reduced to ensure security for new accounts or in response to suspicious activity. These changes are usually temporary and only last until further review is conducted. For a Venmo account to be able to increase its limits, you must go through the official help centre’s identity verification process. It is necessary to provide personal information, such as a copy of your identity document. Verification may take several weeks, even though this service is free. Let’s start by learning more.


What is the Venmo Transfer Limit?

Venmo transfer limit is the maximum amount you can send or get within a certain timeframe. This limit was set to protect users and prevent fraud. It also helps maintain the security of the platform. Venmo has different transfer limits, such as daily, weekly, and single transaction limits.

Here is a quick overview of the standard limit for Venmo:

·         Venmo users can transfer up to $4.999.99 per week.

·         The Venmo weekly transaction limits for unverified accounts are lower, typically around $299.99.

·         Venmo Daily Transfer Limit: Venmo has a daily transfer limit of $3,000.


What is the Daily Transfer Limit on Venmo?

Venmo’s daily transfer limit, also known as “Venmo maximum transfer per day,” has been set at $3,000 in verified accounts. This cap only applies to transactions that involve other users. It does not apply to ATM withdrawals, or purchases directly made from your Venmo account. The limit for unverified users is usually lower. The Venmo daily limit can vary based on account status, Venmo security checks and recent Venmo policy changes.

Verifying your identity and linking your Venmo account with your bank account are the only ways to increase your limit. Both can be done in your Settings menu. As part of the verification process, you will need to provide identification documents. Once completed, your transfer and payment limit can be increased.

How to Increase Your Venmo Transfer Limit?

You can increase your daily or weekly limits if the standard Venmo transfers are too restrictive. Verifying your account is the easiest way to increase Venmo sending limit. Venmo gives you a basic account that has limited transfer abilities when you first sign up. You can access higher transaction limits by verifying your identity.

To verify your Venmo account:

·         Go to Settings in the Venmo App.

·         Select Identity Verification.

·         Follow the prompts and enter your personal information, such as your full name, Social Security Number, and date-of-birth.

·         The verification process can be quick and increase your Venmo daily limits to up to $4,999.99 and $3,000 per day.


FAQ

What is the Venmo daily limit for unverified users?

Venmo accounts that are not verified have a daily limit of $299.99 and a weekly limit of $299.99.


Can I send $5,000 in one day on Venmo?

Venmo does not have a daily maximum limit. The maximum for verified users is $3,000 You can, however, reach $4,999.99 in a single week.


Why is my Venmo transfer limit so low?

If your account has not been verified, it may have a low limit. Complete the Venmo identity verification process to increase your limits.


Can I increase my Venmo transfer limit by linking my bank account?

The verification process includes linking a bank account, which will increase your transfer limit. The primary way to increase your Venmo transaction limit is to complete the Venmo identity verification.


Is there a limit on how much I can receive on Venmo?

Venmo has a few basic limits. These are for sending transactions. Venmo can limit the amount of money you receive if your account is having problems or there are suspicious activities.


Do Venmo transfer limits reset every day?

Venmo’s daily limit resets 24 hours after the last transaction. The weekly limit resets seven days after the transaction.

How to Activate Cash App Card by Phone [Easy Way]

Activating a Cash App card is a simple process that lets you start using your Cash App balance for purchases, payments, and cash withdrawals. You can activate your Cash App card directly from your phone, making it easy and convenient to get started. Whether you’ve just received your card or need to replace an old one, this guide will walk you through the steps to activate cash app card by phone and get ready to make transactions in no time.

Why Activate Your Cash App Card?

The Cash App card connects to your Cash App balance, allowing you to use it like a debit card anywhere Visa is accepted. By activating your card, you gain immediate access to your funds, which can be used for both online and in-store purchases, as well as cash withdrawals from ATMs. The Cash App card also offers customizable features, security settings, and access to Boost discounts, which provide cashback on selected purchases. To start using your Cash App card, follow the steps below to activate it on your phone.

Steps to Activate Cash App Card by Phone

1. Open Cash App on Your Phone

The first step to activate your Cash App card by phone is to open the Cash App on your smartphone. Make sure you’re logged into your account to access the card activation settings.

2. Go to Cash Card Settings

On the Cash App home screen, you’ll see an icon that looks like a small credit card, typically located at the bottom of the screen. Tap on this icon to open the Cash Card settings. This is where you’ll find the options to activate Cash App card.

3. Choose the “Activate Cash Card” Option

Once you’re in the Cash Card settings, you’ll see an option labeled “Activate Cash Card.” Tap on this to begin the activation process. Cash App gives you two options for activating your card: by scanning a QR code or by manually entering the card details.

4. Activate with QR Code

When you choose to activate your Cash App card, Cash App will ask if you’d like to use a QR code. Hold your phone’s camera over the QR code located on your Cash App card. If the code is recognized, the app will automatically activate your card. This is the quickest way to activate your Cash App card if you have the QR code available.

5. Activate Manually Without a QR Code

If you’re unable to scan the QR code, you can activate your Cash App card manually. Select the manual option, and then enter your card’s CVV number, expiration date, and any other requested details. This option allows you to activate your Cash App card even if the QR code isn’t accessible.

6. Confirm Activation

After entering the required information, Cash App will confirm that your Cash App card is activated. Once activated, your card is ready to use for online purchases, in-store transactions, and ATM withdrawals.

Tips for Activating Cash App Card by Phone

Ensure Good Lighting: If you’re using the QR code method, make sure there’s adequate lighting and your camera lens is clean to get a clear scan of the code.
Use Updated App Version: Check that you’re using the latest version of Cash App, as outdated versions might not support the latest features or activation methods.
Have Strong Internet Connection: A stable internet connection will help avoid any interruptions during the activation process.
Secure Your Account: For added security, set up a PIN or enable two-factor authentication. This will help protect your Cash App funds.
Benefits of Activating Cash App Card

After activation, your Cash App card allows you to access the following benefits:

Direct Access to Cash App Balance: Use your Cash App balance instantly for purchases and payments.
ATM Withdrawals: With an activated card, you can withdraw cash from ATMs, making it a versatile financial tool.
Boost Discounts: Cash App offers Boosts, which are special discounts on select purchases that can save you money over time.
Contactless Payments: Link your Cash App card to mobile wallets like Apple Pay or Google Pay for convenient, contactless payments.
Troubleshooting Common Activation Issues

If you encounter any issues during activation, here are a few common problems and solutions:

QR Code Scanning Issues: If the QR code doesn’t scan, switch to the manual entry option. Enter your CVV and expiration date manually to complete the activation.
Incorrect Details: Ensure you enter all card details accurately. Small errors in the CVV or expiration date can prevent successful activation.
Unverified Account: If your account isn’t verified, you may face activation challenges. Complete any verification steps needed to unlock full access to Cash App’s features.
Conclusion

Cash App activate card is a quick and convenient way to access your funds. By following these simple steps, you can activate your card using either the QR code or manual entry method and start enjoying the benefits immediately. With your Cash App card activated, you’ll be ready to make secure and effortless payments, access cash at ATMs, and take advantage of exclusive discounts.

FAQs

Q1: How do you activate your Cash App card without a QR code?
A: You can manually activate your Cash App card by entering the CVV number and expiration date in the app.

Q2: Can I activate my Cash App card online?
A: Yes, you can activate your Cash App card directly through the Cash App mobile app, which is available online.

Q3: Is my Cash App card ready to use immediately after activation?
A: Yes, once activated, you can start using your Cash App card for transactions and ATM withdrawals right away.

Q4: Do I need to verify my Cash App account to activate the card?
A: In most cases, Cash App requires some verification for security purposes. Complete any verification steps if prompted during activation.

How to Activate a Cash App Card: A Complete Guide

Activating a Cash App card is simple and quick, allowing you to access your Cash App funds seamlessly for purchases, payments, and cash withdrawals. If you’re wondering how to activate a Cash App card or looking for steps to activate it with ease, this guide covers everything you need to know. Whether it’s a new card, a replacement, or you’re activating it online, here are the steps and tips to get your Cash App card activated.

Steps to Activate a Cash App Card

When you receive your Cash App card, activating it should be your first step. Follow these steps to ensure you set it up correctly and securely.

Step 1: Open Cash App

To activate your Cash App card, start by opening the Cash App on your mobile device. Ensure you are logged into your account to access the card settings and activation options.

Step 2: Go to the Card Activation Section

On the Cash App home screen, locate the card icon at the bottom of the screen. Tap on it to access the Cash App card settings. Here, you’ll find the option to activate your card, either with a QR code or through manual entry.

Step 3: Activate Your Cash App Card Using QR Code

When you choose the option to activate a Cash App card, you’ll see an option to scan a QR code. Hold your phone camera over the QR code on your Cash App card, and let the app scan it. Once scanned, Cash App will recognize and activate your card automatically.

Step 4: Activate Your Cash App Card Manually

If you’re unable to scan the QR code, you can activate your Cash App card manually. Select the manual option, then enter your card details, including the CVV number and expiration date printed on the card. After entering this information, Cash App will confirm your card activation.

Step 5: Start Using Your Activated Cash App Card

Once activated, your Cash App card is ready to use. You can make purchases at any location that accepts Visa, use it to withdraw cash from ATMs, or link it to mobile wallets like Apple Pay and Google Pay for contactless transactions.

How to Activate a Replacement Cash App Card

If you’ve received a replacement Cash App card, the process to activate it is nearly identical. Simply log in to your Cash App account, go to the card settings, and select “activate.” You can then either scan the QR code on your replacement card or manually enter its details. Once the activation is confirmed, your replacement Cash App card is ready to use.

Tips for a Smooth Cash App Card Activation

Update Your Cash App: Make sure you’re using the latest version of the Cash App to access all available features for card activation.
Check Internet Connectivity: Activating your card requires an internet connection. Ensure you’re connected to Wi-Fi or a stable mobile network to avoid disruptions.
Secure Your Account: Use a strong PIN and enable notifications for enhanced security. This will help you monitor transactions and prevent unauthorized access to your Cash App funds.
Common Issues During Cash App Card Activation

While activate CashApp card is usually straightforward, you may encounter some issues. Here are common problems and solutions:

QR Code Not Scanning: Make sure your camera is clean and has adequate lighting. If it still doesn’t work, use the manual activation option.
Incorrect Card Details: Double-check that you’re entering the correct CVV and expiration date. Even small errors can prevent activation.
Account Not Verified: If you haven’t verified your identity on Cash App, you might face difficulties activating your card. Go to account settings to complete the verification process.
FAQs

Q1: How do you activate a Cash App card without a QR code?
A: If you don’t have the QR code, you can activate your Cash App card manually. Open Cash App, navigate to the card settings, and select the manual activation option. Enter the CVV and expiration date to activate the card.

Q2: Can I activate my Cash App card online?
A: Yes, you can activate your Cash App card online through the Cash App mobile app. There’s no need for a computer; simply follow the steps within the app to complete activation.

Q3: What should I do if I’m unable to activate my Cash App card?
A: If you face difficulties, check your internet connection, ensure you’re using the latest app version, and confirm your account is verified. If problems persist, contact Cash App support for assistance.

Q4: How long does it take to activate a Cash App card?
A: Activation is usually instant and should only take a few minutes if all information is entered correctly.

Q5: Is my Cash App card ready to use after activation?
A: Yes, once activated, your Cash App card is immediately ready for purchases, ATM withdrawals, and linking to mobile wallets.

Activating your Cash App card is essential for accessing the full benefits of your Cash App account. With this guide, you can quickly activate your card and start enjoying convenient and secure payments right away.

How to Withdraw Buying Power from Robinhood: A Complete Guide

Are you wondering how to withdraw buying power from Robinhood, transfer it to your bank, or simply manage your finances better? You’re not alone. Many investors want to access their funds and optimize their trading experiences. In this guide, we’ll walk you through the entire process, offering valuable insights and expert advice to make your financial journey smoother.

The Basics of Buying Power
Before we delve into the specifics of withdrawing and transferring buying power, let’s understand what buying power is. Buying power refers to the funds available in your Robinhood account that you can use to trade stocks, options, and other investments.

Unlocking Your Financial Freedom
Your buying power is your key to unlocking financial opportunities. It allows you to seize the right investment moments, whether it’s purchasing stocks or diversifying your portfolio. So, let’s explore how to make the most of it.

Withdrawing Buying Power
Withdrawals are a crucial aspect of managing your Robinhood account. Here’s a step-by-step guide to help you access your buying power:

Accessing Your Robinhood Account To begin the withdrawal process, log in to your Robinhood account.
Locate Your Buying Power Within your account, navigate to the “Buying Power” section. This is where you’ll find the funds available for withdrawal.
Initiating the Withdrawal Click on the “Withdraw Funds” button to start the withdrawal process.

Select the Amount Choose the amount you wish to withdraw. Ensure it aligns with your financial needs and goals.
Confirm Your Bank Account You’ll need to have your bank account linked to your Robinhood account for the withdrawal to proceed.
Review and Confirm Double-check the withdrawal details and confirm your request. You’ll receive a confirmation once it’s processed.
Wait for Processing Withdrawal processing times may vary, but you can typically expect the funds to reach your bank within a few business days.
Transferring Buying Power to Your Bank
Transfer buying power from Robinhood to a bank account is a seamless process. Follow these steps to get your funds where you need them:

Access Your Robinhood Account Log in to your Robinhood account to get started.

Navigate to “Banking” Within your account, find the “Banking” section.

Choose “Transfers” Click on “Transfers” to initiate the process.

Select “Transfer to Bank” Choose the option to transfer funds to your linked bank account.

Specify the Amount Indicate the amount you want to transfer. Ensure it aligns with your financial objectives.
Confirm the Transfer Double-check all the information and confirm the transfer.

Wait for Processing Your transfer will be processed, and the funds should be in your bank account in a few business days.
Managing Your Money Wisely
Once you’ve successfully withdrawn or transferred your buying power, it’s essential to manage your finances prudently. Consider the following tips:

Create a Budget: Develop a budget to ensure your expenses align with your financial goals.

Diversify Your Investments: Don’t put all your eggs in one basket. Diversify your portfolio to mitigate risks.
Stay Informed: Keep yourself updated on market trends and investment opportunities.

Consult a Financial Advisor: Seeking professional advice can help you make informed decisions.
FAQs
How long does it take for a withdrawal or transfer to process?
Withdrawal and transfer times vary but generally take a few business days.

Can I transfer my buying power to any bank account?
You can transfer your buying power to a bank account linked to your Robinhood profile.

Is there a minimum or maximum limit for withdrawals or transfers?
Limits may apply, so check your Robinhood account for specific details.

Can I invest my buying power within Robinhood instead of withdrawing it?
Yes, you can use your buying power to invest in stocks and other assets.

Are there any fees associated with withdrawals or transfers?
Robinhood typically doesn’t charge fees for withdrawing or transferring buying power, but check for any recent updates.

What if I encounter issues during the process?
Reach out to Robinhood’s customer support for assistance with any issues you face.

Conclusion
Managing your buying power with Robinhood is a straightforward process, allowing you to access your funds and invest wisely. By following the steps outlined in this guide, you can confidently withdraw and transfer your buying power while making informed financial decisions. Remember to stay vigilant, stay diversified, and stay financially empowered.


https://www.linkedin.com/pulse/when-does-cash-app-weekly-limit-reset-comprehensive-guide-smith-lyscf
https://www.linkedin.com/pulse/what-cash-app-atm-limits-how-much-can-you-withdraw-jenshi-smith-9ahuf/
https://evvnt.com/events/?_evDiscoveryPath=%2Fevent%2F2736716-how-to-1-747-205-0398-withdraw-money-from-robinhood
https://evvnt.com/events/?_evDiscoveryPath=%2Fevent%2F2736725-1-747-205-0398-how-to-withdraw-buying-power-robinhood
https://evvnt.com/events/?_evDiscoveryPath=%2Fevent%2F2736727-robinhood-buying-power-to-withdrawable-cash
https://evvnt.com/events/?_evDiscoveryPath=%2Fevent%2F2736729-how-to-transfer-buying-power-to-withdrawable-cash
https://evvnt.com/events/?_evDiscoveryPath=%2Fevent%2F2736731-why-1-747-205-0398-can-t-i-withdraw-money-from-robinhood-after-selling
https://evvnt.com/events/?_evDiscoveryPath=%2Fevent%2F2736734-1-747-205-0398-how-long-does-it-take-to-withdraw-money-from-robinhood-after-selling
https://evvnt.com/events/?_evDiscoveryPath=%2Fevent%2F2736736-1-747-205-0398-i-sold-my-stock-on-robinhood-where-is-my-money
https://evvnt.com/events/?_evDiscoveryPath=%2Fevent%2F2736767-how-do-i-get-my-money-out-of-robinhood
https://evvnt.com/events/?_evDiscoveryPath=%2Fevent%2F2736769-1-747-205-0398-i-sold-stock-on-robinhood-where-is-my-money
https://selling-stocks-on-robinhood.blogspot.com/2024/11/robinhood-withdrawal-process-why.html
https://amazonfirestick.video.blog/2024/11/08/robinhood-withdrawal-process-why-robinhood-isnt-letting-me-withdraw-cash/
https://smithjenshiusa.tumblr.com/post/766569155946250240/robinhood-withdrawal-process-why-robinhood-isnt
https://www.faceblock.io/blogs/53725/Robinhood-Withdrawal-Process-Why-Robinhood-Isn-t-Letting-Me-Withdraw
https://www.faceblock.io/blogs/53750/How-to-Withdraw-Buying-Power-from-Robinhood-A-Step-by
https://selling-stocks-on-robinhood.blogspot.com/2024/11/how-to-withdraw-buying-power-from.html
https://smithjenshiusa.tumblr.com/post/766571602564546560/how-to-withdraw-buying-power-from-robinhood-a
https://amazonfirestick.video.blog/2024/11/08/how-to-withdraw-buying-power-from-robinhood-a-step-by/
https://sites.google.com/view/cash-app-daily-atm-withdrawal/home
https://sites.google.com/view/withdraw-buyingpower-robinhood/home
https://withdraw-buying-power-from-robinhood.blogspot.com/2024/11/how-to-withdraw-buying-power-from.html

0

How to Activate Cash App Card Before It Arrives

If you’re eagerly awaiting your Cash App card but want to start using it before it physically arrives, you’re in luck! Cash App provides a way to activate your card online and make it functional even before it’s in your hands. This guide will take you through the steps to activate your Cash App card without waiting for it to arrive in the mail, so you can start enjoying its benefits as soon as possible. Let’s dive in and explore how you can cash app activate card online or with just a few simple steps on your phone.

Why Activate a Cash App Card Before It Arrives?

The Cash App card provides numerous advantages such as cashback, discounts, and convenience for in-store and online purchases. When activated, it can be linked to your Cash App balance, allowing you to access funds and make payments right from your account. By activating your card early, you can streamline your financial transactions and avoid the wait, making it easier to access funds in your Cash App balance without any delays.

How to Activate Cash App Card Online Before It Arrives

Know how to activate cash app card before it arrives

1. Download and Open Cash App

Before activating, make sure you have the Cash App installed on your smartphone. Download it from your device’s app store if you haven’t already. Once installed, log in to your account or create a new one if you’re a first-time user.

2. Access Your Cash App Card Settings

Once you’re logged in, look for the card icon on the Cash App home screen. This icon is usually located at the bottom of the screen and will lead you to the card settings section, where you can manage and activate your Cash App card.

3. Select “Activate Cash App Card” Option

In the card settings, you’ll see an option labeled “Activate Cash App Card”. Click on this option to initiate the activation process. If you’re activating before your card arrives, follow the instructions to proceed with the online activation.

4. Use the CVV and Expiration Date for Early Activation

Cash App often allows you to activate your card using the CVV number and the expiration date printed on the card. If you have received these details digitally or were provided with a virtual card version, enter the information to enable your card.

Note: If you don’t have access to your CVV or expiration date, you might have to wait for your physical card. However, in some cases, Cash App will allow virtual card activation without these details.

5. Verify Your Identity

To ensure the security of your Cash App card, you may be prompted to verify your identity. This can include confirming your phone number, email, or verifying a PIN if you have one set up. Complete any verification steps to finalize the activation.

6. Start Using Your Activated Cash App Card

Once your Cash App card is activated, you can start making purchases or transactions using the card. You can use it online or add it to your mobile wallet for even greater convenience in stores that accept contactless payments.

How to Activate a Virtual Cash App Card Immediately

If you’re eligible for a virtual Cash App card, you can activate it and use it right away without needing the physical card at all. Here’s how:

Open Cash App and Navigate to Card Options: Log into your account and go to the card settings where you’d usually activate a physical card.
Select the Virtual Card Option: In the card options, select to activate a virtual version of the Cash App card. Not all accounts may have this option, as it depends on your Cash App setup and account eligibility.
Verify and Complete the Virtual Activation: Follow the prompts to complete your virtual card activation, including verifying your identity if required. Once activated, the virtual card can be used for online transactions.
Add the Virtual Card to Your Mobile Wallet: For in-store use, add your virtual card to your Google Pay or Apple Wallet. This way, you can use your Cash App funds just like you would with the physical card, even if it hasn’t arrived yet.
Common Issues with Cash App Card Activation

Sometimes, issues arise when Cash App card activate, especially if you’re doing it before the card has arrived. Here’s a rundown of some common problems and solutions:

Missing CVV or Expiration Date: Without these details, you may be unable to activate the physical card. In this case, request a virtual card if eligible, or contact Cash App support.
Unverified Account: If your account is not fully verified, you may face activation issues. Complete the verification process by providing identification documents or confirming your phone number and email.
Device Compatibility: Ensure that your Cash App is up to date. Older versions may not support certain activation features, so download any updates to avoid issues.
Network Connectivity Issues: Weak internet connectivity can disrupt the activation process. Make sure you’re connected to a stable network.
Benefits of Activating Your Cash App Card Early

Activating your Cash App card before it arrives provides several benefits, such as:

Early Access to Funds: Use your Cash App balance right away without needing the physical card.
Seamless Online Transactions: Enjoy the convenience of online purchases through your activated virtual or digital card.
Enhanced Security: Cash App’s verification steps help ensure your account and transactions remain secure.
Discounts and Rewards: Get access to discounts, Boosts, and other rewards linked to your Cash App card from day one.
Conclusion

Activate Cash App card before it arrives allows you to enjoy the card’s features and benefits right away. By following a few simple steps online or using a virtual card option, you can make purchases, earn rewards, and access funds immediately. For those waiting on the physical card, early activation offers a seamless way to use the card’s services without delays, ensuring you’re ready to make the most out of Cash App’s convenience.

FAQs

Q1: Can I use my Cash App card before it arrives?
A: Yes, by activating it online or through a virtual card, you can start using your Cash App funds even before the physical card arrives.

Q2: Do I need the CVV number to activate my Cash App card?
A: In most cases, yes. However, some users may have access to virtual card activation, which can bypass the need for physical card details.

Q3: Is it safe to activate my Cash App card online?
A: Yes, as long as you follow the steps provided by Cash App and keep your account secure through proper verification and PIN setup.

Q4: How long does it take to activate a Cash App card?
A: The activation process usually takes only a few minutes if all details are available.

Q5: Can I get a virtual Cash App card?
A: Some users are eligible for a virtual Cash App card, which can be activated immediately and used for online and mobile wallet transactions.

Can’t Access Your Robinhood Cash After Selling? Here’s Why

How to Withdraw Buying Power on Robinhood?
If you’re an active Robinhood user, understanding how to manage your buying power and withdraw funds efficiently is essential. While Robinhood provides a seamless platform for stock trading, navigating the withdrawal process can sometimes be confusing. In this guide, we will discuss step-by-step instructions for transferring your buying power to withdrawable cash, methods for moving funds to your bank account, and answer common questions regarding Robinhood’s withdrawal policies.

What is Buying Power on Robinhood?
Buying power represents the funds available in your Robinhood account to make trades or purchase assets. It includes:

Cash deposits you have made.
Proceeds from sales of stocks or other assets.
Margin borrowing (if you’re on a Robinhood Gold plan).
It’s important to distinguish between buying power and withdrawable cash because not all funds immediately become withdrawable after transactions. Understanding this distinction is key to accessing your money promptly.

How to Transfer Buying Power to Withdrawable Cash?
To withdraw funds from Robinhood, your buying power must convert into withdrawable cash. Here’s a detailed look at the steps and timeframes involved.

Selling Stocks or Other Assets
Once you sell stocks, Robinhood provides the proceeds as buying power. However, these funds don’t become withdrawable cash right away. Here’s the breakdown:

Settlement Period: When you sell a stock or asset, Robinhood must adhere to a two-business-day settlement period (known as T+2). Only after this settlement period can your funds be available as withdrawable cash.
Settlement and Availability of Withdrawable Cash
After the T+2 settlement period, your buying power converts to withdrawable cash. If you need the funds immediately, be aware that withdrawals are limited to the cash that has already settled. Unsettled funds remain in your buying power but cannot be transferred to your bank until fully settled.

Conversion to Withdrawable Cash
Once the settlement is complete, your funds move to withdrawable cash. Follow these steps to check your withdrawable balance:

Open Robinhood and log in.
Go to the Account tab.
Select “Transfers” to see your available withdrawable cash.
How to Transfer Buying Power to Your Bank Account on Robinhood?
Once your buying power is converted to withdrawable cash, you can move it to your linked bank account. Here’s how:

Initiating a Bank Transfer
Open Robinhood and access your account.
Select “Transfers” and choose “Transfer to Your Bank.”
Choose the Bank Account: Select the bank account you want to transfer funds to.
Enter the Amount: Specify the amount you wish to withdraw.
Confirm the Transfer: Review your details and confirm the transfer.
Transfer Timeline
Transfers from Robinhood to a bank account typically take 1-3 business days. However, delays can occur depending on your bank’s processing time and whether the funds are fully settled.

Limits on Withdrawals
Robinhood limits withdrawals to $50,000 per business day. If you have large sums to withdraw, you may need to space out transfers over multiple days.

Why Can’t I Withdraw Money from Robinhood After Selling?
If you’ve recently sold assets on Robinhood but cannot withdraw the money, the reason is likely related to the settlement period.

Settlement Time Explained
The T+2 settlement rule is required for most securities transactions, meaning funds from the sale of stocks or ETFs take two business days to settle before they become withdrawable cash.

Are There Any Exceptions?
While most stocks and ETFs follow the T+2 rule, Robinhood offers instant access to up to $1,000 of your pending funds if you’re a standard account holder. If you are on the Robinhood Gold plan, you may access more instant funds, although certain limitations still apply.

How Long Does It Take to Withdraw Money from Robinhood After Selling?
The total time required to access your funds on Robinhood after selling stocks depends on several factors:

Settlement Period (2 Business Days): Required for proceeds to become withdrawable cash.
Bank Transfer Processing (1-3 Business Days): Robinhood transfers to a linked bank account usually take an additional 1-3 business days after you initiate the withdrawal.
In total, you may need to wait between 3-5 business days to see the funds in your bank account after a sale.

I Sold My Stock on Robinhood, Where is My Money?
After selling stocks on Robinhood, users often wonder where their money is. Here’s a quick summary:

Sale proceeds initially appear as buying power but are not immediately withdrawable.
The T+2 settlement period is mandatory before funds become withdrawable cash.
After settlement, you can initiate a transfer to your bank account.
How to Get Your Money Out of Robinhood?
Here is a straightforward process to ensure you can withdraw funds from Robinhood efficiently:

Check Your Withdrawable Balance: Verify that your buying power has settled into withdrawable cash.
Initiate the Transfer: Use the “Transfers” feature to transfer your funds to your linked bank account.
Allow for Processing Time: Expect between 1-3 business days for your bank to receive the funds after the transfer is confirmed.
Troubleshooting Common Withdrawal Issues on Robinhood
While Robinhood’s platform is generally straightforward, a few common issues can delay your withdrawals. Here’s how to troubleshoot them:


Pending Settlement

If your funds are still pending, wait for the settlement period to conclude. After T+2, the funds will be available for transfer.


Bank Account Link Issues

Ensure that your bank account is correctly linked. Robinhood may delay transfers if there are errors or mismatches between your bank and Robinhood details.


Withdrawal Limits and Holds

If you’ve recently deposited funds into Robinhood, note that cash deposits may have a brief holding period before they become withdrawable. Additionally, check the daily withdrawal limit of $50,000 per business day.


Account Security Concerns

If you receive any notifications about account security, address them immediately. Robinhood may delay transfers if suspicious activity is detected.

Conclusion
Managing buying power and transferring funds out of Robinhood requires an understanding of the platform’s policies, especially regarding settlement times and withdrawal limits. By following these steps and planning accordingly, you can ensure a smooth withdrawal process whenever you need access to your funds.

0

How Long Does It Take to Withdraw Money from Robinhood After Selling?(Complete Guide)

The settlement period for equities and options trades is the trade date plus 1 trading day ☎️+1(747)205 0398 (T+1), sometimes referred to as regular-way settlement. On the 2nd day, those proceeds will be available as withdrawable cash.


Robinhood has transformed the way investors trade by simplifying the buying and selling of stocks, options, and cryptocurrencies. However, once you’ve sold a stock, the next step—withdrawing your funds—can bring up questions, especially regarding timing and process. In this comprehensive guide, we’ll walk you through how long it takes to withdraw money from Robinhood after selling, how to access your buying power quickly, and common withdrawal issues and how to solve them.

Understanding Robinhood’s Settlement Period
When you sell stocks on Robinhood, the proceeds aren’t immediately available for withdrawal. This is due to the trade settlement period, which applies to all U.S. brokers per regulatory requirements. The settlement period refers to the time it takes for your trades to be officially cleared and finalized. Currently, Robinhood operates under a T+2 settlement for most trades, meaning two business days after the trade date.

For example, if you sell a stock on a Tuesday, the settlement occurs on Thursday, after which your funds are available for withdrawal. Keep in mind this timeline can be impacted by holidays or weekends.


How to Withdraw Buying Power from Robinhood Quickly?
 

How to Withdraw Money From Robinhood on Your Computer?

Click “Account” (on the top-right corner)☎️+1(747)205 0398
Click “Transfers,” then “Withdrawal”
☎️+1(747)205 0398 Enter how much you want to withdraw.
Click “From” and choose the Robinhood account you’re pulling money from.
Once your selling transaction has settled, you’re ready to withdraw your buying power. Here’s a quick guide to help you convert your buying power to withdrawable cash in a few simple steps:

Open the Robinhood App: Start by launching the app and logging into your account.
Access Your Cash Account: Tap on the account icon at the bottom of the app screen and look for “Cash” in the menu.
Select Transfer to Your Bank: Once in the Cash section, find and select “Transfer to Your Bank.” This option allows you to initiate a transfer from your Robinhood account to your linked bank.
Choose Withdrawal Amount: Enter the amount you want to withdraw from your available cash balance. Ensure the amount does not exceed your settled funds.
Confirm Your Withdrawal: Double-check the amount and confirm the transaction to start the withdrawal process.
Typically, bank transfers take about 1-3 business days to reflect in your bank account. However, the timing can vary based on your bank’s processing speed.

How to Transfer Buying Power to Withdrawable Cash on Robinhood?
Access Account Menu: Tap on the account icon at the bottom right of the screen (app) or click on your profile (web). Select Transfers:☎️+1(747)205 0398 Choose “Transfers” from the menu options. Withdraw Funds: Tap on “Transfer to Your Bank” (app) or “Transfer” and then “To Your Bank” (web).


If you’re looking to convert buying power to withdrawable cash, here’s a step-by-step guide that simplifies the process:

Wait for Trade Settlement: Any funds from recent sales will first need to settle, which can take up to two business days.
Convert to Withdrawable Cash: Once settled, your buying power will appear as “Cash Available for Withdrawal.”
Select Your Bank Account: To move the funds, go to the “Cash” section, choose “Transfer to Your Bank,” and pick your bank account from the list of linked accounts.
Initiate the Withdrawal: Input the amount of settled funds you wish to transfer, and confirm the withdrawal.
Why Can’t I Withdraw Money from Robinhood After Selling?
After you sell your reward stock, you’re free to use the proceeds from the sale toward other investments. ☎️+1(747)205 0398 However, if you want to withdraw the proceeds, you must keep the cash value of that stock in your account for at least 30 days after claiming it.


Sometimes, you may find that funds are not immediately available for withdrawal even after selling stock. Here are common reasons why this might happen:

Trade Settlement Period Not Complete: The two-business-day settlement period may not yet be complete. This is often the reason for withdrawal delays.
Account Restrictions or Holds: In some cases, Robinhood may place holds on accounts due to security concerns or regulatory issues. Contact Robinhood support if you suspect an issue with your account.
Day Trading Restrictions: Frequent or pattern day trading can trigger restrictions that temporarily freeze your buying power, which could impact withdrawal eligibility.
Pending Deposits: If you recently deposited funds that are still pending, this may also limit the cash you can withdraw. Deposited funds may take up to five business days to clear.
By ensuring that your funds have settled and addressing any account-specific issues, you can avoid common withdrawal problems.

Where Is My Money After I Sold My Stock on Robinhood?
 

When you sell your shares, the proceeds generated from the sale will be deposited into the Robinhood account as ‘unsettled funds’.☎️+1(747)205 0398 They generally take two trade days before they settle.


Once you’ve sold a stock, your funds are held as “unsettled cash” until the T+2 period is over. Here’s a breakdown of where your money goes in each stage:

Unsettled Cash: This term refers to funds from recent sales that are not yet eligible for withdrawal due to the settlement period.
Available for Buying Power: While unsettled cash cannot be withdrawn, it can be used for additional investments on Robinhood.
Available for Withdrawal: After the settlement period, the funds move into your withdrawable balance and can be transferred to your bank account.
Tracking your account details in the app will give you insight into where your money is in this process.

How to Transfer Buying Power to Withdrawable Cash – The Quickest Way
 

☎️+1(747)205 0398-To withdraw buying power, you need to get your earnings in the form of a currency (fiat or potentially crypto), and ☎️+1(747)205 0398 then send that money over to a bank or to an exchange.


Want to expedite your access to withdrawable cash on Robinhood? Here are some tips:

Monitor Settlement Period Closely: Keep track of the settlement period for each sale. Initiating transfers right after funds become available speeds up the process.
Avoid Day Trading Patterns: If you engage in frequent day trading, be aware of the limitations it imposes on your account and avoid trading patterns that can lead to account restrictions.
Consider Upgrading to Robinhood Gold: Robinhood Gold members have access to additional features, like instant deposits and extended buying power, which can improve cash flow.
Simple Steps to Get Your Money Out of Robinhood
 

Click “Account” (top-right corner)
Click “Transfers”☎️+1(747)205 0398
Select “Transfer to your bank” (or “Transfer to debit card”)
Select your bank account (or debit card)☎️+1(747)205 0398
Enter the amount you’d like to withdraw.
Confirm the amount and details.☎️+1(747)205 0398
Click “Transfer”☎️+1(747)205 0398
 

Withdrawing from Robinhood is straightforward once you understand the timing and limitations involved. Here’s a simplified summary:

Sell Your Stocks: Initiate the sale of your stocks.
Wait for Settlement: Allow two business days for the trade to fully settle.
Initiate Withdrawal: Go to the “Cash” section, select “Transfer to Your Bank,” and confirm your transfer.
Wait for Bank Processing: Bank transfers typically take 1-3 business days, depending on your bank’s processing speed.
Following these steps ensures a smooth, timely withdrawal process.

Tips for Faster Withdrawals from Robinhood
Getting your funds quickly after selling on Robinhood can sometimes be a challenge. Here are some tips to ensure a seamless withdrawal experience:

Link Multiple Bank Accounts: Having more than one linked bank account can prevent delays due to account verification or restrictions.
Use a High-Processing Bank: Some banks are known for faster processing times, which can shave off a day from your withdrawal process.
Request Withdrawals Early in the Day: Many banks process withdrawals initiated before noon on the same day, potentially speeding up transfers.
Check for Robinhood Notifications: Robinhood may notify you if there are delays in the settlement process. Monitoring these can help you stay informed.
For anyone investing on Robinhood, understanding the withdrawal process is crucial. By following these detailed steps and keeping an eye on settlement times, you can minimize wait times and enjoy easy access to your funds. Whether you’re a beginner or seasoned investor, these insights will empower you to manage your withdrawals effectively and confidently.


0

Cash App Limit Per Day: What is the Cash App Daily ATM Withdrawal Limit?

Cash App is a versatile mobile payment service that has simplified how we handle daily transactions. However, understanding Cash App limits—such as daily, weekly, and monthly caps—can be essential for users who rely heavily on this platform for financial transactions. In this article, we explore the Cash App daily ATM withdrawal limit, ways to increase your Cash App limits from $2,500 to $7,500, and details on weekly, monthly, and verified account limits.

What is the Cash App Limit Per Day?
Cash App imposes daily limits on certain types of transactions to ensure the security of user accounts. These limits vary based on transaction type and account verification status.

Cash App Daily ATM Withdrawal Limit: For standard accounts, the daily ATM withdrawal limit is $310 per day. This means users cannot withdraw more than $310 from ATMs within a 24-hour period.
Cash App Daily Sending Limit: Cash App’s daily sending limit for unverified users is $250. If you’ve verified your account, this limit can significantly increase.
Cash App Daily Receiving Limit: Unverified Cash App accounts are limited to receiving $1,000 per month. Once verified, users can receive an unlimited amount.
Understanding these limits helps users plan their transactions more effectively, especially if they rely on Cash App for frequent payments or withdrawals.

How to Increase the Cash App Limit from $2,500 to $7,500?
Increasing your Cash App limit from $2,500 to $7,500 is a straightforward process, but it requires identity verification. Follow these steps to verify your account and unlock higher transaction capabilities:

Open Cash App: Launch the Cash App on your mobile device.
Go to Profile Settings: Tap on the profile icon located in the top right corner.
Select “Personal”: This option is usually under the “Account” section.
Provide Additional Information: Cash App will prompt you to enter your full name, date of birth, and the last four digits of your Social Security number.
Submit Verification Details: Cash App may ask you to provide more documentation, such as a photo ID, to confirm your identity.
Once you complete these steps, your account will typically be verified within 24-48 hours. After verification, your Cash App sending limit increases to $7,500 per week, and you’ll gain access to higher ATM withdrawal limits.

What is the Cash App Weekly Limit?
The Cash App weekly limit varies depending on whether or not the account is verified.

Unverified Accounts: For users who have not completed identity verification, the weekly sending limit is $250.
Verified Accounts: If you verify your account, the weekly sending limit increases to $7,500. This is particularly beneficial for users who conduct a high volume of transactions, as it provides more flexibility and purchasing power.
Cash App ATM Withdrawal Limit: Verified accounts have a weekly ATM withdrawal cap of $1,000.
Increasing your Cash App weekly limit through verification is essential for users who need the ability to send or withdraw larger amounts regularly.

What is the Cash App Monthly Limit?
The Cash App does not impose a specific monthly limit on verified accounts for receiving money. However, unverified accounts are limited to receiving a maximum of $1,000 per month. Here’s how monthly limits vary:

Unverified Accounts: Limited to $1,000 in total received funds per month.
Verified Accounts: No monthly limit on the amount that can be received. However, certain sending limits may still apply based on other transaction restrictions.
Ensuring your Cash App account is verified is crucial if you expect to receive more than $1,000 per month through Cash App payments.

What is the Cash App Limit After Verification?
Once your Cash App account is verified, you will experience a considerable increase in your transaction capabilities:

Cash App Sending Limit: Verified users can send up to $7,500 per week, offering substantial freedom to conduct business or personal transactions.
Cash App Receiving Limit: There is no cap on receiving funds for verified accounts, which is beneficial for freelancers, small businesses, or those who use Cash App for regular income.
Cash App ATM Withdrawal Limit: Verified Cash App users can withdraw up to $1,000 per week from ATMs. However, this still breaks down to a daily cap of $310 per day.
Verification is an essential step if you plan to maximize Cash App’s transaction limits and streamline your financial management on the platform.

How Does Cash App Compare to Other Payment Services in Terms of Limits?
When comparing Cash App to similar payment platforms, such as Venmo, PayPal, or Zelle, it’s clear that Cash App offers competitive features with specific limitations that cater to user security.

Venmo: Venmo imposes a weekly rolling limit of $4,999.99 for verified accounts, slightly lower than Cash App’s $7,500 weekly cap. However, Venmo allows a broader scope of transfers within its limits.
PayPal: PayPal’s personal account limit for verified users is often customizable but can also depend on account activity. Business accounts on PayPal, however, can exceed Cash App’s limits significantly.
Zelle: Zelle’s transaction limits vary by bank but can be as low as $500 daily for certain accounts, meaning Cash App often provides more flexibility for direct transfers.
Tips to Manage Your Cash App Limits Effectively
Complete Verification: Verification unlocks higher limits and is essential for frequent or large transactions.
Monitor Transaction History: Keep track of your transactions to avoid inadvertently hitting your daily or weekly limit.
Plan Withdrawals: Cash App limits daily ATM withdrawals, so planning ahead ensures you have access to cash when needed.
Consider Additional Accounts: If you rely heavily on Cash App and frequently hit limits, using supplementary services like Venmo or PayPal may help balance out your transaction load.
 
What is the daily limit on Cash App?

The Cash App daily ATM withdrawal limit is $1,000. ☎️+1(747) 977-3171 There are also weekly and monthly limits of $1,000 and $1,250.


Can you withdraw $5,000 from Cash App?

☎️+1(747) 977-3171 Cash App’s ATM withdrawal limit is $1,000 per day, so it is not possible to withdraw $5,000 in one go.


Conclusion
Understanding Cash App’s limits on daily, weekly, and monthly transactions is key to making the most of this payment platform. By verifying your account, you can unlock higher limits and enjoy increased flexibility. Whether you’re withdrawing from an ATM, sending funds, or receiving payments, Cash App offers competitive options to meet your needs.

0

How to Increase Cash App ATM Withdrawal Limit in one Day

Cash App is a convenient platform for handling everyday transactions, including ATM withdrawals. However, many users find Cash App’s default ATM withdrawal limits restrictive. This guide will show you how to increase your Cash App ATM withdrawal limit quickly, giving you greater flexibility when accessing cash.

Understanding Cash App ATM Withdrawal Limits

Cash App sets default limits on ATM withdrawals to ensure account security and control user spending. Knowing these limits can help you manage your transactions effectively.

Standard Cash App ATM Withdrawal Limits:

Per Transaction: $500
Daily Limit: $1,000
Weekly Limit: $1,000
Monthly Limit: $1,250
For users who need to withdraw larger amounts, increasing these limits is possible by taking a few quick steps.

How to Increase Your Cash App ATM Withdrawal Limit in 2 Minutes

1. Verify Your Cash App Account

The simplest way to increase your ATM withdrawal limit on Cash App is by verifying your account. Verification unlocks higher transaction capabilities and greater withdrawal limits. Here’s how:

Open Cash App: Go to your account settings.
Submit Personal Information: Cash App will ask for your full name, date of birth, and the last four digits of your Social Security Number (SSN).
Wait for Verification: Once submitted, Cash App usually verifies your account within minutes or up to 24 hours.
Once verified, your account can access the highest allowable ATM limits, maximizing how much you can withdraw daily, weekly, or monthly.

2. Set Up Direct Deposits

By setting up regular direct deposits to your Cash App, you may qualify for additional ATM fee reimbursements, making it easier to cover withdrawal costs even if the ATM withdrawal limit remains the same.

To set up direct deposits:

Go to the Banking section in Cash App.
Select Direct Deposit and generate your deposit form.
Fill in your employer’s details and submit the form to enable direct deposits into your Cash App.
Receiving at least $300 monthly in direct deposits can make you eligible for up to $7 in fee reimbursements per ATM withdrawal, for up to three withdrawals monthly.

Can You Increase Your Cash App ATM Limit Further?

After verification and setting up direct deposits, your account will have the maximum ATM withdrawal capabilities Cash App allows. If your account is fully verified and you still require additional flexibility, consider the following options:

Plan Withdrawals Strategically: Cash App allows up to $1,000 daily in ATM withdrawals. Planning larger withdrawals over two days or several transactions helps manage higher cash needs within set limits.
Use Linked Bank Account Transfers: Instead of cash, you can transfer funds to a linked bank account, where withdrawal limits may be higher, depending on your bank’s policies.
Contact Cash App Support: In rare cases, Cash App support may offer guidance on using the app’s features or temporarily increasing limits if you have a specific need.
Frequently Asked Questions

Can You Increase Your Cash App ATM Limit?

Yes, the best way to increase your ATM withdrawal limit on Cash App is to verify your account. Verification requires providing your full name, date of birth, and SSN. Once verified, you’ll access the highest allowable withdrawal limits for Cash App.

How Do I Increase My Daily ATM Withdrawal Limit?

You can increase your daily ATM withdrawal limit by verifying your Cash App account. After verification, Cash App allows withdrawals of up to $1,000 daily, $1,000 weekly, and $1,250 monthly.

Can I Withdraw $2000 from Cash App?

Cash App’s maximum daily ATM withdrawal limit is $1,000. If you need to withdraw more than $1,000, you’ll need to complete withdrawals over multiple days.

How Do I Change My ATM Withdrawal Limit?

Cash App does not offer customized ATM withdrawal limits, but you can increase your limit by verifying your account. Verification will automatically raise your withdrawal cap to the highest available amount.