How to Verify Bitcoin on Cash App without ID

In this comprehensive guide, we will walk you through the step-by-step process of verifying your Bitcoin on Cash App without ID. As a leading authority in the cryptocurrency space, we understand the importance of privacy and security in the digital age. By following these instructions, you can successfully complete the verification process and gain access to all the benefits that Cash App has to offer, without compromising your personal information.


Understanding Cash App and Bitcoin Verification

Before we delve into the verification process, let’s take a moment to understand what Cash App is and why verifying your Bitcoin transactions is essential. Cash App is a popular mobile payment service that allows users to send and receive money easily. It also supports the buying, selling, and storing of Bitcoin. Verifying your Bitcoin on Cash App is crucial because it ensures the safety of your transactions and protects against potential fraud or unauthorized access.


Creating a Cash App Account

If you don’t already have a Cash App account, the first step is to download the app and sign up. Follow these easy steps to create your account:

·        Go to the App Store or Google Play Store, search for “Cash App,” and download the application.

·        Open the app and enter your email address or phone number to begin the registration process.

·        Create a unique and secure password for your account.

·        Verify your email or phone number by entering the verification code sent to you.

·        Link your debit or credit card to your Cash App account to send and receive money.


Adding Bitcoin to Your Cash App Wallet

To use Cash App for Bitcoin transactions, you need to add Bitcoin to your Cash App wallet. Here’s how you can do it:

·        Open the Cash App and log in to your account.

·        Tap on the “Investing” tab located at the bottom of the screen.

·        Select “Bitcoin” from the list of available investment options.

·        Click on “Buy” and enter the amount of Bitcoin you want to purchase.

·        Review the transaction details and confirm your purchase.


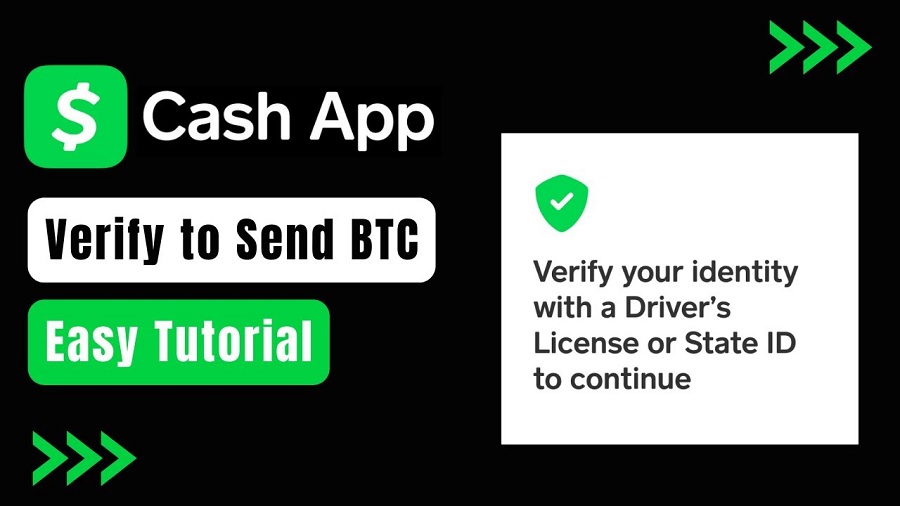
Understanding Cash App’s Verification Process

Cash App implements a verification process to ensure the security and legitimacy of users’ transactions. While some platforms may require ID verification, Cash App offers an alternative method that allows you to verify your identity using your Social Security Number (SSN) or Individual Taxpayer Identification Number (ITIN). This way, you can maintain a level of privacy without compromising the verification process.


Verifying Bitcoin on Cash App without ID

Now, let’s walk you through the steps to verify your Bitcoin on Cash App without the need for an ID:

·        Launch the Cash App and navigate to your profile by tapping on your profile picture in the top left corner.

·        Scroll down and select “Personal.”

·        Choose the option “Verify Identity.”

·        Instead of selecting “Use ID,” opt for the “SSN” or “ITIN” option.

·        Enter the required information accurately and double-check for any errors.

·        Cash App will then review the information provided, and upon successful verification, you’ll receive a confirmation notification.


Tips for a Smooth Verification Process

To ensure a seamless verification process, consider the following tips:

·        Double-check all the information you provide during the verification process.

·        Make sure your SSN or ITIN is up-to-date and accurate.

·        Avoid using VPNs or proxies during the verification process, as it may raise security concerns.


Conclusion

Congratulations! By following the steps mentioned above, you have successfully verified your Bitcoin on Cash App without the need for an ID. This not only protects your privacy but also enables you to enjoy the full benefits of Cash App’s features securely. As a responsible cryptocurrency user, it is essential to prioritize safety while engaging in digital transactions.

0

The Top 10 Challenges Users Face with Cash App Refunds

Embarking on a digital journey of effortless transactions, Cash App promises swift money transfers and frictionless payments. Yet, amid the virtual splendour, users may stumble upon elusive challenges when retrieving refunds. So, let’s begin and discuss about the top 10 challenges users face with Cash App refunds. Brace yourself for an adventure as we traverse these winding trails and uncover the secrets to conquering these mystifying tribulations.


·        Delayed Refunds: Delayed refunds stand tall among the many riddles that intrigue Cash App users. The enigmatic labyrinth of processing delays leaves users in suspense while waiting for their funds to return. Unravelling the reasons behind these mysterious delays, from elusive gremlins to soaring transaction volumes, requires patience and a touch of wizardry.


·        Unauthorized Transactions: Akin to phantoms from another realm, unauthorized transactions haunt the users of Cash App. As these spectral charges manifest, users need a remedy – a refund. Yet, dispelling these mischievous apparitions and claiming a refund can be a harrowing quest, requiring a blend of vigilance and sorcery.


·        Lack of Customer Support: When the winds of uncertainty howl, seeking solace in the arms of Cash App’s customer support can be a daunting endeavour, users may find themselves lost in the misty maze of delayed responses and limited communication channels. They can only expect a glimmer of clarity to guide them through the fog by harnessing the power of patience and persistence.


·        Confusing Refund Policy: The secrets to unlocking the elusive art of getting refunds lie within the arcane codex of Cash App’s refund policy. This intricate tapestry of jargon and clauses can confound even the most astute users. Deciphering this enigmatic codex becomes a quest for knowledge, unveiling the path to rightful refunds.


·        Disputing Transactions: In the battleground of disputed transactions, users must muster the strength of Hercules to emerge victorious. Armed with irrefutable evidence, they confront the formidable Gorgons of the refund process, each gaze more piercing than the last. Only with a shield of evidence and a sword of perseverance can they slay these mythical adversaries and claim their rightful refund.


·        Incomplete Refunds: In the lunar realm of refunds, a half-moon casts an eerie glow upon users who receive partial refunds instead of the full celestial bounty. These enigmatic partial refunds leave users adrift in a sea of questions, yearning for answers from the stars above.


·        Funds Sent to the Wrong Recipient: The precision compass may falter in the vast expanse of digital realms, leading users to send their treasure astray – to the wrong recipient. Reclaiming the lost treasure and recovering a refund requires navigating the celestial paths of communication, where a single misstep could lead to a difficult journey.


·        Non-Responsive Recipients: In the chamber of echoes, users requesting refunds from fellow Cash App locals may be met with silence. Unresponsive recipients form an enigmatic barrier, hindering the flow of refunds. Only by invoking the magic of perseverance and finding alternative routes can users hope to break through the echoing silence.


·        App Glitches and Technical Issues: As the digital matrix weaves its web, glitches, and technical hiccups disrupt the harmonious dance of transactions. Users find themselves entangled in a labyrinth of errors, seeking to untangle the web and secure a refund with the aid of a techno-mage.


·        Lack of Transparency: Beyond the veil of transparency, the truth behind refund processes often lies concealed. Users seeking answers may feel like intrepid adventurers on a quest to reveal the obscured reality. By peeling back, the layers of the mystical veil, they may uncover the truth and embrace the knowledge they seek.


How to Overcome Cash App Refund Challenges?

Here is some tips to overcome the challenges related to refund on Cash App:

·        Keep meticulous records of transactions and refund requests – an ancient grimoire holding the key to resolving disputes.

·        Master the incantations within Cash App’s refund policy, and you will wield the power to claim rightful refunds.

·        Invoke the spirits of patience and persistence as you seek guidance from the ethereal realm of customer support.

·        Guard against unauthorized transactions with the vigilance of a guardian wizard, and swiftly report any fraudulent activity.


FAQ

How long does it take to get a Cash App refund?

The Cash App refund processing time can vary, but it usually takes 2-7 business days. Sometimes, it may take longer due to specific circumstances or delays.


Can I get a refund on a cancelled transaction?

Yes, you should be eligible for a refund if a transaction is cancelled. However, the time it takes to receive the refund may vary.


What should I do if I do not receive a refund on Cash App?

If you do not receive a refund within the expected timeframe, contact Cash App customer support immediately and provide them with the necessary transaction details for further assistance.


Are all Cash App transactions eligible for refunds?

While many transactions may be eligible for refunds, some may not be eligible, depending on the nature of the transaction and the specific circumstances involved.


0

How to Increase Cash App Bitcoin Withdrawal or transfer limit?

Do want to enhance you journey of digital finance? The Bitcoin emerges as a beacon of hope, promising secure and decentralized transactions. Welcoming this groundbreaking wave, Cash App, an innovative mobile payment platform, extends its arms to embrace the fascinating world of cryptocurrencies, facilitating seamless Bitcoin transactions.

Yet, amid this financial revolution, we find ourselves navigating the intricacies of bitcoin withdrawal and sending limits on Cash App. So, let’s begin and know the procedure of exceeding this Cash App Bitcoin withdrawal limits, understanding the rationale behind these boundaries, and revealing exhilarating alternatives for transcending Cash App’s limits.


Understanding Bitcoin withdrawal and sending limits on Cash App

Enter the labyrinth of Bitcoin’s potential on Cash App, where seemingly elusive withdrawal and sending limits lurk. A realm where liberty dances hand in hand with restrictions, as users encounter boundaries dictating the volume of Bitcoin they can withdraw or send within predefined timeframes.


Why does Bitcoin withdraw and send limits to exist?

Within these virtual walls, the enigmatic presence of withdrawal and sending limits serves a grander purpose, meticulously woven into the very fabric of Cash App’s ecosystem:

·        As sentinels of the financial realm, Cash App Bitcoin withdrawal and sending limits stand vigilant against potential threats and unauthorized infiltrations. Diminishing the transfer of vast Bitcoin volumes fortifies defences against nefarious activities, preventing substantial losses in the event of security breaches.

·        Harmonizing with the ever-evolving regulatory landscape, Cash App weaves its limits in compliance with the laws that govern cryptocurrencies. An intricate ballet that treads the line of financial responsibility with grace.

·        Bitcoin’s volatile movements compose a symphony of risk in this turbulent orchestra of digital currencies. To harmonize the melody of stability, Cash App orchestrates limits on Bitcoin transactions, tempering the tides of price fluctuations.

·        A bastion against fraudulent machinations arises within these limits, thwarting money laundering and illicit endeavours. A fortified bastion safeguards both platform and the user.


Factors that affect Cash App Bitcoin withdrawal and sending limits

These Cash App Bitcoin limits, like tidal forces, ebb, and flow with a dance of intricate factors, delicately shaping Cash App’s Bitcoin withdrawal limits:

·        Ascend the verification tiers, for it is here that the gateway to higher limits lies. Embrace the ritual of verifying your account, establishing an identity that beckons trust.

·        Tale of your past financial endeavours, inscribed in the annals of Bitcoin transactions, casts its spell on the limits before you. Inscribe your name in the chronicles of responsible usage and be rewarded with gradual limit expansions.

·        A dance of Debutantes unfolds in digital finance. Younger accounts, yet untested in the storms of transactions, may see their limits modestly guarded. But as accounts mature and demonstrate prowess, the limits shall bow and yield.

·        Embrace the warmth of Cash App’s policies, for compliance with their tenets opens gates to elevated limits. Stray not from the path, lest restrictions cast shadows upon your potential.

·        Ventures beyond Bitcoin transactions into the world of peer-to-peer payments and Cash Card exploits weave a tapestry of trust. Here lies the secret to expanding Bitcoin sending limits, a treasure concealed in diversification.


0

How to Increase Venmo Weekly & Per Day Limit [2023]

We understand the importance of increasing your Venmo weekly and per day limit, and we’re here to provide you with comprehensive guidance on achieving this goal. Venmo, the popular peer-to-peer payment platform, has become an essential part of our daily lives, allowing us to conveniently transfer money to friends, family, and businesses. However, the default limits set by Venmo might be restricting your financial activities, and that’s where we come in to help you overcome these limitations.


Understanding Venmo Limits

Before we delve into the methods to increase your Venmo limits, let’s first understand what these limits entail. As of 2023, Venmo imposes standard weekly and per day transaction limits to ensure security and prevent potential fraudulent activities.

As a new Venmo user, your weekly rolling limit for sending and receiving payments is set at $2,999.99. Additionally, you’re per day limit for transactions are set at $999.99. This means that any combination of payments or transfers you make within a rolling seven-day period cannot exceed $2,999.99, and your transactions in a single day cannot surpass $999.99.


The Need for Higher Limits

While these limits may be sufficient for many users, certain individuals or businesses might find them restrictive. For instance, entrepreneurs running businesses that involve larger transactions, or people frequently splitting expenses in groups, might hit these limits frequently. If you find yourself in such a situation, it’s essential to explore ways to increase your Venmo limits.


Steps to Increase Venmo Limits


1. Link and Verify Bank Account

The first step to increase your Venmo limit is to ensure that your bank account is linked and verified on the platform. To do this, go to your Venmo app settings and add your bank account details. Venmo will then make small deposits to your account, which you’ll need to confirm to verify your bank account successfully.


2. Complete Your Profile

Having a complete profile can boost your credibility with Venmo, potentially increasing your chances of getting higher limits. Fill out all necessary information, including your legal name, date of birth, and a profile picture.


3. Build a Positive Transaction History

Venmo assesses your transaction history to determine your trustworthiness as a user. Engage in regular and legitimate transactions to build a positive history over time. Avoid any involvement in suspicious or potentially fraudulent activities, as they may adversely affect your chances of getting higher limits.


4. Request a Limit Increase

Once you’ve built a credible transaction history and regularly used Venmo for a considerable period, you can submit a limit increase request. Go to the Venmo app settings, navigate to “Increase Limits,” and provide the necessary information required for the evaluation process. Be transparent about your needs and how higher limits will benefit your financial activities.


5. Link Credit Card (Optional)

Linking a credit card to your Venmo account might improve your chances of receiving a limit increase. However, exercise caution with credit card usage, as Venmo charges a 3% fee for credit card transactions.


6. Be Patient

While you might be eager to get higher limits, remember that Venmo assesses each request individually. Be patient and continue using the platform responsibly while awaiting a response to your limit increase request.


Tips to Make the Most of Increased Limits

Congratulations on successfully increasing your Venmo limit! Now that you have more flexibility in your transactions, consider these tips to make the most of your higher limits:


1. Consolidate Payments

With higher limits, you can consolidate multiple smaller transactions into a single one. This approach saves on transaction fees and provides a more streamlined financial experience.


2. Plan Group Expenses

If you frequently split expenses with friends or colleagues, higher limits allow you to handle these transactions effortlessly. Whether it’s splitting the bill at a restaurant or sharing rental costs, Venmo becomes a seamless payment solution.


3. Utilize for Business Purposes

If you’re a business owner, increased Venmo limits can facilitate larger transactions with clients or suppliers. It’s an excellent way to manage business finances and maintain smooth operations.


4. Set Personal Budgets

While higher limits offer more financial flexibility, it’s essential to set personal spending and budgeting goals. Stay mindful of your financial habits and use Venmo responsibly.


Conclusion

In conclusion, increasing your Venmo weekly and per day limit is possible with the right approach and responsible usage. By linking and verifying your bank account, building a positive transaction history, and requesting a limit increase, you can enjoy higher limit on Venmo. Remember to use the newfound financial flexibility wisely, whether for personal or business purposes.

0

Cash App Bitcoin Verification Made Easy: A Comprehensive Guide

Amidst the surge in cryptocurrency popularity, Cash App has become a favoured platform for swift Bitcoin transactions. Nevertheless, before you embark on your Bitcoin journey, a vital step awaits – the Bitcoin verification process on Cash App. This essential verification ensures a secure, compliant experience, safeguarding both users and the platform. So, please continue reading to learn more about how you verify Cash App with Bitcoin, making the process smooth and hassle-free.


What is the significance of Bitcoin Verification on Cash App?

The Cash App’s Bitcoin verification process is paramount in utilizing the platform for Bitcoin transactions. With stringent compliance measures and advanced security protocols, verification deters fraudulent activities and unauthorized usage. Users establish trust with the platform by completing this Cash App verification for Bitcoin, fostering a secure environment for buying, selling, and sending Bitcoin.


The Cash App Bitcoin Verification Process

Embarking on your Bitcoin journey is effortless with Cash App’s user-friendly verification process. Below is a step-by-step method to verify Bitcoin on Cash App:

·        Obtain Cash App from the App Store (iOS) or Google Play Store (Android). Install the app on your mobile device and launch it.

·        Register using your mobile phone number or email address. Forge a unique, robust password to safeguard your account.

·        On the Cash App homepage, locate and click on the “Bitcoin” tab.

·        Before any Bitcoin transaction, Cash App prompts you to complete the verification process. Provide essential details, including your full legal name, date of birth, and the last four digits of your social security number (SSN).

·        The subsequent step may require you to submit a clear photo of your government-issued ID (driver’s license, passport, or state ID) to verify your identity. Ensure that all details are legible and visible in the photo.


What are the Benefits of Completing Bitcoin Verification on Cash App?

Here are benefits of verifying your Cash App account for Bitcoin transactions:

·        Verification bolsters your account’s security, mitigating risks of unauthorized access and potential fraud.

·        After Cash App btc verification process, you unlock many Bitcoin transaction features on the app.

·        By completing the verification process, you demonstrate compliance with relevant financial regulations.

·        Verified users relish a seamless experience while buying, selling, and sending Bitcoin through Cash App.


FAQ

How long for Cash App Bitcoin verification?

The verification process may take a few hours or up to a couple of days, contingent on Cash App’s current volume of verifications.


Can I engage in Bitcoin transactions on Cash App without verifying my identity?

No, Bitcoin verification is mandatory to conduct Bitcoin transactions on Cash App.


Is my personal information secured during the verification process?

Cash App employs cutting-edge security measures to safeguard your data, ensuring encrypted and secure storage.


Can I complete Bitcoin verification on Cash App using temporary contact information?

No, valid and permanent contact information, such as a phone number or email address, is imperative for successful verification.


Is Bitcoin verification obligatory to use Cash App?

While basic transactions can be conducted without verification, Bitcoin verification is indispensable for buying, selling, and sending Bitcoin.

0

Detailed Instructions for transfer Apple Cash to Your Bank

Transfer Apple Cash to your bank account is a convenient way to access the funds you’ve received or stored in your Apple Cash account. While the specific steps may vary slightly depending on your device and the version of iOS you’re using, I’ll provide you with a comprehensive guide that should work for most users. Please note that this guide assumes you have already set up Apple Cash and linked a valid bank account to your Apple ID. If you haven’t done so, make sure to set up Apple Cash and link your bank account before proceeding.


Here’s a step-by-step guide to transferring Apple Cash to your bank:

1.     Open the Wallet app: Locate the Wallet app on your iPhone or iPad. The Wallet app should have a white icon with a blue outline of a credit card.


2.     Access Apple Cash: Once you open the Wallet app, you should see your default payment card or the last card you used. Swipe left or right to locate and select your Apple Cash card. The Apple Cash card has a light green color with your initials on it.


3.     Tap on the three dots: In the top-right corner of the Apple Cash card, you’ll see three dots in a vertical line. Tap on the dots to access additional options.


4.     Choose “Transfer to Bank”: From the options that appear, select “Transfer to Bank.” This will initiate the process of transferring your Apple Cash funds to your linked bank account.


5.     Enter the transfer amount: On the transfer screen, you’ll be prompted to enter the amount you wish to transfer to your bank account. Type in the desired amount. Keep in mind that there may be a minimum transfer amount and that transferring funds may take some time, typically 1-3 business days.


6.     Confirm the transfer: After entering the transfer amount, review the details to ensure everything is correct. If all looks good, tap “Next” or “Transfer” to proceed.


7.     Wait for the transfer to complete: Once you confirm the transfer, Apple will begin processing it. The duration of the transfer may vary, but it usually takes 1-3 business days for the funds to appear in your bank account.


8.     Verify the transfer: After the transfer is complete, you should receive a notification from your bank indicating the arrival of the funds. Additionally, you can also check your bank account balance or transaction history to confirm the transfer.

Remember to keep your Wallet app and iOS updated to the latest versions to ensure smooth functionality and access to the latest features related to Apple Cash transfers.

Please note that Apple Cash transfers may be subject to fees, limits, and availability depending on your region and the specific terms and conditions of your Apple Cash account. It’s always a good idea to review the terms and any applicable fees before initiating a transfer.

I hope this guide helps you transfer your Apple Cash to your bank account successfully!


FAQ                                                                                                    

Q: Can I transfer Apple Cash to my bank account?

A: Yes, you can transfer funds from Apple Cash account to bank account.


Q: How do I link my bank account to Apple Cash?

A: To link your bank account to Apple Cash, you’ll need to set up Apple Cash and go through the account linking process. This can usually be done during the initial setup of Apple Cash or through the Wallet app settings.


Q: Are there any fees for transferring Apple Cash to my bank account?

A: Apple does not charge any fees for standard transfers to a bank account. However, there may be fees or limitations imposed by your bank or financial institution.


Q: How long does it take for the transfer to complete?

A: Typically, it takes 1-3 business days for the funds to appear in your bank account after initiating the transfer.


Q: Is there a minimum transfer amount for Apple Cash transfers to a bank account?

A: Yes, there may be a minimum transfer amount set by Apple. Make sure to check the transfer screen in the Wallet app for any applicable minimums.


Q: Can I cancel or reverse a transfer from Apple Cash to my bank account?

A: No, once you’ve initiated a transfer, it cannot be canceled or reversed. Make sure to review the details carefully before confirming the transfer.


Q: Can I transfer Apple Cash to a bank account outside of my country?

A: The availability of bank transfers and specific countries supported may vary. It’s best to check with Apple or refer to their documentation to see which countries are eligible for Apple Cash transfers.


Q: Are there any limits on transferring Apple Cash to a bank account?

A: Yes, there may be limits on the amount you can transfer from your Apple Cash account to your bank account. These limits can vary depending on various factors, such as your account history and regional regulations.


Q: Can I transfer Apple Cash to a bank account using a different Apple ID?

A: No, you can only transfer funds to a bank account linked to the same Apple ID that is associated with your Apple Cash account.


Q: What happens if there is an issue with the transfer?

A: If you encounter any issues during the transfer process, such as delays or errors, it’s recommended to contact Apple Support for assistance. They can help troubleshoot the problem and provide guidance.

0

How do I send money through Apple Pay?

Are you tired of fumbling around with cash or struggling to find your credit card when it’s time to pay? Look no further than Apple Pay! This convenient payment method is not only easy to use, but also offers added security for all your transactions. In this blog post, we’ll walk you through how to send money using Apple Pay so you can breeze through any payment situation with ease. Let’s get started!


Introduction to Apple Pay

Apple Pay is a mobile payment and digital wallet service by Apple Inc. that lets users make payments in person, in iOS apps, and on the web. It uses the built-in Near Field Communication (NFC) hardware in iPhone 6 and later to make secure purchases at participating stores and restaurants. Users can also use Apple Pay to send and receive money through iMessage or Siri.

In order to use Apple Pay, you’ll need an iPhone 6 or later with iOS 8.1 or later, or an iPad Pro, iPad Air 2, iPad mini 3, or iPod touch with iOS 8.1 or later. You’ll also need a supported credit or debit card from a participating bank or financial institution.

To set up Apple Pay on your device, open the Settings app and tap “Wallet & Apple Pay.” From there, you can add a new credit or debit card by using your device’s camera to capture your card information, or by entering it manually. Once you’ve added a card, you can start using Apple Pay wherever it’s accepted.

When making a purchase in person, look for the Apple Pay logo at the checkout counter and hold your device near the contactless reader. You may be asked to enter your PIN code on your device to complete the transaction. To make a purchase in an iOS app, tap the “Buy with Apple Pay” button and confirm your payment with Face ID or Touch ID. To pay on the web with Safari, look


What is needed to Send Money through Apple Pay?

In order to send money through Apple Pay, you will need the following:

-An iPhone 6 or later with iOS 8.2 or later, or an iPad Air 2 or later with iOS 8.3 or later

·        A compatible Apple Watch

·        An iCloud account

·        One of the following:

·        A debit or credit card from a participating issuer

·        An Apple Pay Cash card in your Wallet

To see if your device is compatible with Apple Pay, check out this link: https://support.apple.com/en-us/HT204506

 If you don’t have an iCloud account, you can create one here: https://www.apple.com/icloud/setup/.


How to Set Up Apple Pay

If you’re new to Apple Pay, setting it up is easy. Here’s how:

1.     Open the Settings app on your iPhone.

2.     Tap Wallet & Apple Pay.

3.     Tap Add Credit or Debit Card.

4.     Use your camera to capture your card information or enter it manually.

5.     Follow the instructions on your screen to add a billing address and verify your card.

6.     Once you’ve verified your card, tap done.

 And that’s it! Now you can start using Apple Pay to make purchases in stores, in apps, and online.


How to Add Money to Your Apple Pay Cash Account

In order to add money to your Apple Pay Cash account, you will need to have a compatible device with iOS 11.2 or later installed. Once you have done this, open the Wallet app and tap on the Apple Pay Cash card. Then, tap on the “Add Money” option. From here, you can either use your debit or credit card to add money or you can transfer money from your bank account.


How to Send and Receive Money with Apple Pay

Assuming you have already set up Apple Pay on your iPhone, sending money is easy. Simply open up the Messages app and start a new conversation. Then, tap the Apple Pay button and enter the amount of money you want to send.

Once you’ve entered the amount, tap the Pay button and confirm your payment with Face ID or Touch ID. That’s it! The recipient will then receive a notification that they’ve been sent money and can claim the funds by opening up the Messages app and tapping on the Apple Pay button.

If you’re on the receiving end of an Apple Pay transaction, claiming the money is just as easy. When you receive a notification that someone has sent you money, simply open up the Messages app and tap on the Apple Pay button. You’ll then be prompted to enter your bank account information so that the funds can be transferred.


Security Features of Apple Pay

When you add a credit or debit card to Apple Pay, the actual card numbers are not stored on your device, or on Apple servers. Instead, a unique Device Account Number is assigned, encrypted and securely stored in the Secure Element on your iPhone or iPad. Each transaction is authorized with a one-time unique dynamic security code.

In addition to keeping your financial information private and secure, Apple Pay is also safer than using a physical credit or debit card. When you use Apple Pay, your card number and identity are never shared with the merchant. In fact, your name, card number and security code are never even transmitted to the merchant. And because your transactions are authorized with a one-time unique security code, they can’t be used to create counterfeit cards to make fraudulent purchases.


Alternatives to Sending Money through Apple Pay

There are a few different ways that you can send money to someone through Apple Pay. You can use the Messages app, or you can use the Wallet app.

If you want to send money through the Messages app, open up a conversation with the person that you want to send money to. Then, tap on the “i” icon in the top right corner of the screen. Next, tap on the “Apple Pay” button. From there, you can enter in the amount of money that you want to send.

If you want to use the Wallet app, open it up and tap on the “Passbook & Apple Pay” button. Then, tap on the “Apple Pay” button. From there, you can add a credit or debit card by tapping on the “+” sign in the top right corner of the screen. Once you’ve added a card, you can choose it as your payment method and enter in an amount of money to send.


Conclusion

Sending money through Apple Pay is a quick and easy way to pay people you know. It’s free for personal use, secure and backed by the latest in fraud protection technology. Plus, you can quickly send money directly from your bank account or credit card using just your iPhone or iPad. Now that you understand how to send money through Apple Pay, why not give it a try today?

0