When Does Cash App Weekly Limit Reset? A Complete Guide

Cash App has become one of the most popular mobile payment solutions for fast, convenient transfers. However, many users wonder about the Cash App weekly limit reset — when it happens, how it works, and what they can do if they need a higher limit. Here, we provide an in-depth guide on Cash App’s weekly limit, including how it resets, options for increasing your limit, and how it affects specific transactions like Bitcoin and withdrawals.


What Is the Cash App Weekly Limit?

Cash App imposes limits to ensure secure transactions and manage risk on the platform. For most users, the standard weekly sending limit is $2,500. This limit applies to peer-to-peer (P2P) transactions, making it essential for users to understand their limits, especially if they frequently send larger amounts.


For unverified accounts, Cash App places restrictions with a smaller weekly limit of $250 for sending. Verification significantly increases the Cash App limit, enabling users to send up to $7,500 per week and receive an unlimited amount. This distinction between verified and unverified accounts emphasizes the importance of verifying your account to access higher limits and added security.


When Does the Cash App Weekly Limit Reset?

The Cash App weekly limit operates on a rolling basis. This means that your sending capacity replenishes exactly one week (7 days) after each transaction. For example, if you sent $500 on Monday, that amount will become available again the following Monday. Unlike some platforms that reset limits on a specific day (e.g., every Sunday), Cash App’s rolling schedule ensures users regain their sending power continuously.

To check when your specific transactions reset, visit the Activity tab on your Cash App, which displays each transaction and its exact date and time. This tab is crucial for understanding when your weekly limit will refresh.


How to Check Your Remaining Weekly Limit on Cash App

Checking your remaining weekly limit can help you plan transactions effectively. Here’s how to check your current limit:

Open Cash App and go to the Profile
Select Limits under the account settings.
Your current sending and receiving limits will be displayed here, along with a breakdown of usage.
Staying informed of your current limit helps avoid potential interruptions, especially if you need to make significant transfers.


Cash App Weekly Limit for Bitcoin Transactions

For users engaged in cryptocurrency trading, Cash App’s weekly Bitcoin limit functions similarly to its regular weekly sending limit but with a few distinctions. Verified users can buy up to $100,000 in Bitcoin per week. However, limits on Bitcoin withdrawals are separate. The weekly Bitcoin withdrawal limit typically stands at $2,000, with a daily cap of $5,000.


Increasing the Cash App Weekly Bitcoin Limit

To increase your Cash App Bitcoin transaction and withdrawal limits, you must complete identity verification on Cash App. Here’s a brief guide:

Verify Your Identity: Go to the Bitcoin tab, select Verify Identity, and submit the requested documents, including a photo ID.
Enable Two-Factor Authentication (2FA): Cash App may also require 2FA for larger Bitcoin transactions.
Maintain Regular Activity: Active and consistent Bitcoin trading can sometimes improve transaction privileges.
Once verified, you gain access to higher limits, which can be especially beneficial if you frequently trade or withdraw Bitcoin.


How to Increase Your Cash App Weekly Limit

Increasing your Cash App weekly limit allows more freedom with your transactions. If you find the default limit restrictive, follow these steps to increase it:

Complete Account Verification: To boost your limit, open Cash App, go to your Profile and select Personal. Cash App will ask for details such as your full name, date of birth, and last four digits of your Social Security Number.
Follow Identity Verification Steps: After submitting this information, Cash App will review your account for verification. Once verified, you’ll gain access to the higher limit, enabling you to send up to $7,500 weekly.
Contact Cash App Support (if needed): If you encounter issues, contact Cash App Support for further assistance. Verified users typically have higher transaction privileges, making verification a worthwhile step.
Completing verification ensures enhanced security and a smoother experience with higher spending capacity.


Understanding Cash App’s Withdrawal Limits and Reset Timing

Cash App also imposes a weekly limit on withdrawals, which is essential to note for users who frequently cash out to their bank accounts. The Cash App weekly withdrawal limit is generally $25,000 for verified users. However, unverified accounts face stricter limitations. The withdrawal limit follows a similar rolling schedule to the weekly sending limit, resetting 7 days after the transaction. To optimize your withdrawals, check the Cash App Activity tab for timing on when your specific transactions reset. This helps in planning high-value withdrawals within your weekly limit.


FAQ

Does Cash App Weekly Limit Reset Automatically?

Yes, the Cash App weekly limit resets automatically on a rolling basis, with each transaction resetting exactly 7 days after it was made. You don’t need to request a reset; Cash App’s system handles this automatically.


How Can I Track My Limit on Cash App?

Cash App’s Activity tab displays your transaction history, including dates and times for each transaction. By monitoring this tab, you can calculate when funds from specific transactions will become available again.


Can I Request a Higher Limit?

Although there isn’t an option to request additional increases beyond the $7,500 weekly limit, maintaining a verified account ensures you access the maximum limit Cash App offers. Should your needs exceed the current cap, contacting Cash App Support may offer alternatives, but further increases are generally limited.


Why Does Cash App Have Weekly Limits?

Weekly limits enhance user safety, reduce fraud risks, and ensure a secure environment for all Cash App users. Limiting the amount transferable weekly helps Cash App manage potential security risks and provide a stable experience.


Cash App Weekly Limit Insights from Reddit

Cash App’s weekly limit is a common topic on Reddit, where users discuss their experiences and strategies for optimizing their transaction limits. Many verified users confirm that while the $7,500 limit is generally sufficient, completing account verification is crucial to reach this threshold. Some Redditors also mention using alternative payment methods when needing to surpass Cash App’s limitations, underscoring the platform’s strict adherence to its weekly caps.


Conclusion

Understanding Cash App’s weekly limit reset schedule, increase options, and withdrawal constraints empowers users to make the most of this platform. By verifying your account, checking limits in the Activity tab, and planning transactions within the weekly caps, you can ensure smoother usage and avoid potential interruptions. For those who need even greater flexibility, engaging with Cash App Support or exploring alternative payment methods may provide the solutions required.

0

How to Send Money through Venmo: A Step-by-Step Guide

Venmo is one of the most popular mobile payment platforms in the U.S., making it easy to send and receive money with just a few taps on your phone. Whether you’re splitting a bill, paying back a friend, or sending a gift, Venmo simplifies transactions for anyone with a smartphone. This guide will walk you through the essentials of Venmo money transfer, from setting up your account to sending and receiving money.

How to Send Money on Venmo

Venmo’s user-friendly interface makes it simple to send money, whether you’re paying a friend or reimbursing a family member. Follow these steps to start:

Set Up Your Venmo Account: Download the Venmo app from the App Store or Google Play Store. Open the app, then sign up using your email, Facebook account, or mobile number. Once your account is created, you’ll be prompted to add a payment method.
Add a Payment Method: You can link a bank account, debit card, or credit card. Venmo recommends using a debit card or bank account to avoid fees when sending money. Credit card transactions have a 3% fee, so keep this in mind.
Find the Recipient: Tap the “Pay or Request” button on the Venmo home screen, and search for the recipient by their Venmo username, phone number, or email. Ensure you’re sending money to the correct person by verifying their profile picture or username.
Enter the Amount and Add a Note: Type the amount you want to send and add a note to personalize the transaction. Notes can be helpful for your own records or to explain the purpose of the transfer.
Select Your Privacy Setting: Venmo allows you to choose whether a transaction is public, visible to friends, or private. Adjusting these settings can help you maintain privacy as needed.
Complete the Payment: Review the transaction details, then hit “Pay.” Venmo will complete the Venmo send money process, and the funds will be instantly available in the recipient’s Venmo balance.
How to Receive Money on Venmo

Receiving money on Venmo is just as straightforward. Here’s how:

Share Your Username or QR Code: Give your Venmo username to the person sending you money, or show them your unique QR code in the Venmo app, which they can scan to find you quickly.
Accept the Payment: When someone sends you money, it will appear immediately in your Venmo balance. You can leave it there to make future payments or transfer it to your bank.
Transfer to Bank (Optional): To move funds from your Venmo balance to your bank account, tap “Transfer to Bank” in the app. You’ll have the option to choose between standard (1-3 business days, free) or instant transfers (within 30 minutes, with a small fee).
How to Send Money via Venmo Without Adding Funds First

You don’t need to pre-load funds into your Venmo balance to make payments. Venmo allows you to send money directly from your linked bank account or card. Here’s how it works:

Go to the Pay Screen: Tap “Pay or Request” in the Venmo app.
Choose Your Funding Source: Before completing the transaction, confirm that your payment method is either a linked bank account, debit card, or credit card.
Send Money Without Adding to Balance: Venmo will debit the amount directly from your selected funding source and credit the recipient’s Venmo balance.
This approach is ideal if you prefer not to maintain a balance within the app or if you’re sending a one-time payment.

How to Transfer Money from Venmo to a Bank Account

Once you’ve received money in your Venmo balance, you may want to transfer it to your bank account:

Tap on “Transfer to Bank”: Open the Venmo app and tap “☰” to access your settings, then select “Transfer to Bank.”
Choose the Transfer Speed: Select between the standard (free) option, which takes 1-3 business days, or the instant transfer, which typically costs 1.5% of the transfer amount (minimum fee of $0.25, maximum fee of $15).
Confirm and Complete the Transfer: Enter the amount and confirm the transfer. The funds will appear in your bank account according to your chosen transfer speed.
How to Send Money on Venmo Internationally

Currently, Venmo is only available in the United States. Users cannot send money to individuals in other countries. For international money transfers, consider alternatives like PayPal, Wise, or Western Union.

Venmo Transaction Limits

Venmo has weekly transaction limits for its users:

Unverified Accounts: Up to $299.99 per week for person-to-person payments.
Verified Accounts: Up to $4,999.99 per week for payments, purchases, and transfers.
To increase your limit, verify your account by providing your legal name, date of birth, social security number, and address.

Venmo Instant Transfer Fees

Venmo charges an instant transfer fee if you want to send money to your bank account in less than 30 minutes. The fee is currently 1.5% of the transaction amount, with a minimum charge of $0.25 and a maximum of $15. Regular 1-3 business day transfers are free.

Conclusion

Venmo is a versatile and user-friendly app for transferring funds, whether you’re paying someone back, receiving money, or managing a balance. The app’s convenience, combined with its connection to bank accounts and cards, makes it an ideal choice for everyday payments. By following the steps above, you can master how to send money on Venmo and make the most of this popular payment platform.

Frequently Asked Questions (FAQs)

1. Is Venmo free to use?

Yes, Venmo is free for most transactions, including sending and receiving money. However, there’s a 3% fee for payments funded by a credit card and a 1.5% fee for instant transfers to your bank account.

2. Can I send money on Venmo without a linked bank account?

Yes, you can use a debit or credit card instead of a bank account. However, keep in mind that credit card transactions have a 3% fee.

3. How quickly do Venmo transactions process?

Person-to-person payments process instantly. Bank transfers can take 1-3 business days, but instant transfers to a debit card are available for a fee.

4. Can I send money internationally through Venmo?

No, Venmo is currently only available for U.S. users and doesn’t support international transactions.

5. What is the maximum amount I can send on Venmo?

Unverified accounts have a limit of $299.99 per week for person-to-person payments, while verified accounts can send up to $4,999.99 per week.

0

How to Send Money on Venmo: A Complete Guide

Venmo is one of the most popular platforms for sending and receiving money quickly, offering a seamless way to handle transactions with friends, family, or even businesses. Whether you’re a first-time user or looking for more advanced ways to use the app, this guide will walk you through the essential functions of Venmo, including sending money, receiving payments, transferring funds, and connecting with other financial apps. Here’s everything you need to know about Venmo money transfers.

How to Send Money on Venmo

Download and Set Up the App: First, download the Venmo app from the App Store (for iPhone) or Google Play Store (for Android) and create an account.
Link Your Bank Account or Card: Once signed in, link a bank account, credit card, or debit card to your Venmo account. This step is essential as it enables you to fund your transactions.
Find the Recipient: Tap the “Pay or Request” button, then search for the recipient by their Venmo username, phone number, or email.
Enter the Amount and Message: Enter the amount you wish to send and add a short note or message if needed.
Complete the Payment: Hit “Pay,” confirm the details, and finalize the transaction.
How to Send Money from Venmo to Bank Account

Go to the Transfer Option: Open Venmo and tap on the “☰” icon, then go to the “Transfer to Bank” option.
Choose Transfer Method: Select “Instant” for immediate transfers, which incur a small Venmo instant transfer fee, or “1-3 Business Days” for a free transfer.
Select Your Bank Account: If you’ve already linked a bank account, select it, enter the amount, and confirm. Venmo will then transfer your funds to your bank account.
How to Pay Someone on Venmo Without an Account

Venmo currently requires both the sender and receiver to have an account. However, you can invite someone to join Venmo via their email or phone number. Once they sign up, you can send them money directly through the app.

How to Transfer Money from Bank to Venmo Fast

Use Instant Transfer: To quickly add funds to your Venmo balance, select the “Instant Transfer” option.
Link and Verify Your Bank Account: Ensure your bank account is verified on Venmo, which will allow quicker and more secure transfers.
Use Your Debit Card: Linking a debit card can expedite transfers, often appearing in your Venmo balance within minutes.

How to Use Venmo to Receive Money

Request Payment: Tap “Pay or Request,” enter the username of the person you want to receive money from, input the amount, and tap “Request.”
Share Your Username: You can also send your Venmo username to others to make it easier for them to locate you.
Accept the Funds: Once they send the payment, it will appear in your Venmo account balance immediately. You can either use these funds within Venmo or transfer them to your bank.

How to Transfer Money from Venmo to Cash App

Venmo and Cash App don’t directly integrate. However, you can transfer funds by linking a common bank account to both apps.

Transfer to Bank First: Transfer the funds from Venmo to your linked bank account.
Transfer from Bank to Cash App: Once the funds are in your bank account, open Cash App, tap “Add Cash,” and complete the transfer.

How to Transfer Money from Venmo to Debit Card

Venmo allows you to transfer funds directly to your debit card via the “Instant Transfer” option.

Choose the Transfer Amount: Open Venmo, go to “Transfer to Bank,” and select your debit card as the destination.
Select “Instant” Transfer: This method usually incurs a small fee but transfers the funds within 30 minutes.
Confirm the Details: Once confirmed, Venmo will initiate the transfer to your debit card.
How Much Can You Send on Venmo for Free?

Venmo allows free transactions between users, but there are limits depending on your account status:

Unverified Accounts: Up to $299.99 per week.
Verified Accounts: Up to $4,999.99 per week.
Note that transactions funded by a credit card are subject to a 3% fee, even if within the sending limits.

How to Transfer Money from Venmo to PayPal

There isn’t a direct transfer option from Venmo to PayPal. However, a workaround involves linking the same bank account to both platforms.

Transfer from Venmo to Bank: Transfer your funds from Venmo to your bank.
Transfer from Bank to PayPal: Open PayPal, go to “Add Funds,” select your linked bank account, and move the funds over.

How to Transfer Money from Cash App to Venmo

Like with PayPal, Cash App and Venmo do not integrate directly. Here’s how you can transfer funds:

Send to Bank Account First: Move your Cash App balance to your linked bank account.
Transfer from Bank to Venmo: Open Venmo and add funds from your bank to your Venmo balance.
Venmo offers an array of options for sending, receiving, and transferring funds, whether between friends, to a bank account, or across other financial apps. By understanding the various processes and fees associated with these transfers, you can make the most out of Venmo’s features.

What is Cash App Bitcoin Withdrawal Limit – How can I Increase It?

As the popularity of cryptocurrencies continues to surge, platforms like Cash App have made it easier for users to buy, sell, and withdraw Bitcoin seamlessly. However, understanding the withdrawal limits on the Cash App is crucial for effectively managing your Bitcoin transactions. Whether you’re a seasoned trader or a newcomer to the crypto world, knowing the Cash App Bitcoin withdrawal limits and how to increase them can significantly enhance your experience. This comprehensive guide will delve into everything you need to know about Cash App Bitcoin withdrawal limits, including how to increase them and answers to frequently asked questions.


What is the Cash App Bitcoin Withdrawal Limit?

The Cash App Bitcoin withdrawal limit refers to the maximum amount of Bitcoin you can transfer out of your Cash App account within a specific timeframe. Cash App users can withdraw Bitcoin with a minimum of 0.00001 BTC. The maximum withdrawal limit is $2,000 worth of BTC per day and $5,000 worth of BTC per week. These limits are in place to ensure the security of transactions and compliance with regulatory standards. Understanding these limits is essential for planning your Bitcoin transactions effectively.


Importance of Knowing Bitcoin Withdrawal Limits

Knowing your Bitcoin withdrawal limits on Cash App can help you avoid disruptions in your trading activities. Whether you’re moving Bitcoin to a private wallet, another exchange, or using it for purchases, being aware of these limits ensures you can manage your funds efficiently and securely. Cash App limits how much Bitcoin you can withdraw in two ways: daily limits and weekly limits.


Daily limit: You can withdraw up to $2,000 worth of Bitcoin in a single day. Weekly limit: You can withdraw up to $5,000 worth of Bitcoin within any 7-day period.
 

Types of Cash App Bitcoin Withdrawal Limits

Cash App Bitcoin Daily Withdrawal Limit: The daily Bitcoin (BTC) withdrawal limit on Cash App is $2,000. This limit is in place to prevent large-scale fraud and ensure that the platform operates smoothly. If you attempt to withdraw more than this amount within a 24-hour period, the transaction will be declined, and you will need to wait until the next day to complete the withdrawal.


Cash App Bitcoin Weekly Withdrawal Limit: Cash App allows users to withdraw up to $5,000 worth of Bitcoin within any rolling 7-day period. This weekly limit is cumulative, meaning that if you reach the $5,000 limit within a week, you will need to wait until some of those transactions fall outside of the 7-day window before making additional withdrawals.


Cash App Bitcoin Purchase Limit: The purchase limit for Bitcoin on Cash App can vary based on the account verification status and other factors. Generally, users can purchase up to $100,000 worth of Bitcoin per week.


Monthly and Other Limits: While the Cash App primarily focuses on daily and weekly limits, understanding these can help you infer your monthly limits. By planning your withdrawals according to daily and weekly limits, you can estimate your monthly transaction capacity. However, always check the latest updates from the Cash App for any changes in limits or additional restrictions.


Can I Increase My Cash App Bitcoin Withdrawal Limit?

Yes, you can increase your Cash App Bitcoin withdrawal limit. By verifying your identity within the app, including providing personal information like your full name, date of birth, and the last four digits of your Social Security Number, Cash App allows you to access higher withdrawal limits. Once verified, you can enjoy more flexibility with your Bitcoin transactions.


How to Increase Your Cash App Bitcoin Withdrawal Limit?

If you find the current limits too restrictive, you can request a limit increase from Cash App. To do this, you will need to complete additional verification steps, such as providing your full name, date of birth, social security number, and uploading a photo ID. Once verified, Cash App may increase your Bitcoin withdrawal, purchase, and sending limits, allowing you more flexibility in managing your Bitcoin transactions. Here is how to increase Cash App Bitcoin withdrawal limit:


Verify Your Identity: The first step to increasing your limit is to verify your identity on Cash App. This involves providing your full name, date of birth, and the last four digits of your Social Security Number (SSN).
Enable Bitcoin Withdrawals and Deposits: Go to the Bitcoin section in the Cash App and complete the verification process to enable Bitcoin withdrawals and deposits.
Submit Additional Information: If prompted, provide any additional information required, such as a photo ID or a utility bill, to confirm your address. This step is crucial for higher withdrawal limits.
Regular Transactions: Maintain a history of regular and legitimate transactions on the Cash App. This can build trust and potentially lead to higher limits over time.
Contact Customer Support: Reach out to Cash App’s customer support to request an increase in your Cash App Bitcoin withdrawal limit. Be prepared to provide a rationale for your request and any additional information they may require.
 

Tips for Managing Your Limits

Plan Ahead: If you anticipate needing to withdraw large amounts of Bitcoin, plan your transactions to stay within your limits.
Monitor Your Limits: Regularly check your withdrawal limits and usage to avoid any disruptions.
Stay Verified: Ensure your account verification is up to date to avoid any issues with your limits.
 

Why Cash App Bitcoin Withdrawal Not Working?

If you’re experiencing issues with Bitcoin withdrawals on Cash App, here are some common problems and solutions:


Unverified Account: Ensure your account is verified. With verification, your withdrawal limits will be significantly expanded.
Exceeded Limits: Check if you’ve exceeded your daily or weekly withdrawal limits. If so, you will need to wait for the limits to reset.
Network Issues: Occasionally, network issues can delay or prevent transactions. Ensure you have a stable internet connection.
Pending Transactions: If you have pending transactions, they need to be completed before initiating new ones.
 

When does Cash App Bitcoin Withdrawal Limit Reset?

The Bitcoin withdrawal limit in Cash App resets on a rolling basis. The daily limit resets every 24 hours after your last withdrawal, and the weekly limit resets 7 days after your first withdrawal within the given week. Here’s what you need to know:


Daily Limit Reset: The daily Bitcoin withdrawal limit resets every 24 hours from the time of your first transaction. For example, if your first withdrawal was at 10 AM, your daily limit will reset at 10 AM the next day.
Weekly Limit Reset: The weekly limit is reset on a rolling basis. If you make a transaction on Monday at 2 PM, that amount will count against your limit until the next Monday at 2 PM.
 

Frequently Asked Questions (FAQs)

1. What is the Cash App Bitcoin withdrawal limit?

For Bitcoin, Cash App imposes a withdrawal limit of $2,000 worth of Bitcoin every 24 hours and $5,000 within any 7 days. To withdraw Bitcoin, your identity must be verified, and you need to have passed additional geographic and other types of compliance measures.

2. What Is Cash App Bitcoin (BTC) Withdrawal Limit?

The Bitcoin (BTC) withdrawal limit on Cash App refers to the maximum amount of Bitcoin that a user can transfer out of their Cash App account to an external wallet. This limit is generally set at $2,000 worth of Bitcoin per day and $5,000 within a 7-day period. These limits can vary slightly depending on your account verification status and transaction history.


3. What is Cash App weekly Bitcoin withdrawal limit?

In addition to the daily limit, Cash App also imposes a weekly Bitcoin withdrawal limit. The weekly limit for Bitcoin withdrawals is $5,000 worth of Bitcoin.


4. What Is Cash App Bitcoin (BTC) Sending Limit?

The sending limit on Cash App governs how much Bitcoin you can send to other users or external wallets. The sending limit is directly related to the withdrawal limit, with a maximum of $2,000 worth of Bitcoin per day and $5,000 per week.


5. How to Increase Cash App Bitcoin Withdrawal Limit?

To increase your Cash App Bitcoin withdrawal limit, follow these steps:


Open Cash App: Launch the app on your mobile device.
Go to Profile: Tap on the profile icon located at the top-right corner.
Select ‘Personal’: Enter your full name, date of birth, and the last four digits of your SSN.
Complete Verification: Follow the prompts to complete identity verification.
After verification, your Bitcoin withdrawal limit should be increased, allowing for larger transactions.
 

6. How to Increase Bitcoin Withdrawal Limit on Cash App?

Cash App will ask you to input some personal information to verify your identity. Share details such as your name, date of birth and last four digits of social security number. After verification your Cash App weekly Bitcoin withdrawal limit will increase to $7500.


7. How to Increase the Cash App Bitcoin Withdrawal Limit Per Week?

Cash App’s weekly Bitcoin withdrawal limit is $5,000 worth of Bitcoin for verified users. To request an increase, users should ensure their account is fully verified. Consistent use of the platform, maintaining a positive transaction record, and contacting Cash App support for a limit review can also help raise the weekly withdrawal limits.


8. Why is my Cash App Bitcoin withdrawal not working?

Bitcoin withdrawals may not work due to unverified accounts, exceeded limits, network issues, or pending transactions. Ensure your account is verified and check your limits.


9. How do I enable Bitcoin withdrawals on Cash App?

To enable Bitcoin withdrawals, go to the Bitcoin section in the Cash App, complete the verification process, and provide any required additional information.


10. When does the Cash App Bitcoin daily limit reset?

The daily limit resets every 24 hours from the time of your first transaction of the day.


11. Can I contact Cash App support to increase my withdrawal limit?

Yes, you can contact Cash App support to request a higher withdrawal limit. Be prepared to provide a valid reason and any necessary documentation.


12. Is there a monthly Bitcoin withdrawal limit on Cash App?

While Cash App focuses on daily and weekly limits, you can estimate your monthly limit based on these. Currently, the weekly limit is $5,000 worth of Bitcoin.


13. What should I do if my Bitcoin withdrawal is not enabled?

Ensure your account is verified, update your Cash App to the latest version, and contact Cash App support if the issue persists.


14. Does the Cash App Bitcoin withdrawal limit apply to deposits as well?

No, the withdrawal limit specifically applies to Bitcoin withdrawals. Deposits have their limits and procedures.


15. How much Bitcoin can withdraw from Cash App per day?

For users who engage in cryptocurrency transactions, Cash App offers the ability to buy, sell, and withdraw Bitcoin. However, there are specific limits associated with these transactions. Cash App Daily Bitcoin Withdrawal Limit: You can withdraw up to $2,000 worth of Bitcoin per day.


16. How can I increase my Cash App Bitcoin withdrawal limit?

To increase your Bitcoin withdrawal limit, you need to verify your identity on the Cash App. This involves providing your full name, date of birth, and the last four digits of your Social Security number. Additional information may also be required.


Conclusion

Understanding the Cash App Bitcoin withdrawal limits is essential for effectively managing your cryptocurrency transactions. By knowing the daily and weekly limits, verifying your account, and following best practices, you can ensure smooth and secure transactions. If you need higher limits, don’t hesitate to contact Cash App support and provide the necessary information. Staying informed and proactive about your limits will help you make the most of your Cash App experience.

0

How to Transfer Money from Robinhood to Bank with Easy Steps

If you’ve been investing with Robinhood and now want to cash out, the good news is that Robinhood offers a straightforward process to withdraw money, whether you’re using the mobile app (Android or iOS) or a desktop computer. This guide covers all the ways you can pull money out of Robinhood, how long it takes to transfer money, and common issues you may face.

How to Transfer Money from Robinhood to Bank?
Withdrawing funds from your Robinhood account using the iOS app is a straightforward process and the fastest way to transfer money from Robinhood to a bank. Here’s a step-by-step guide to help you navigate through the withdrawal procedure seamlessly:

Launch the Robinhood iOS app on your mobile device.
Locate and tap on the account icon, typically found in the bottom-right corner of the screen.
In the account menu, look for three horizontal lines (often referred to as the “hamburger” icon) in the top-right corner. Tap on this icon to access the menu options.
Select “Transfers” from the menu to proceed to the next step.
Within the “Transfers” section, you’ll find the option labeled “Transfer Money.” Tap on this option to initiate the withdrawal process.
Enter the desired dollar amount you wish to withdraw from your Robinhood account.
For the “From” field, select “Robinhood,” indicating the source of the funds.
In the “To” field, choose the bank account where you want the withdrawn funds to be deposited.
Follow the on-screen prompts to confirm the withdrawal details and complete the transaction.
Processing times for withdrawals can vary, and you may need to exercise patience as the transaction is finalized. Once the withdrawal is completed, the funds will be transferred to your chosen bank account, providing you with the financial flexibility you need.


How to withdraw money from Robinhood on Android?

Access Account: Start by tapping the account icon located at the bottom right corner of the screen on your Android device.
Open Menu: Next, tap on the three lines in the upper right corner, often referred to as the “hamburger” icon, to open your account’s menu.
Navigate to Transfers: In the menu, find and tap on “Transfers,” which is usually near the top.
Initiate a bank transfer: Look for “Transfer to Your Bank” and tap on it. This option is typically at the top of the transfer menu.
Enter the amount and details: Input the dollar amount you wish to transfer, then tap “Continue.” Choose “Robinhood” in the “From” field and select your desired bank account in the “To” field. Complete the process by tapping “Transfer.”
Transfer Processing: Please note that the transfer process may take up to 5 days.
 

Following these steps will guide you through withdrawing money from Robinhood on your Android device.


How to Withdraw Money from Robinhood on the Desktop?

Click “Account” and then select “Transfers” from the menu.
Fill out the necessary details for the transfer. Choose “Robinhood” in the “From” field and your desired bank in the “To” field. Enter the amount you wish to transfer, and then proceed to review the transfer.
Review the transfer information to ensure accuracy. Once confirmed, click on “Submit.”
Withdrawal Time: Like with the mobile app, expect the funds to take 3-5 business days to reach your bank account.


7 Tips for a Smooth Cash-Out Transition
Here are some key tips to ensure a hassle-free withdrawal process and a seamless shift to your chosen alternative:


1. Plan Ahead: Before initiating any withdrawals, take the time to review your investment goals and strategy. Consider factors such as your desired timeline, financial objectives, and risk tolerance. Planning ahead will help you make informed decisions and minimize any disruptions during the transition.


2. Adhere to Waiting Periods: Robinhood enforces waiting periods for various withdrawal activities, such as deposits and stock sales. It’s essential to understand and respect these waiting periods to avoid unexpected delays. Factor them into your withdrawal timeline and ensure that you comply with Robinhood’s policies.


3. Consider Account Restrictions: Be mindful of any potential account restrictions that may impact your withdrawal ability. Review your account status and address any outstanding issues, such as negative balances or suspected fraud, before attempting to withdraw funds. Clearing up these matters in advance will prevent hurdles during the transition.


4. Gather the necessary documentation: If you’re switching bank accounts or encountering account restrictions, be prepared to provide any required documentation promptly. This may include photo identification, bank statements, or other proof of ownership. Having these documents ready can expedite the resolution process if any issues arise.


5. Choose the Right Timing: Timing is crucial when initiating withdrawals. Consider market conditions, pending trades, and other factors that could affect your portfolio’s performance. Aim to withdraw funds during periods of stability to avoid unnecessary market fluctuations.


6. Communicate with Support: If you encounter any challenges or uncertainties during the withdrawal process, don’t hesitate to reach out to Robinhood’s customer support. Their assistance can help clarify any concerns and ensure that your transition proceeds smoothly.


7. Explore Alternative Investment Options: As you prepare to withdraw from Robinhood, take the opportunity to explore alternative investment platforms that align with your goals and preferences. Research different platforms, and compare features, fees, and available investment options to make an informed choice.


Common Issues and FAQs:-
I Sold Stock on Robinhood, Where Is My Money?
After selling stock on Robinhood, the funds will not be immediately available for withdrawal. This is because stock trades take two business days to “settle.” Once the funds are settled, you’ll be able to transfer them to your bank.

How Long Does It Take to Withdraw Money from Robinhood?
Typically, it takes 3-5 business days for Robinhood withdrawals to complete. This time frame applies to both mobile and desktop transactions.

Why Can’t I Withdraw Money from Robinhood After Selling?
If you recently sold stock but can’t withdraw the funds yet, it’s because your trade hasn’t settled. Robinhood follows a standard T+2 settlement period, meaning funds will only become available for withdrawal two business days after the sale.

Cashing Out Robinhood: Are There Any Fees?
Robinhood does not charge a fee to withdraw money to your bank. However, certain banks may impose fees for incoming transfers. Always check with your bank to avoid surprises.

Robinhood Withdrawal Limit
Robinhood does not have a specific withdrawal limit. However, you may encounter issues withdrawing large amounts at once if there are bank-related limits or settlement periods in play.

Robinhood Transfer Fee
Robinhood does not charge any fees for standard ACH transfers. If you’re using other financial services in conjunction with Robinhood, make sure to verify any applicable fees on their side.


Frequently Asked Questions About Withdrawing Money from Robinhood
How to Transfer Money From Robinhood to Bank?
To transfer money from Robinhood to your bank account, navigate to the Transfers section on either the mobile app or desktop, select Transfer to Your Bank, and confirm the amount you want to move.

How to Cash Out on Robinhood?
Cashing out on Robinhood simply means selling your assets and transferring the proceeds to your bank account. Follow the steps outlined earlier to initiate the transfer.

Pull Money Out of Robinhood Without Fees
Robinhood does not charge fees for pulling money out of your account. Just ensure your funds are settled and available before initiating a transfer.


Conclusion
Whether you’re using the Robinhood app on iOS, Android, or the desktop version, withdrawing money is a simple process. Keep in mind the T+2 settlement period for trades and the 3-5 business days it takes to process withdrawals. While Robinhood doesn’t charge withdrawal fees, always check with your bank to see if they charge any fees for receiving funds. By following this guide, you’ll know exactly how to transfer money out of Robinhood, manage your cash flow, and ensure your investments work for you.

0

How to Withdraw Money from Robinhood – A Step-by-Step Guide

Robinhood has become one of the most popular platforms for buying and selling stocks, options, and cryptocurrencies. However, for new investors, understanding how to withdraw funds from Robinhood to a bank account can be a bit confusing. This guide will explain the process of withdrawing funds, the timing involved, and address common issues that users may face.

How to Withdraw Money from Robinhood to Your Bank Account

Withdraw money from Robinhood to a bank account is straightforward once you understand the steps involved. Here’s a step-by-step guide:

Open the Robinhood App: Launch the app on your device and log in to your account.
Access the Account Menu: Tap on the Account icon (usually at the bottom right).
Select “Transfers”: In the menu, select Transfers to view the transfer options.
Choose “Transfer to Your Bank”: Tap on Transfer to Your Bank to initiate the withdrawal process.
Enter the Withdrawal Amount: Specify the amount you wish to transfer to your bank account. Ensure this amount does not exceed your available withdrawable cash.
Confirm the Transfer: Double-check the information and confirm the transfer. Robinhood will show you an estimated processing time.

How to Withdraw Money from Robinhood Immediately

While Robinhood provides free instant deposits, withdrawals can take a bit longer. Here’s how you can expedite the process:

Verify Your Bank Account: Ensure that your bank account is verified and linked to Robinhood. Unverified accounts may delay withdrawal processing.
Check for Withdrawable Cash: Funds become withdrawable cash once they clear any settlement period. Only withdrawable cash can be transferred immediately.
Use Cash Management Feature (If Available): Robinhood’s Cash Management feature offers users a debit card to spend directly from their account, eliminating the need to transfer money.
Wait for Settlement: Stock trades require up to two business days (T+2) to settle. Only after settlement can the proceeds become withdrawable.
Select “Instant Transfers”: Robinhood does not offer instant withdrawals, but choosing a direct deposit bank with quick processing times can speed up access to funds.

Why Can’t I Withdraw Money from Robinhood After Selling?

There are several reasons why you may not be able to withdraw funds immediately after selling assets on Robinhood:

Settlement Period: Following a sale, funds need two business days to settle (T+2) before becoming available for withdrawal.
Withdrawal Hold: New deposits are subject to a five-business-day hold. If you funded your account recently, the hold period must pass before withdrawals.
Account Restrictions: Occasionally, accounts face restrictions if suspicious activity is detected or if the user has triggered risk management rules.
Insufficient Withdrawable Cash: Only cash from fully settled transactions is withdrawable. Pending trades or unsettled amounts cannot be withdrawn.
If you are unable to withdraw, check if your funds have settled, and ensure that no withdrawal restrictions apply.

How Long Does It Take to Withdraw Money from Robinhood After Selling?

Withdrawing money from Robinhood after selling investments depends on two main factors: settlement time and bank processing time.

Settlement Time (T+2): After selling stocks, funds take two business days to settle. This standard settlement period applies to stock and ETF sales.
Withdrawal Processing Time: After funds settle, withdrawals can take 1-3 business days to reflect in your bank account. Processing time varies by bank, with some banks processing transactions faster than others.
In total, it can take 3-5 business days from the sale date to have money available in your bank account.

Robinhood Withdrawable Cash: What It Means

In Robinhood, withdrawable cash refers to the amount of money in your account that is eligible for withdrawal. Withdrawable cash includes:

Settled Funds: Funds from completed sales that have undergone the two-day settlement period.
Deposits Beyond Hold Period: Deposited funds become withdrawable after the five-business-day hold.
Funds not marked as withdrawable cash cannot be transferred out of Robinhood until they clear the required periods.

Robinhood Withdrawal Limit

Robinhood limits the amount of money that can be withdrawn based on account status and activity. Here are the key points regarding withdrawal limits:

Daily Withdrawal Limit: Typically, Robinhood enforces a daily withdrawal limit of $50,000 per business day.
New Deposit Hold: Recently deposited funds have a five-business-day hold period before they can be withdrawn.
Cash Management Limit: Users with Cash Management can use the debit card up to their balance limit without facing withdrawal restrictions.
If your withdrawal request exceeds the daily limit, you may need to split the transaction over multiple days.

I Sold Stock on Robinhood – Where Is My Money?

After selling stock on Robinhood, users often wonder where their money is or why it isn’t available for withdrawal. Here’s what to expect after selling assets:

Settlement Period: When you sell a stock, the funds generated take two business days to settle. During this period, the funds are visible in your account balance but are not yet withdrawable.
Withdrawable Cash Notification: Once the funds have settled, they will appear as withdrawable cash. You can then initiate a transfer to your bank.
Notifications for Processing: Robinhood typically sends a notification when your money is available for withdrawal, letting you know that the funds have cleared.
Bank Processing: Once you’ve initiated a withdrawal, the money will be transferred to your bank, taking an additional 1-3 business days to appear.
Frequently Asked Questions

Can I Withdraw Money from Robinhood on Weekends?

Robinhood processes withdrawals only during standard banking hours (Monday to Friday). Requests initiated over the weekend will begin processing on the next business day.

Why Is My Withdrawal Delayed?

Withdrawal delays can occur due to new deposit holds, settlement requirements, or bank processing times. Check if your funds have settled, and make sure no holds or restrictions apply.

Can I Withdraw Less Than $1?

Yes, Robinhood allows users to withdraw amounts as small as $1, provided it is within the withdrawable cash balance.

How Often Can I Withdraw Money from Robinhood?

There is no restriction on the frequency of withdrawals, as long as they do not exceed the daily limit of $50,000 and are within the available withdrawable cash.

How Do I Check Withdrawable Cash on Robinhood?

To check your withdrawable cash balance, open the app, access the account menu, and view the cash balance. Withdrawable funds will be specified separately from the total balance.

By following these steps and understanding the limitations, Robinhood users can manage their funds effectively and avoid unexpected delays when transferring money out of the platform.

Cash App Closed My Account – Need Help? A Complete Guide

Cash App, developed by Square, Inc., has become a popular choice for fast and convenient mobile payments. However, many users find themselves in challenging situations when Cash App unexpectedly cash app closes accounts due to various reasons. In this comprehensive guide, we will cover why Cash App might close your account, what to do if there’s money in it, steps to recover access, and tips for creating a new account if necessary.

Why Did Cash App Close My Account? Common Reasons for Account Termination

Cash App may close accounts when users violate the platform’s terms of service. Cash App’s terms are set to protect users and ensure a safe and legal financial environment. Here are the most frequent reasons why cash app accounts closed:

Violation of Terms of Service: Cash App has clear policies that all users must adhere to. Engaging in prohibited activities or transactions outside the permitted scope can lead to account termination.
Suspicious or Unauthorized Transactions: Cash App actively monitors accounts for any unusual activity, which may be flagged as suspicious. If certain transactions seem out of line with the usual activity, Cash App may freeze or close the account as a safety precaution.
Gambling or Restricted Activities: Certain activities, including gambling and betting, are restricted on Cash App. Engaging in such activities through the platform can result in immediate account closure.
Multiple Accounts: According to Cash App’s policies, each user is typically allowed to maintain only one verified account. Having multiple accounts, or attempting to create a duplicate, could lead to closure.
Fraudulent Activity or Scams: If Cash App suspects fraudulent behavior, such as using the platform to scam others, this can lead to permanent account closure. Cash App strives to protect its community by taking swift action on accounts that violate this policy.
Cash App Closed My Account with all my Money in It – How Can I Retrieve My Funds?

If Cash App closed your account with all my money in it, follow these steps to recover your funds:

Contact Cash App Support: The first step is to contact Cash App’s customer support. Use the app or visit their website to submit a request explaining your situation. Be as detailed as possible in your description.
Verification Process: Cash App may ask you to verify your identity to ensure you’re the rightful owner of the account. This can include providing personal information or answering security questions.
Request a Refund or Transfer: Once your identity is verified, ask Cash App’s support team to initiate a refund or transfer of the funds to an alternate account or bank.
Wait for Processing: Depending on the circumstances, the process can take a few business days. Be patient, as Cash App has standard procedures for securely handling funds from closed accounts.
Can I Open a New Cash App Account if My Account Was Closed?

Many users wonder if they can open a new Cash App account after a previous one has been closed. While this is possible, it’s essential to follow certain guidelines:

Use a New Email and Phone Number: Cash App’s system tracks accounts based on email and phone numbers, so you’ll need to use a different email and phone number than the one linked to the closed account.
Verify Personal Information: During the setup of a new account, Cash App may ask for identification to ensure compliance with their policies. Make sure all provided information is accurate.
Avoid Restricted Activities: To avoid another account closure, do not engage in activities that violate Cash App’s terms, such as gambling or suspicious transactions.
Consult Cash App Support: If you’re unsure about setting up a new account or have specific questions, reach out to Cash App support for guidance.
How to Access Your Money from a Closed Cash App Account

Retrieving money from a closed Cash App account requires persistence and following the proper steps:

Open the Cash App on a New Device: If you can still log in, attempt accessing the funds using a different device. Sometimes, restrictions may apply only to a specific device or network.
Withdraw to Linked Bank Account: If possible, initiate a transfer of any remaining funds to your linked bank account. If access is restricted, contact Cash App support immediately.
Cash App Customer Support: For accounts that are completely inaccessible, Cash App support can help you reclaim your money. They may ask for identification or proof of ownership.
Legal Action as Last Resort: In rare cases, users may have to consider legal avenues to reclaim funds from a closed account. Be sure to document all interactions with Cash App support as evidence if pursuing this option.

Why Is My Cash App Account Gone? Understanding Account Suspension in 2024

In 2024, Cash App continues to enhance its security measures to protect users. Account suspensions often occur without warning due to flagged activities. Here are common causes for sudden account disappearance:

Changes to Terms and Conditions: As Cash App updates its policies, some users may find their accounts flagged due to new restrictions.
Enhanced Security Checks: Cash App’s security systems have evolved, leading to stricter monitoring of transactions. An account may disappear temporarily for security reviews.
Inactivity or Lack of Use: If an account remains inactive for a prolonged period, Cash App may close it. It’s advisable to use your account periodically to avoid inactivity closures.
Preventing Account Closures: Best Practices for Cash App Users

To minimize the risk of Cash App account closure, users should follow these best practices:

Understand and Follow Terms of Service: Familiarize yourself with Cash App’s terms of service. Avoid prohibited activities, such as gambling, fraud, or the use of multiple accounts.
Monitor Account Activity: Regularly review your account for any unusual transactions. If you notice something suspicious, report it to Cash App support.
Use Verified Accounts and Contact Support for Concerns: Ensure all personal information is accurate, and avoid creating multiple accounts. If issues arise, contact Cash App support promptly.
Avoid Third-Party Links or Scams: Do not click on unsolicited links or respond to unknown messages. Scammers frequently target users by impersonating Cash App.
Frequently Asked Questions

Can I Get My Cash App Account Reopened After Closure?

Reopening a closed Cash App account can be challenging. Typically, Cash App closes accounts permanently for serious violations, but in some cases, a temporary suspension may be lifted upon further review. Contacting Cash App support for clarification is crucial.

What If I Need Help with My Cash App Account Recovery?

For users facing difficulty recovering their accounts, Cash App support can assist. Be prepared to provide any requested documents or verification to regain account access.

What Should I Do If I Suspect My Account Closure Was a Mistake?

If you believe your cash app account was closed by mistake, contact Cash App support immediately. Politely explain the situation, providing evidence if possible, and request a review.

Can I Use Someone Else’s Account if Mine Is Closed?

It is not advisable to use another person’s Cash App account, as this can lead to further complications and potential policy violations. Each user should have a unique, verified account.

By following these guidelines, users can manage Cash App account closures effectively and reduce the risk of future issues. Adhering to Cash App’s policies, understanding common reasons for closure, and knowing how to retrieve funds from a closed account are essential steps for a safe Cash App experience.

Find out the easiest way: How to withdraw money from Robinhood

The last 18 months or so have been tough for investing. A downturn in the stock market combined with a myriad of collapses in the cryptocurrency industry made a lot of people poorer. If you made it through with some of your portfolio intact, then you’re doing better than some, and you couldn’t be blamed for wanting out. We’ll try to help by explaining how to withdraw money from Robinhood.


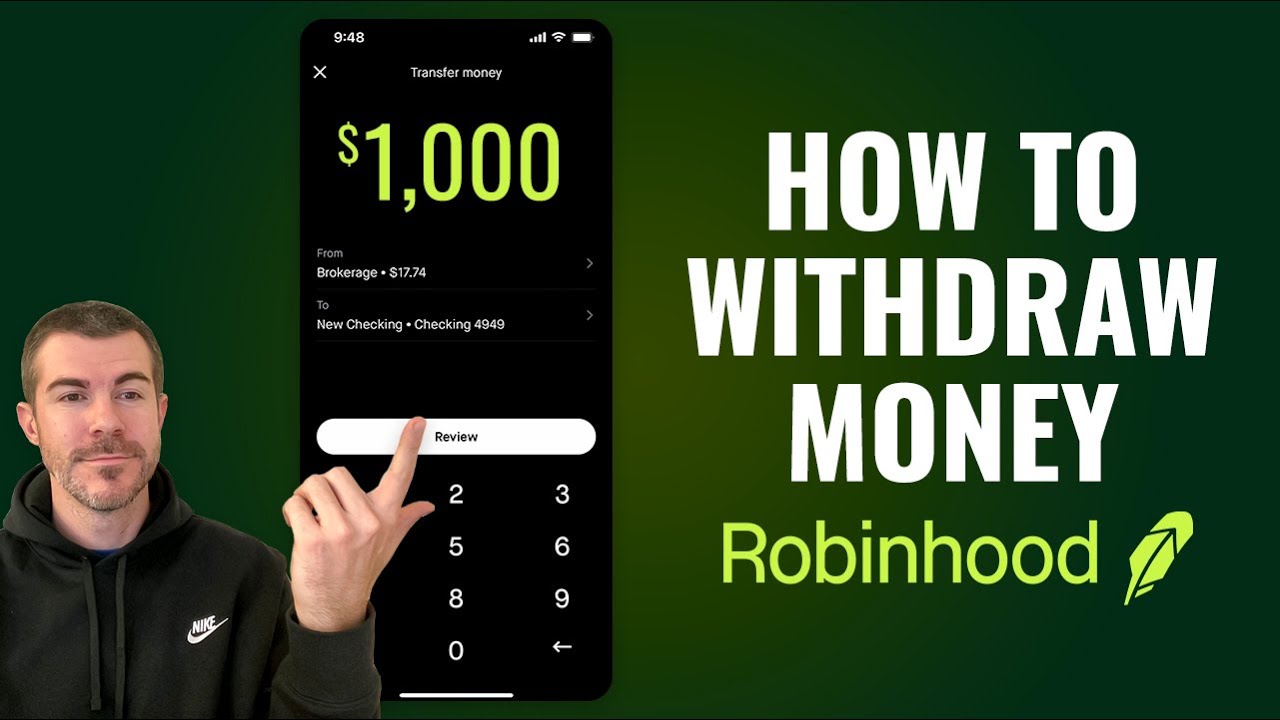
To withdraw your money from Robinhood, go to the Account menu and select Transfer. Specify whether you want to withdraw to a bank account or debit card, then input the amount. Review the withdrawal and press Submit.


Is there a fee to withdraw money from Robinhood?
It depends on the method you want to use to withdraw money from Robinhood. If you’re withdrawing to a bank account, there are no fees. But Robinhood charges a fee of 1.5% to withdraw to a debit card, which is deducted from the requested total when the withdrawal is processed.


Robinhood states that this extra fee is due to the debit card transfer being instant (more on that below), but there are no fees for depositing funds onto the broker using either method. It might be that Robinhood wants to incentivize deposits more than withdrawals, but you can draw your own conclusions.


You should be aware that there are daily withdrawal limits for both methods. For a bank account, you can withdraw up to $50,000 per day plus a further $5,000 in instant transfers. You can also only make up to five withdrawals per day. You can withdraw $5,000 per day to a debit card account.

How to withdraw money from the Robinhood app?
It is quick and easy to withdraw your money from Robinhood, assuming your account is not restricted in some way. You might also have to wait for the money to be available. This could sound obvious, but for example, equities transactions need to settle before the proceeds can be withdrawn and this takes a couple of days.


All being well, you can withdraw money from the Robinhood app using the following steps:-

From the home screen on the app, tap the Account button in the bottom-right corner of the screen.
Tap the Menu button in the top-right corner of the next screen, represented by three horizontal lines.
Select Transfers.
Choose whether to transfer money to your debit card or bank account. If you are withdrawing to a bank account and it qualifies for instant transfers, you can select this preference here (for a 1.5% fee.)
Enter the amount you’d like to withdraw.
Review the withdrawal. If there is a fee associated with the withdrawal, then it will be calculated and shown here.
Confirm by pressing Transfer.
How to withdraw money from the Robinhood website?
The steps to withdraw money from the Robinhood website are almost exactly the same as the app:

Find the Account icon in the top-right corner of the site while you’re logged in.
On the dropdown menu that you see, hit Transfers.
Fill in the details of the withdrawal you want to make on the next screen. This will include inputting the amount and choosing the bank account or debit card you want to withdraw to.
Click Submit to confirm the transfer.
How long does it take to withdraw money from Robinhood?
Withdrawing your money from Robinhood to your bank account can take up to five trading days, which essentially means five business days. If withdrawing to your bank or debit card using the instant transfer option, the process usually takes from 10-30 minutes, though it’s possible that your bank could take longer to reflect the funds in your account.


There are instances in which you aren’t able to withdraw your money within these time frames. For example, you can get free stock from Robinhood when you successfully make a referral, which is known as referral stock. If you sell this referral stock, then you are unable to withdraw the proceeds of the sale for at least 30 days.


You also may face a longer wait if you wish to withdraw money to a bank account that is not the same as the one from which you deposited. If you attempt to do this within 60 days of the deposit, then you will likely have to provide further details and documentation to the support team. As annoying as this could be, it is understandable to stop money from being laundered through a brokerage account.

Why can’t I withdraw my money from Robinhood?
There are a number of reasons why you may not be able to withdraw your money from Robinhood, some of which have already been covered in this article. Here are some possibilities:

You’ve hit your withdrawal limit for the day or reached the maximum number of withdrawals you can make in one day.
The money you are trying to withdraw may be the proceeds of a transaction that requires a wait time. This could be the referral stock mentioned above or money from an equities sale. The latter transaction needs to “settle” before the funds can be withdrawn, which takes two days.
You just deposited the money from the bank. It takes five trading days for this money to become available for transactions and withdrawal.
You have already requested to withdraw the money and the request is being processed.
You are withdrawing to a different bank account within 60 days of the initial deposit, as outlined in the section above.
Your account has been restricted for any reason.
In the last two examples, you may be required to contact Robinhood customer service to resolve the issues. Otherwise, it’s probably just a matter of waiting.


0

Venmo Account Verification Process: A Step-by-Step Guide

If you are new to Venmo or are looking to enjoy its full range of features, understanding the Venmo account verification process is essential. Venmo, owned by PayPal, is a popular mobile payment platform in the U.S., allowing users to send and receive money quickly. However, to ensure security and comply with financial regulations, Venmo requires account verification. This guide will walk you through how to verify your Venmo account, why it’s necessary, and what steps are involved in the verification process.

Why is Venmo Account Verification Important?

Verifying your Venmo account isn’t just a formal procedure; it unlocks additional features, enhances your transaction limits, and strengthens the security of your funds and personal information. This verification process is required by financial regulatory bodies to confirm users’ identities, ensuring the safety of funds and protecting against fraudulent activity.

Once you have a Venmo verified account, you gain access to these benefits:

Increased Transaction Limits: Verified accounts enjoy higher limits on sending, receiving, and transferring funds.
Enhanced Security: Verification helps Venmo confirm that you are the legitimate account holder, protecting your funds from unauthorized access.
Ability to Use Certain Features: Only verified users can transfer funds from Venmo to their bank accounts and vice versa.
Step-by-Step Guide to Verify Venmo Account

If you’re ready to get started with verifying your Venmo account, here’s a detailed walkthrough of the entire process.

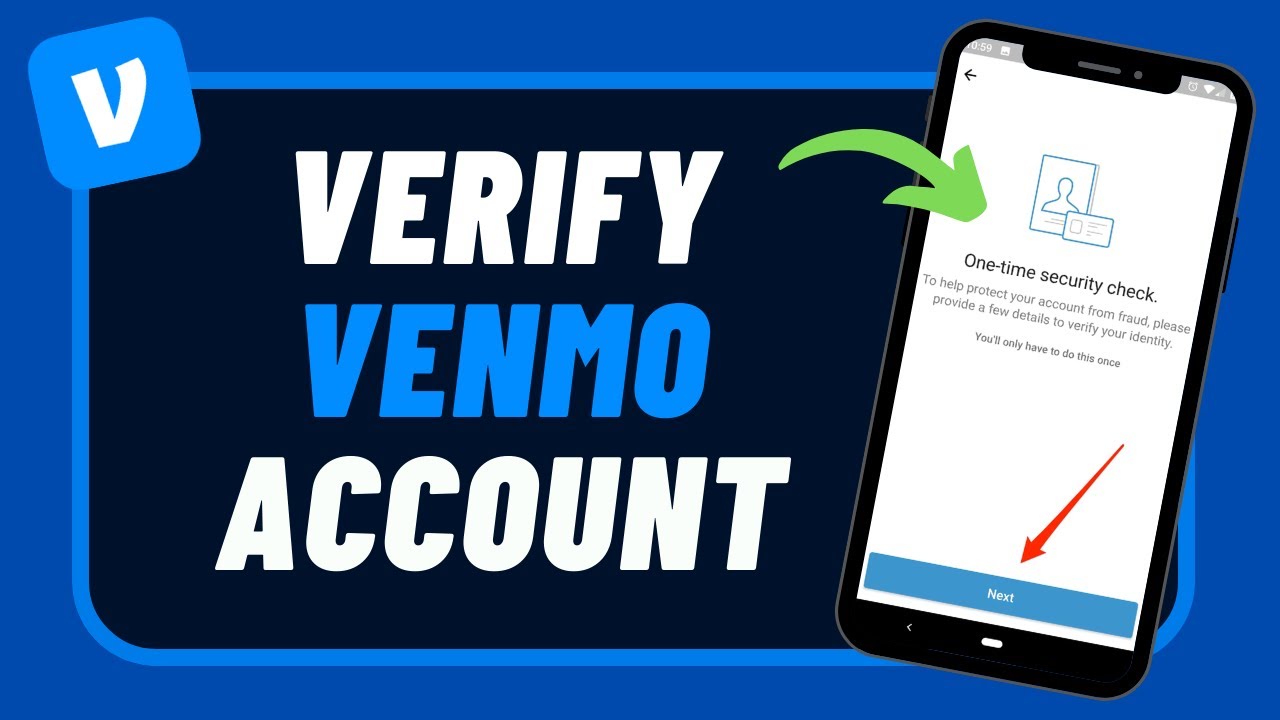
1. Open the Venmo App and Access Settings

To begin, open the Venmo app on your mobile device and log in. Once you’re logged in:

Tap on the menu icon (usually represented by three horizontal lines) in the top left or right corner.
Scroll down to Settings and select it to open a new menu.

2. Choose the ‘Identity Verification’ Option

In the Settings menu, look for the option labeled Identity Verification. This option directs you to the verification process for confirming your identity, which is a key step in completing your Venmo account verification.

3. Provide Personal Information

Venmo will prompt you to enter some basic personal information as part of the process to verify your identity:

Full Name
Date of Birth
Social Security Number (SSN)
Address
This information is essential for Venmo to validate your identity and meet regulatory requirements. Make sure all details match those on your government-issued ID to avoid issues with verification.

4. Upload a Government-Issued ID

To further authenticate your account, Venmo may ask for a government-issued ID, such as a driver’s license or passport. This additional step is designed to protect both users and Venmo from fraudulent activity.

Here’s how to upload your ID:

Take a clear photo of your ID (front and back if needed).
Ensure that the details on the ID are legible and that the entire ID is visible.
Upload the photo directly through the app when prompted.
5. Wait for Venmo to Review Your Information

Once you’ve submitted your information and ID, Venmo will review it. The verification process typically takes between 1-3 business days, depending on the volume of verification requests. You’ll receive a notification from Venmo once your account is verified or if any additional information is required.

How to Complete Venmo Bank Account Verification

In addition to verifying your identity, Venmo may require you to verify your bank account before you can transfer funds. This step ensures that the bank account linked to your Venmo account is genuinely yours.

1. Link Your Bank Account to Venmo

Open the Venmo app and go to Settings.
Select Payment Methods and then choose Add a Bank or Card.
Follow the prompts to enter your bank account details.
2. Verify the Linked Bank Account

Venmo offers two methods for bank account verification:

Instant Verification: Venmo partners with Plaid to instantly verify certain banks. You’ll need to provide your online banking credentials, which will be authenticated through Plaid.
Micro-Deposits Verification: If instant verification isn’t available, Venmo will send two small deposits to your bank account, typically under $1. Check your bank statement for these deposits, which should arrive within 1-3 business days.
Once the deposits arrive:

Return to the Venmo app.
Go to Settings > Payment Methods, select your bank, and enter the exact amounts of the micro-deposits to confirm your account.
Troubleshooting Common Issues in Venmo Account Verification

Sometimes, users encounter issues while verifying their Venmo accounts. Here are some common problems and tips to help resolve them:

Incorrect Information: Ensure your personal information matches what’s on your government-issued ID.
Issues with SSN: If you’re not comfortable providing your full SSN, Venmo may allow you to enter the last four digits. However, this may limit some features.
Photo ID Not Accepted: Ensure your ID photo is clear, well-lit, and meets Venmo’s guidelines.
Bank Account Verification Fails: If micro-deposits don’t appear, double-check your account information and ensure there are no restrictions on small deposits in your bank account.
If issues persist, contact Venmo’s Customer Support for further assistance. They can provide guidance and may help resolve any additional verification issues you encounter.

Conclusion

Completing the Venmo account verification process unlocks the full potential of Venmo, enhancing security and enabling full access to all available features. From identity verification to bank account verification, this guide has detailed each step to ensure you can verify your account seamlessly. By following these instructions, you’ll not only secure your Venmo account but also enjoy increased transaction limits and a better overall experience on the platform.

FAQs

1. Why is Venmo asking for my Social Security Number (SSN)?

Venmo requires an SSN to verify users’ identities as part of regulatory compliance. This step ensures security and protects against fraud.

2. How long does the Venmo verification process take?

The verification process typically takes 1-3 business days. However, it may take longer depending on the volume of requests.

3. Can I use Venmo without verification?

Yes, but unverified accounts have limited functionality. Verifying your account unlocks higher transaction limits and allows you to transfer funds to your bank account.

4. What if my Venmo account verification fails?

If verification fails, check that your information matches your ID. You can also contact Venmo’s support team for help.

5. Is it safe to provide my bank information to Venmo?

Yes, Venmo uses encryption and secure systems to protect users’ bank information.

How Do You Activate Your Cash App Card?

The Cash App card is a convenient debit card linked to your Cash App balance, allowing you to make purchases online and in-store or withdraw cash from ATMs. Before you can use it, you’ll need to activate Cash App card. Whether you’re a new user or just received a replacement card, the steps for activation are straightforward. Let’s walk through the entire process to get your Cash App card up and running.

How to Activate Your Cash App Card

Activating your Cash App card can be done in two ways: scanning the QR code on the card or entering the card details manually. Here’s how to do it step by step.

1. Activate Your Cash App Card with a QR Code

The easiest and quickest way to cash app card activate is by using the QR code included with your card. Follow these instructions:

Open the Cash App on your mobile device.
Tap the Cash Card icon on the home screen.
Select Activate Cash Card.
When prompted, use your phone’s camera to scan the QR code on the card.
Once scanned, your Cash App card should be activated immediately, ready for use.

2. Activate Your Cash App Card Manually

If you don’t have the QR code or cannot scan it, you can activate the card manually:

Open Cash App and go to the Cash Card section.
Select Activate Cash Card.
Choose the option to use your CVV instead of scanning.
Enter the CVV code and expiration date found on your Cash App card.
After entering the details, your card should be activated and linked to your Cash App balance.

Tips for a Smooth Cash App Card Activation

Following these tips can help ensure a smooth activation process:

Ensure App Updates: Make sure you’re using the latest version of Cash App to avoid technical glitches.
Enable Camera Permissions: If you’re using the QR code method, ensure that Cash App has permission to access your device’s camera.
Check Your Internet Connection: A stable internet connection is essential for the activation process to complete successfully.
Using Your Cash App Card after Activation

Once your Cash App card is activated, it’s immediately ready for use. Here’s what you can do with your activated card:

In-Store Purchases: Use it just like any other debit card at stores that accept Visa.
Online Transactions: Pay online by entering your card details at checkout.
ATM Withdrawals: Withdraw cash from ATMs, but remember that Cash App may charge a small fee.
Conclusion

Cash App Activate card is a simple process that can be completed in minutes, whether you use the QR code or manual entry method. Once activated, your card is ready for immediate use, giving you convenient access to your Cash App balance for purchases and withdrawals.

FAQs

1. How can I activate my Cash App card without the app?

Currently, Cash App only supports activation through its mobile app. If you don’t have the app installed, download it from the Apple App Store or Google Play Store, log in, and follow the activation steps provided above.

2. Can I use my Cash App card as soon as I activate it?

Yes, once your Cash App card is activated, you can use it immediately for in-store purchases, online shopping, and ATM withdrawals.

3. Why won’t my Cash App card work?

If your Cash App card isn’t working, check that it’s properly activated and linked to your account. Make sure your Cash App balance is sufficient to cover the transaction. Also, ensure that the merchant accepts Visa, as Cash App cards work on the Visa network.

4. How to set up a Cash App card online?

To get a Cash App card, open the Cash App, go to the Cash Card tab, and follow the prompts to order your card. Once it arrives, follow the activation steps outlined above.

0