How to Send Crypto on Venmo: A Comprehensive Guide

Venmo has become a popular platform for seamless digital payments, including cryptocurrency transactions. Whether you’re sending Bitcoin to another wallet, transferring crypto to a bank account, or facing technical hiccups, this guide walks you through every step of the process.

Understanding Venmo Crypto Transactions

Venmo supports buying, selling, and transferring cryptocurrency, making it a convenient choice for crypto enthusiasts. Users can currently manage popular cryptocurrencies like Bitcoin, Ethereum, Litecoin, and Bitcoin Cash directly within the app.

How to Buy Bitcoin on Venmo

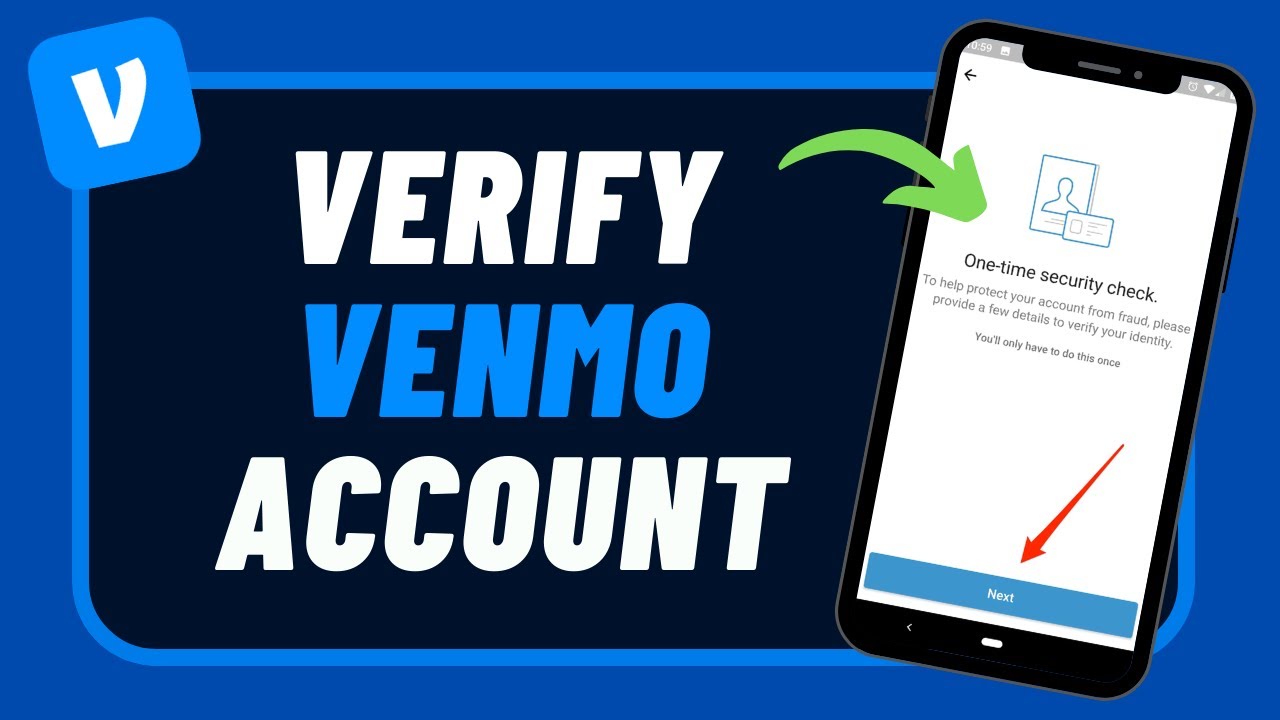
Log into Venmo: Open the Venmo app and ensure your account is fully verified.
Navigate to Crypto Section: Tap the menu icon and select “Crypto.”
Select Your Preferred Cryptocurrency: Choose Bitcoin or other available cryptocurrencies.
Set Purchase Amount: Enter the desired amount in USD to buy.
Confirm Payment Method: Choose a linked bank account or card for payment.
Complete the Transaction: Review and confirm your purchase. Your cryptocurrency balance will reflect in the app.
How to Send Crypto on Venmo to Another Wallet

To send crypto from Venmo to an external wallet:

Access the Crypto Tab: Navigate to the cryptocurrency section in your Venmo app.
Select the Cryptocurrency: Choose Bitcoin, Ethereum, or any supported crypto.
Click on “Transfer”: This option allows you to move funds to an external wallet.
Enter Wallet Address: Input the recipient’s wallet address carefully. Double-check to avoid errors, as crypto transactions are irreversible.
Review Fees and Limits: Venmo will display transaction fees and applicable limits.
Confirm the Transfer: Review the details and confirm. Transfers typically process within minutes but may take longer during network congestion.
How to Transfer Crypto to Cash App

Although Venmo and Cash App operate as separate platforms, you can send cryptocurrency between them with the following steps:

Verify Your Wallets: Ensure both Venmo and Cash App wallets are fully verified.
Initiate a Transfer in Venmo: Send the desired cryptocurrency to your personal wallet (external wallet address).
Transfer to Cash App: From your wallet, transfer the cryptocurrency to your Cash App wallet using the provided address.
How to Send Crypto on Venmo to a Bank Account

Currently, Venmo does not support direct crypto-to-fiat transfers into a bank account. However, you can:

Sell the Cryptocurrency: Go to the crypto tab in the app, select “Sell,” and choose the cryptocurrency.
Withdraw Funds: Once the sale is complete, the equivalent USD will appear in your Venmo balance. Transfer it to your linked bank account.
Can You Send Bitcoin from Venmo to Blockchain Wallets?

Yes, Venmo allows you to send Bitcoin to blockchain wallets. Follow these steps:

Access Crypto in Venmo: Navigate to the crypto section and select Bitcoin.
Choose “Transfer to Wallet”: Input the public address of the blockchain wallet.
Double-Check Details: Errors in wallet addresses can lead to lost funds. Review everything thoroughly.
Complete the Transfer: Confirm the transaction. Processing times vary based on network activity.
Venmo Bitcoin Transfer Limit

Venmo imposes specific limits for cryptocurrency transactions:

Weekly Purchase Limit: $20,000 for cryptocurrencies.
Annual Purchase Limit: $50,000.
Transfer Limit: Each transaction may be subject to limits based on user account status.
Stay updated on Venmo’s terms to ensure compliance with current limits.

What to Do If Venmo Crypto Transfer Is Not Working

Occasionally, users encounter issues when sending crypto on Venmo. Here are common problems and their fixes:

Network Congestion: Delays may occur during peak network activity. Wait for confirmation or retry later.
Incorrect Wallet Address: Double-check the recipient’s address for typos.
Insufficient Balance: Ensure your cryptocurrency balance covers the amount and associated fees.
App Errors: Update your Venmo app to the latest version or restart it to resolve glitches.
If the issue persists, contact Venmo’s customer support for assistance.

Venmo Crypto Processing Time

The time taken for crypto transfers varies. On average:

Internal Transfers: Instantaneous within Venmo.
External Wallet Transfers: Typically completed within 30 minutes to an hour, depending on blockchain congestion.
How to Send Crypto on Venmo Reddit Tips

Reddit users recommend the following best practices:

Always Test Small Amounts: Send a small transfer to ensure wallet compatibility.
Monitor Fees: Crypto transaction fees fluctuate; choose the optimal time for low fees.
Stay Updated: Follow Venmo’s official announcements for policy changes or technical updates.
Final Thoughts

Venmo simplifies cryptocurrency management by integrating buying, selling, and transferring features. Whether you’re sending Bitcoin to another wallet, transferring crypto to a bank account, or troubleshooting transfer issues, following these steps ensures a smooth process.

How to Transfer Money from Venmo to Your Bank: A Complete Guide

Venmo makes it easy to manage money, split bills, and pay friends all within one app. Once you’ve accumulated funds in your Venmo balance, you might want to transfer that money to your bank account. This guide will walk you through how to transfer money to Venmo, move funds from Venmo to your bank, and make other essential payments with Venmo.

How to Transfer Money from Venmo to Your Bank Account

Transferring funds from Venmo to your bank is a simple and quick process. Follow these steps:

Open the Venmo App: Download the Venmo app if you haven’t already, and log into your account.
Go to the “Me” Tab: Tap on your profile picture in the bottom right corner to access your account details.
Tap “Transfer to Bank”: Here, you’ll find options for transferring money from Venmo to your linked bank account.
Choose Transfer Type:
Standard Transfer: This option is free and will typically take 1-3 business days to complete.
Instant Transfer: For a small fee (1.5% of the transfer amount, with a minimum fee of $0.25 and a maximum of $15), you can transfer the money within minutes.
Select the Amount: Enter the amount you wish to transfer and choose your bank account if you have multiple linked.
Review and Confirm: Double-check your transfer details, and then confirm the transaction. Your funds will move to your bank according to the transfer type you selected.
How to Get Money from Venmo to Your Bank

If you want to access funds from your Venmo balance directly in your bank, follow these steps:

Link a Bank Account: Make sure you’ve linked a bank account to Venmo. To add a bank account, go to Settings, select “Payment Methods,” and add your bank details. Venmo will verify your bank with a test deposit and withdrawal, which could take 1-2 days.
Transfer Funds from Venmo Balance: Once your bank is linked and verified, go to your Venmo balance, select “Transfer to Bank,” and follow the prompts.
Choose Standard or Instant Transfer: For immediate access to funds, choose Instant Transfer. Standard transfer is free but requires a short waiting period.

How to Pay Someone on Venmo

Paying someone on Venmo is a fast and secure way to settle debts, split bills, or pay friends directly.

Go to “Pay or Request”: Tap the blue “Pay or Request” button on the home screen.
Find the Recipient: Enter the username, email, or phone number of the person you want to pay. Double-check the name and profile picture to ensure you have the right person.
Enter Payment Amount: Type in the amount you want to pay and add a brief note explaining the payment purpose (e.g., “dinner,” “movie tickets”).
Select Payment Method: Venmo allows you to pay directly from your linked bank account, debit card, or Venmo balance. Remember, using a credit card incurs a 3% fee.
Complete the Payment: Confirm and tap “Pay” to send the funds. The recipient will get the money instantly in their Venmo account.

How to Pay Someone with Venmo Using a QR Code

If you’re paying someone in person, Venmo’s QR code feature is a quick way to make a payment.

Open Venmo and Tap “Scan”: Open the Venmo app, go to the home screen, and tap on the “Scan” icon.
Scan Their QR Code: Ask the recipient to display their QR code. Scan it with your camera to find their Venmo profile.
Enter the Payment Amount: Type the amount, add a note if needed, and tap “Pay” to complete the transaction.
Complete the Payment: Review the details and confirm. Your payment will be instantly sent to the recipient’s Venmo account.
How to Send Venmo Money from Your Bank Account

If you don’t have a balance in your Venmo account, you can still send money using a linked bank account. Here’s how:

Go to “Pay or Request”: Tap on the “Pay or Request” button and enter the recipient’s details.
Select Your Bank Account: Before finalizing, choose your linked bank account as the funding source. Venmo will pull funds directly from your bank, so you don’t need to maintain a Venmo balance.
Confirm and Send Money: Double-check the details, tap “Pay,” and Venmo will process the transaction. Your bank account will be debited, and the recipient’s Venmo account will be credited immediately.

How Do I Pay Someone on Venmo Without Linking a Bank Account?

If you prefer not to link a bank account, you can still pay someone on Venmo using a debit or credit card.

Add a Card: In the app, go to “Payment Methods,” then add your debit or credit card details.
Go to “Pay or Request”: Tap “Pay or Request,” find the recipient, enter the amount, and choose your card as the funding source.
Review and Confirm: Complete the payment by tapping “Pay.” Remember, using a credit card will incur a 3% fee.
Conclusion

Venmo provides users with multiple ways to manage money, whether you’re transferring funds to your bank, paying someone, or using a card for quick transactions. With the flexibility to choose between instant and standard transfers, you can control both the cost and speed of moving money. By following these steps, you can master how to transfer money from Venmo to your bank, pay friends, and keep your transactions as seamless as possible.

Frequently Asked Questions (FAQs)

1. Is it free to transfer money from Venmo to my bank account?

Yes, standard bank transfers are free, but they take 1-3 business days. Instant transfers are available for a 1.5% fee.

2. Can I transfer money from Venmo to my bank without a Venmo balance?

Yes, Venmo allows you to send payments directly from a linked bank account or card, so you don’t need a Venmo balance to make payments.

3. How fast are instant transfers from Venmo?

Instant transfers typically take 30 minutes or less to complete, depending on your bank.

4. Is there a limit to how much I can transfer from Venmo to my bank?

For verified accounts, the Venmo weekly transfer limit is $19,999.99. Standard users have a lower limit, so consider verifying your account for larger transfers.

5. Can I use Venmo internationally?

No, Venmo is only available for users within the United States and cannot be used for international payments.

How to Send Money through Venmo: A Step-by-Step Guide

Venmo is one of the most popular mobile payment platforms in the U.S., making it easy to send and receive money with just a few taps on your phone. Whether you’re splitting a bill, paying back a friend, or sending a gift, Venmo simplifies transactions for anyone with a smartphone. This guide will walk you through the essentials of Venmo money transfer, from setting up your account to sending and receiving money.

How to Send Money on Venmo

Venmo’s user-friendly interface makes it simple to send money, whether you’re paying a friend or reimbursing a family member. Follow these steps to start:

Set Up Your Venmo Account: Download the Venmo app from the App Store or Google Play Store. Open the app, then sign up using your email, Facebook account, or mobile number. Once your account is created, you’ll be prompted to add a payment method.
Add a Payment Method: You can link a bank account, debit card, or credit card. Venmo recommends using a debit card or bank account to avoid fees when sending money. Credit card transactions have a 3% fee, so keep this in mind.
Find the Recipient: Tap the “Pay or Request” button on the Venmo home screen, and search for the recipient by their Venmo username, phone number, or email. Ensure you’re sending money to the correct person by verifying their profile picture or username.
Enter the Amount and Add a Note: Type the amount you want to send and add a note to personalize the transaction. Notes can be helpful for your own records or to explain the purpose of the transfer.
Select Your Privacy Setting: Venmo allows you to choose whether a transaction is public, visible to friends, or private. Adjusting these settings can help you maintain privacy as needed.
Complete the Payment: Review the transaction details, then hit “Pay.” Venmo will complete the Venmo send money process, and the funds will be instantly available in the recipient’s Venmo balance.
How to Receive Money on Venmo

Receiving money on Venmo is just as straightforward. Here’s how:

Share Your Username or QR Code: Give your Venmo username to the person sending you money, or show them your unique QR code in the Venmo app, which they can scan to find you quickly.
Accept the Payment: When someone sends you money, it will appear immediately in your Venmo balance. You can leave it there to make future payments or transfer it to your bank.
Transfer to Bank (Optional): To move funds from your Venmo balance to your bank account, tap “Transfer to Bank” in the app. You’ll have the option to choose between standard (1-3 business days, free) or instant transfers (within 30 minutes, with a small fee).
How to Send Money via Venmo Without Adding Funds First

You don’t need to pre-load funds into your Venmo balance to make payments. Venmo allows you to send money directly from your linked bank account or card. Here’s how it works:

Go to the Pay Screen: Tap “Pay or Request” in the Venmo app.
Choose Your Funding Source: Before completing the transaction, confirm that your payment method is either a linked bank account, debit card, or credit card.
Send Money Without Adding to Balance: Venmo will debit the amount directly from your selected funding source and credit the recipient’s Venmo balance.
This approach is ideal if you prefer not to maintain a balance within the app or if you’re sending a one-time payment.

How to Transfer Money from Venmo to a Bank Account

Once you’ve received money in your Venmo balance, you may want to transfer it to your bank account:

Tap on “Transfer to Bank”: Open the Venmo app and tap “☰” to access your settings, then select “Transfer to Bank.”
Choose the Transfer Speed: Select between the standard (free) option, which takes 1-3 business days, or the instant transfer, which typically costs 1.5% of the transfer amount (minimum fee of $0.25, maximum fee of $15).
Confirm and Complete the Transfer: Enter the amount and confirm the transfer. The funds will appear in your bank account according to your chosen transfer speed.
How to Send Money on Venmo Internationally

Currently, Venmo is only available in the United States. Users cannot send money to individuals in other countries. For international money transfers, consider alternatives like PayPal, Wise, or Western Union.

Venmo Transaction Limits

Venmo has weekly transaction limits for its users:

Unverified Accounts: Up to $299.99 per week for person-to-person payments.
Verified Accounts: Up to $4,999.99 per week for payments, purchases, and transfers.
To increase your limit, verify your account by providing your legal name, date of birth, social security number, and address.

Venmo Instant Transfer Fees

Venmo charges an instant transfer fee if you want to send money to your bank account in less than 30 minutes. The fee is currently 1.5% of the transaction amount, with a minimum charge of $0.25 and a maximum of $15. Regular 1-3 business day transfers are free.

Conclusion

Venmo is a versatile and user-friendly app for transferring funds, whether you’re paying someone back, receiving money, or managing a balance. The app’s convenience, combined with its connection to bank accounts and cards, makes it an ideal choice for everyday payments. By following the steps above, you can master how to send money on Venmo and make the most of this popular payment platform.

Frequently Asked Questions (FAQs)

1. Is Venmo free to use?

Yes, Venmo is free for most transactions, including sending and receiving money. However, there’s a 3% fee for payments funded by a credit card and a 1.5% fee for instant transfers to your bank account.

2. Can I send money on Venmo without a linked bank account?

Yes, you can use a debit or credit card instead of a bank account. However, keep in mind that credit card transactions have a 3% fee.

3. How quickly do Venmo transactions process?

Person-to-person payments process instantly. Bank transfers can take 1-3 business days, but instant transfers to a debit card are available for a fee.

4. Can I send money internationally through Venmo?

No, Venmo is currently only available for U.S. users and doesn’t support international transactions.

5. What is the maximum amount I can send on Venmo?

Unverified accounts have a limit of $299.99 per week for person-to-person payments, while verified accounts can send up to $4,999.99 per week.

0

How to Send Money on Venmo: A Complete Guide

Venmo is one of the most popular platforms for sending and receiving money quickly, offering a seamless way to handle transactions with friends, family, or even businesses. Whether you’re a first-time user or looking for more advanced ways to use the app, this guide will walk you through the essential functions of Venmo, including sending money, receiving payments, transferring funds, and connecting with other financial apps. Here’s everything you need to know about Venmo money transfers.

How to Send Money on Venmo

Download and Set Up the App: First, download the Venmo app from the App Store (for iPhone) or Google Play Store (for Android) and create an account.
Link Your Bank Account or Card: Once signed in, link a bank account, credit card, or debit card to your Venmo account. This step is essential as it enables you to fund your transactions.
Find the Recipient: Tap the “Pay or Request” button, then search for the recipient by their Venmo username, phone number, or email.
Enter the Amount and Message: Enter the amount you wish to send and add a short note or message if needed.
Complete the Payment: Hit “Pay,” confirm the details, and finalize the transaction.
How to Send Money from Venmo to Bank Account

Go to the Transfer Option: Open Venmo and tap on the “☰” icon, then go to the “Transfer to Bank” option.
Choose Transfer Method: Select “Instant” for immediate transfers, which incur a small Venmo instant transfer fee, or “1-3 Business Days” for a free transfer.
Select Your Bank Account: If you’ve already linked a bank account, select it, enter the amount, and confirm. Venmo will then transfer your funds to your bank account.
How to Pay Someone on Venmo Without an Account

Venmo currently requires both the sender and receiver to have an account. However, you can invite someone to join Venmo via their email or phone number. Once they sign up, you can send them money directly through the app.

How to Transfer Money from Bank to Venmo Fast

Use Instant Transfer: To quickly add funds to your Venmo balance, select the “Instant Transfer” option.
Link and Verify Your Bank Account: Ensure your bank account is verified on Venmo, which will allow quicker and more secure transfers.
Use Your Debit Card: Linking a debit card can expedite transfers, often appearing in your Venmo balance within minutes.

How to Use Venmo to Receive Money

Request Payment: Tap “Pay or Request,” enter the username of the person you want to receive money from, input the amount, and tap “Request.”
Share Your Username: You can also send your Venmo username to others to make it easier for them to locate you.
Accept the Funds: Once they send the payment, it will appear in your Venmo account balance immediately. You can either use these funds within Venmo or transfer them to your bank.

How to Transfer Money from Venmo to Cash App

Venmo and Cash App don’t directly integrate. However, you can transfer funds by linking a common bank account to both apps.

Transfer to Bank First: Transfer the funds from Venmo to your linked bank account.
Transfer from Bank to Cash App: Once the funds are in your bank account, open Cash App, tap “Add Cash,” and complete the transfer.

How to Transfer Money from Venmo to Debit Card

Venmo allows you to transfer funds directly to your debit card via the “Instant Transfer” option.

Choose the Transfer Amount: Open Venmo, go to “Transfer to Bank,” and select your debit card as the destination.
Select “Instant” Transfer: This method usually incurs a small fee but transfers the funds within 30 minutes.
Confirm the Details: Once confirmed, Venmo will initiate the transfer to your debit card.
How Much Can You Send on Venmo for Free?

Venmo allows free transactions between users, but there are limits depending on your account status:

Unverified Accounts: Up to $299.99 per week.
Verified Accounts: Up to $4,999.99 per week.
Note that transactions funded by a credit card are subject to a 3% fee, even if within the sending limits.

How to Transfer Money from Venmo to PayPal

There isn’t a direct transfer option from Venmo to PayPal. However, a workaround involves linking the same bank account to both platforms.

Transfer from Venmo to Bank: Transfer your funds from Venmo to your bank.
Transfer from Bank to PayPal: Open PayPal, go to “Add Funds,” select your linked bank account, and move the funds over.

How to Transfer Money from Cash App to Venmo

Like with PayPal, Cash App and Venmo do not integrate directly. Here’s how you can transfer funds:

Send to Bank Account First: Move your Cash App balance to your linked bank account.
Transfer from Bank to Venmo: Open Venmo and add funds from your bank to your Venmo balance.
Venmo offers an array of options for sending, receiving, and transferring funds, whether between friends, to a bank account, or across other financial apps. By understanding the various processes and fees associated with these transfers, you can make the most out of Venmo’s features.

Venmo Email Verification – Complete Guide and Troubleshooting Tips

Venmo is a popular peer-to-peer payment app, allowing users to send and receive money easily. As part of its account security measures, Venmo requires email verification during the setup process. This guide will explain Venmo email verification steps, troubleshoot common issues, and provide tips on how to verify your Venmo bank account and overall account.

Venmo Email Verification Process

Verifying your email on Venmo is essential to ensure that your account is secure and to allow full access to Venmo’s features. Here’s how to verify your email on Venmo:

Check Your Email for the Verification Link: After signing up, Venmo sends a verification email to the address you used during registration. Open your email inbox and look for an email from Venmo.
Click the Verification Link: Open the email and click on the link provided to verify your email. This action confirms your email address with Venmo, completing the process.
Confirm in Venmo App: Once you click the link, open the Venmo app to ensure your email status shows as “verified” in your account settings.
If you don’t see the email, make sure to check your spam or junk folder, as verification emails sometimes end up there.

Venmo Email Verification Not Working – Common Solutions

If your Venmo email verification isn’t working, try these troubleshooting steps:

Check Email Spam/Junk Folder: Sometimes, verification emails are filtered out. Search for Venmo’s email in both the spam and promotions tabs.
Resend the Verification Email: In the Venmo app, navigate to Settings > Account > Email Address and tap the option to resend the verification email.
Verify You Entered the Correct Email: If you mistyped your email during registration, you may need to correct it in your account settings or contact Venmo support.
Clear Cache and Cookies: If you’re accessing Venmo through a web browser, clear your browser’s cache and cookies before trying again.
Contact Venmo Support: If verification issues persist, reach out to Venmo support to assist with email verification.

Venmo Email Verification Phone Number

Although Venmo does not have a dedicated support phone number for email verification, users can reach Venmo support through the following channels:

Venmo Help Center: Access troubleshooting articles on Venmo’s website, which may help resolve your verification issue.
In-App Support: Open the Venmo app, go to Settings > Help > Contact Us to chat with Venmo’s support team.
For more detailed assistance, contacting Venmo support directly is the best way to resolve ongoing verification issues.

Venmo Email Verification Number

Venmo’s verification process may also require entering a verification code (often called the “verification number”) sent to your email or phone. Here’s how to use this feature if needed:

Open Verification Email/Text: Venmo sends a six-digit code for additional verification. Open the email or text message and find the code.
Enter the Code in the Venmo App: Go to the app and enter the code when prompted to verify your email or phone number.
This added layer of security ensures that only the account owner can access Venmo’s services.

How to Change Venmo Email Without Logging In

If you’re unable to log into Venmo and need to change your email, you’ll need to contact Venmo support for assistance. Here’s how:

Visit Venmo’s Help Center: Go to Venmo’s website and navigate to the Help Center.
Select “Contact Us” Option: Choose the option to reach out to support via email or chat.
Verify Your Identity: Venmo support will likely require information to verify your identity, such as your name, phone number, and last known email address on the account.
Request Email Change: Explain that you need to update your email address, and support will assist you in making the change.
Since Venmo does not provide a direct option to change your email without logging in, working with Venmo support is the most effective way to handle this.

Phone Number for Venmo Verification

Venmo uses your phone number for verification to enhance security. Here’s how to set up and verify your phone number on Venmo:

Add Your Phone Number: In the Venmo app, go to Settings > Account > Phone Number and add your number.
Receive a Verification Code: Venmo will send a six-digit code via SMS to your phone number.
Enter the Code: Input the code in the app to verify your number. Once completed, your phone number will be linked to your Venmo account.
This phone verification helps Venmo authenticate account access and enhances overall account security.

How to Verify Your Bank Account on Venmo

Verifying your bank account on Venmo is essential for seamless transfers and withdrawals. Here’s a quick guide:

Link Your Bank Account: Go to Settings > Payment Methods > Add a Bank or Card and select your bank.
Choose Verification Method: Venmo offers instant verification via your bank’s login credentials or manual verification if you prefer.
Instant Verification: Use your bank credentials to log in through Venmo’s secure portal. If successful, the verification will be immediate.
Manual Verification: Venmo will send two small deposits (each under $1) to your bank account within 1-3 days. Once received, enter the amounts in the Venmo app to complete verification.
Bank verification allows you to transfer funds seamlessly between Venmo and your bank account.

How to Verify Your Venmo Account

Verifying your Venmo account involves confirming your identity to access full features, such as higher transfer limits. Here’s how to complete account verification:

Go to Identity Verification: Open the Venmo app, go to Settings > Identity Verification.
Provide Personal Information: Venmo will ask for information such as your legal name, address, date of birth, and Social Security Number (SSN).
Submit Documentation if Required: In some cases, Venmo may require additional documentation for verification. Follow the prompts to upload any requested documents.
Once verified, your account will have higher transfer and withdrawal limits and provide full access to Venmo’s services.

Conclusion

Completing email verification on Venmo is crucial for account security and access to the app’s features. For those facing issues, troubleshooting steps like checking spam folders, resending the verification email, and contacting support can resolve most issues. Verifying your phone number, bank account, and overall account further secures your Venmo profile and ensures smooth transactions.

Venmo Bank Verification: Everything You Need to Know

Venmo has become one of the most popular ways to send and receive money instantly, but to use its full range of features, users need to complete the Venmo bank verification process. This step is essential for adding funds to your Venmo account and transferring money to your bank. If you’re new to Venmo or need help understanding its verification procedures, this article covers all aspects of Venmo’s bank, email, and identity verification.

Understanding Venmo Bank Verification

Venmo requires bank verification to ensure the safety of users’ funds and to comply with regulatory standards. When you link a bank account, you can choose from two primary verification methods: instant verification through Plaid or micro-deposits verification. These methods allow Venmo to confirm that the bank account belongs to you.

Instant Verification with Plaid

Plaid is a secure service that allows Venmo to verify bank accounts instantly by connecting with your online banking credentials. Once you enter your bank’s login information through Plaid, Venmo can immediately verify the account, making this a quick and efficient option for most users.

Micro-Deposits Verification

If instant verification is not available for your bank, Venmo also offers micro-deposits verification. In this method, Venmo sends two small deposits (typically less than $1 each) to your bank account. Once you see these amounts in your bank statement, you’ll need to enter them in the Venmo app to confirm your account.

Venmo ID Verification Process

To meet regulatory requirements, Venmo may also request ID verification from users. This additional step is usually necessary for users who want to access certain features, such as increasing their transfer limits or completing larger transactions.

Here’s how to complete Venmo ID verification:

Go to the Identity Verification Section: In the app, go to Settings > Identity Verification.
Provide Personal Details: Venmo will ask for information, including your full name, date of birth, address, and Social Security number.
Upload Government-Issued ID: You may also be asked to upload a photo of a government-issued ID, like a driver’s license or passport.
Completing this process helps Venmo confirm your identity and ensures compliance with financial regulations, enhancing the security of your account.

Venmo Email Verification

After creating an account, Venmo requires users to complete email verification to ensure they have access to the registered email address. This step is straightforward:

Venmo sends an email with a verification link to the address you provided during registration.
Simply open the email and click the link to verify your email address.
Completing this step is necessary to secure your Venmo account and to receive notifications related to transactions and account activity.

How to Verify Bank Account in Venmo

If you’re ready to link your bank account to Venmo, here’s a step-by-step guide to the Venmo bank account verification process.

Step 1: Link Your Bank Account in Venmo

Open the Venmo app and go to Settings.
Select Payment Methods and tap on Add a Bank or Card.
Choose Bank Account and follow the prompts to enter your account details.
Step 2: Choose a Verification Method

Venmo will prompt you to select a verification method, depending on your bank’s compatibility with Plaid.

For Instant Verification: Enter your bank login credentials to verify your account immediately.
For Micro-Deposits Verification: Venmo will send two small deposits to your account. Once these appear in your bank statement, return to the Venmo app, enter the deposit amounts, and complete the verification.
Step 3: Confirm Bank Verification

Once you’ve completed either verification method, Venmo will confirm that your bank account is verified. You’re now ready to transfer funds from Venmo to your bank or add money from your bank to Venmo.

Troubleshooting Venmo Bank Verification Issues

Occasionally, users may encounter issues during Venmo verify bank account processes. Here are some common problems and solutions:

Bank Not Compatible with Plaid

If your bank isn’t compatible with Plaid’s instant verification, try the micro-deposits method. This alternative works for most banks, though it may take a few business days to complete.

Incorrect Account Information

Double-check that you’ve entered the correct account and routing numbers. Even a small mistake can prevent Venmo from verifying your account successfully.

Network or Device Issues

Sometimes, switching to a different device or a secure Wi-Fi network can resolve verification problems. Ensure that your Venmo app is up-to-date and try again.

Identity Verification Not Completed

If you’re unable to verify your bank, Venmo may require you to complete ID verification first. Make sure you have submitted all required identity documents.

Conclusion

Completing the Venmo bank verification process is essential for using Venmo’s features, such as transferring funds to and from your bank account. Whether you choose instant verification with Plaid or the micro-deposits method, verifying your bank ensures account security and regulatory compliance. Additionally, Venmo may require ID verification and email verification to fully activate your account and provide access to advanced features. By following the steps outlined in this guide, you can complete these verification procedures with ease and begin using Venmo with confidence.

FAQs

How long does it take for Venmo to verify a bank?

For instant verification, the process is immediate. For micro-deposits, it typically takes 1-3 business days.

Why is Venmo asking me to verify my bank?

Bank verification is required to ensure security, prevent fraud, and comply with financial regulations.

Does Venmo use Plaid to verify bank info?

Yes, Venmo partners with Plaid for instant bank verification, enabling secure and immediate access to most major U.S. banks.

What does Venmo need for verification?

Venmo may require your bank account information, email confirmation, and in some cases, personal identification details like a Social Security number and government-issued ID.


Venmo Verify Bank Not Working: Troubleshooting and Solutions

When using Venmo, linking and verifying your bank account is crucial for sending, receiving, and transferring funds. However, users occasionally encounter issues with the Venmo bank account verification process. This guide will address common issues and provide solutions to help you verify your Venmo bank account smoothly, even when problems arise.

Understanding Venmo Bank Account Verification

Verifying your bank account on Venmo involves linking your bank to your Venmo account and confirming it through one of two methods: Instant Verification or Micro-Deposits Verification. With instant verification, Venmo uses Plaid to securely access your bank’s credentials, while micro-deposits verification requires waiting for Venmo to send small test deposits to your bank account.

Unfortunately, some users encounter issues where they are unable to complete this process. Venmo verify bank not working issues can arise from several causes, including technical errors, compatibility issues, and security restrictions. Here’s a look at the most common problems and how to solve them.

Common Reasons for Verification Issues on Venmo

1. Incompatible Bank Accounts

Not all banks support instant verification with Venmo. Smaller credit unions, certain regional banks, and some online-only banks may not be compatible with the instant verification method Venmo uses through Plaid. In these cases, you may need to try the micro-deposits verification method instead.

Solution: If instant verification fails, opt for the micro-deposits verification method. This method may take a few days but can successfully verify most bank accounts that aren’t compatible with Plaid.

2. Bank Connectivity Issues

Sometimes, verifying your Venmo bank account fails due to connectivity issues between Venmo’s servers and your bank. This problem can be temporary or may result from security features within your bank’s online system that block external access.

Solution: Wait a few hours and try the verification process again. If the problem persists, contact your bank’s support team to check if they are experiencing issues with Venmo or if there are any restrictions in place.

3. Incorrect Bank Account Information

Entering incorrect account details is a common issue that leads to Venmo verification problems. If even one digit of your bank account or routing number is wrong, the verification will fail.

Solution: Double-check your bank account and routing numbers. Ensure they match exactly with the information provided by your bank, as errors here will prevent successful verification.

4. Bank Restrictions on Venmo Transactions

Some banks have policies or restrictions that limit transactions or block third-party platforms like Venmo from accessing accounts. In these cases, verifying a Venmo bank account may be difficult or even impossible without contacting the bank.

Solution: Contact your bank and ask if they have any restrictions related to Venmo transactions. They may be able to lift temporary restrictions or guide you through security settings needed to allow Venmo access.

5. Issues with Venmo Identity Verification

For security reasons, Venmo often requires users to complete an identity verification process before allowing bank verification. If you haven’t verified your identity with Venmo, this may block the verification of your bank account.

Solution: Make sure to complete Venmo’s identity verification by providing the necessary personal details, such as your name, address, date of birth, and Social Security number (SSN). This may help resolve the Venmo verify bank not working issue.

How to Troubleshoot Venmo Verify Bank Not Working Issues

If you are still having trouble verifying your Venmo bank account after addressing the common issues above, here are a few additional troubleshooting steps to consider.

1. Try Using a Different Device or Network

Sometimes, issues with verifying a bank account on Venmo are due to network or device compatibility. Switching to a different device (such as a tablet or desktop computer) or using a different internet connection can sometimes resolve these problems.

2. Clear App Cache or Reinstall the Venmo App

App errors may arise from outdated or corrupted files within the Venmo app, which can disrupt the verification process.

On iOS: Go to Settings > General > iPhone Storage > Venmo and clear the cache.
On Android: Go to Settings > Apps > Venmo > Storage > Clear Cache.
If clearing the cache doesn’t work, consider uninstalling and reinstalling the app to ensure you have the latest version.

3. Update Your Venmo App

Ensure you’re using the latest version of the Venmo app. Outdated versions can cause compatibility issues that impact features like bank verification.

4. Contact Venmo Support

If none of the above solutions resolve the issue, consider reaching out to Venmo’s customer support team. They can check your account details and provide guidance on specific verification problems you may be experiencing.

Conclusion

Encountering issues with Venmo verify bank not working can be frustrating, but understanding the reasons behind these problems and taking the appropriate steps can often resolve them. From checking your bank’s compatibility to completing identity verification and clearing your app cache, there are many ways to troubleshoot this issue. Following these steps should allow you to verify your Venmo bank account successfully and fully enjoy Venmo’s convenient payment features.

FAQs

Why is Venmo not letting me verify my bank account?

Venmo may not let you verify your bank account if the bank is incompatible, if there’s a connectivity issue, or if your identity verification is incomplete. Double-check all details, try an alternative verification method, or contact Venmo support for assistance.

Why isn’t my bank working on Venmo?

Some banks are incompatible with Venmo’s instant verification, especially smaller credit unions and certain online-only banks. In these cases, use micro-deposits verification as an alternative.

Why does my bank keep declining Venmo?

Your bank may have security settings or restrictions that block Venmo transactions. Contact your bank to ensure there are no restrictions preventing you from linking your bank to Venmo.

What banks work best with Venmo?

Venmo works well with most major U.S. banks, including Chase, Bank of America, Wells Fargo, and Citibank. Smaller banks and certain online banks may have compatibility issues with instant verification but can usually be verified through micro-deposits.

Venmo Account Verification Process: A Step-by-Step Guide

If you are new to Venmo or are looking to enjoy its full range of features, understanding the Venmo account verification process is essential. Venmo, owned by PayPal, is a popular mobile payment platform in the U.S., allowing users to send and receive money quickly. However, to ensure security and comply with financial regulations, Venmo requires account verification. This guide will walk you through how to verify your Venmo account, why it’s necessary, and what steps are involved in the verification process.

Why is Venmo Account Verification Important?

Verifying your Venmo account isn’t just a formal procedure; it unlocks additional features, enhances your transaction limits, and strengthens the security of your funds and personal information. This verification process is required by financial regulatory bodies to confirm users’ identities, ensuring the safety of funds and protecting against fraudulent activity.

Once you have a Venmo verified account, you gain access to these benefits:

Increased Transaction Limits: Verified accounts enjoy higher limits on sending, receiving, and transferring funds.
Enhanced Security: Verification helps Venmo confirm that you are the legitimate account holder, protecting your funds from unauthorized access.
Ability to Use Certain Features: Only verified users can transfer funds from Venmo to their bank accounts and vice versa.
Step-by-Step Guide to Verify Venmo Account

If you’re ready to get started with verifying your Venmo account, here’s a detailed walkthrough of the entire process.

1. Open the Venmo App and Access Settings

To begin, open the Venmo app on your mobile device and log in. Once you’re logged in:

Tap on the menu icon (usually represented by three horizontal lines) in the top left or right corner.
Scroll down to Settings and select it to open a new menu.

2. Choose the ‘Identity Verification’ Option

In the Settings menu, look for the option labeled Identity Verification. This option directs you to the verification process for confirming your identity, which is a key step in completing your Venmo account verification.

3. Provide Personal Information

Venmo will prompt you to enter some basic personal information as part of the process to verify your identity:

Full Name
Date of Birth
Social Security Number (SSN)
Address
This information is essential for Venmo to validate your identity and meet regulatory requirements. Make sure all details match those on your government-issued ID to avoid issues with verification.

4. Upload a Government-Issued ID

To further authenticate your account, Venmo may ask for a government-issued ID, such as a driver’s license or passport. This additional step is designed to protect both users and Venmo from fraudulent activity.

Here’s how to upload your ID:

Take a clear photo of your ID (front and back if needed).
Ensure that the details on the ID are legible and that the entire ID is visible.
Upload the photo directly through the app when prompted.
5. Wait for Venmo to Review Your Information

Once you’ve submitted your information and ID, Venmo will review it. The verification process typically takes between 1-3 business days, depending on the volume of verification requests. You’ll receive a notification from Venmo once your account is verified or if any additional information is required.

How to Complete Venmo Bank Account Verification

In addition to verifying your identity, Venmo may require you to verify your bank account before you can transfer funds. This step ensures that the bank account linked to your Venmo account is genuinely yours.

1. Link Your Bank Account to Venmo

Open the Venmo app and go to Settings.
Select Payment Methods and then choose Add a Bank or Card.
Follow the prompts to enter your bank account details.
2. Verify the Linked Bank Account

Venmo offers two methods for bank account verification:

Instant Verification: Venmo partners with Plaid to instantly verify certain banks. You’ll need to provide your online banking credentials, which will be authenticated through Plaid.
Micro-Deposits Verification: If instant verification isn’t available, Venmo will send two small deposits to your bank account, typically under $1. Check your bank statement for these deposits, which should arrive within 1-3 business days.
Once the deposits arrive:

Return to the Venmo app.
Go to Settings > Payment Methods, select your bank, and enter the exact amounts of the micro-deposits to confirm your account.
Troubleshooting Common Issues in Venmo Account Verification

Sometimes, users encounter issues while verifying their Venmo accounts. Here are some common problems and tips to help resolve them:

Incorrect Information: Ensure your personal information matches what’s on your government-issued ID.
Issues with SSN: If you’re not comfortable providing your full SSN, Venmo may allow you to enter the last four digits. However, this may limit some features.
Photo ID Not Accepted: Ensure your ID photo is clear, well-lit, and meets Venmo’s guidelines.
Bank Account Verification Fails: If micro-deposits don’t appear, double-check your account information and ensure there are no restrictions on small deposits in your bank account.
If issues persist, contact Venmo’s Customer Support for further assistance. They can provide guidance and may help resolve any additional verification issues you encounter.

Conclusion

Completing the Venmo account verification process unlocks the full potential of Venmo, enhancing security and enabling full access to all available features. From identity verification to bank account verification, this guide has detailed each step to ensure you can verify your account seamlessly. By following these instructions, you’ll not only secure your Venmo account but also enjoy increased transaction limits and a better overall experience on the platform.

FAQs

1. Why is Venmo asking for my Social Security Number (SSN)?

Venmo requires an SSN to verify users’ identities as part of regulatory compliance. This step ensures security and protects against fraud.

2. How long does the Venmo verification process take?

The verification process typically takes 1-3 business days. However, it may take longer depending on the volume of requests.

3. Can I use Venmo without verification?

Yes, but unverified accounts have limited functionality. Verifying your account unlocks higher transaction limits and allows you to transfer funds to your bank account.

4. What if my Venmo account verification fails?

If verification fails, check that your information matches your ID. You can also contact Venmo’s support team for help.

5. Is it safe to provide my bank information to Venmo?

Yes, Venmo uses encryption and secure systems to protect users’ bank information.

Understanding the Venmo Weekly Transfer Limit: How Much Can You Send and Receive?

Venmo has become an essential tool for millions of people who enjoy the convenience of quick and secure digital transactions. From splitting bills with friends to paying rent, Venmo provides a seamless way to send and receive money. However, there are limitations to how much users can transfer on a weekly basis, and understanding these restrictions is crucial to using Venmo effectively.

In this article, we’ll explore everything you need to know about Venmo weekly transfer limits—from person-to-person transfers to bank account limits, daily restrictions, and potential ways to increase your transfer capabilities. We’ll also address frequently asked questions to help you make the most of your Venmo experience.

What is the Venmo Weekly Transfer Limit?

Venmo applies transfer limits to ensure security, control fraud, and comply with regulatory requirements. If you’ve ever wondered how much you can send on Venmo for free or what the restrictions are, you’re not alone. Here’s a breakdown of Venmo’s weekly transfer limits:

1. Venmo Weekly Transfer Limit to Bank Account

When it comes to transferring money from Venmo to a bank account, the Venmo weekly transfer limit to bank account applies. Verified users can transfer up to $19,999.99 to their bank accounts per week, with a single transfer limit of $5,000. For those using Venmo’s Instant Transfer feature, the maximum amount per transaction is $2,999.99. Instant transfers come with a small fee but are processed within minutes.

To maximize your weekly limit, it’s important to verify your identity on Venmo. Verified users enjoy higher limits compared to unverified users, who may face a lower transfer cap.

2. Venmo Person-to-Person Limit

Venmo also has limits for person-to-person transfers. Verified users can send up to $4,999.99 per week in payments to other Venmo users. For unverified users, this weekly cap is lower, typically around $299.99.

These person-to-person limits are separate from the bank transfer limits. This means if you reach your limit for person-to-person payments, you can still transfer funds to your bank account within the bank transfer limit.

3. Venmo Send Limit Per Day

While Venmo does not have a specified daily send limit, all transactions count toward the overall Venmo weekly transfer limit. This means that if you have already reached your weekly transfer limit, you won’t be able to send any more funds until the limit resets, regardless of the day.

Understanding these limitations can help you plan your transfers and avoid disruptions.

Increasing Your Venmo Weekly Transfer Limit

For users who find Venmo’s standard limits restrictive, it’s possible to increase them. Here are a few tips to maximize your Venmo transfer capabilities:

Complete Identity Verification: Venmo offers higher limits to users who verify their identity. To complete this process, go to your settings, select “Identity Verification,” and follow the steps. You’ll need to provide your legal name, address, and the last four digits of your Social Security number.
Use a Linked Bank Account: If you’re using a debit or credit card to make payments, switching to a linked bank account may offer smoother transactions and help you reach your maximum transfer limit.
Check for Weekly Reset: Venmo’s transfer limits reset on a rolling weekly basis. If you reach your limit, wait until your restriction period resets before trying again.

How Do I Know My Venmo Limit?

You can check your Venmo transfer limit by going to your account settings. Under “Payment Limits,” you’ll see a breakdown of your current limits based on your verification status. Monitoring these settings regularly helps ensure that you’re within your allowable range.

Venmo Transfer Limit Tax Considerations

It’s important to consider tax implications, especially if you use Venmo for business purposes or large transactions. Here’s what to keep in mind:

Personal vs. Business Transactions: Venmo distinguishes between personal and business accounts. If you exceed certain thresholds in a calendar year—usually $600 in business-related transactions—you may receive a 1099-K form for tax reporting purposes. However, personal transactions typically don’t trigger tax reporting.
Transaction History: To keep accurate records for tax purposes, regularly review your Venmo transaction history. This feature is available under account settings and can be downloaded for easy record-keeping.
Venmo’s transfer limit policies are designed to support personal and business transactions within reasonable boundaries. Always consult a tax professional if you’re uncertain about reporting requirements.

Frequently Asked Questions (FAQs)

1. How Much Can You Send on Venmo for Free?

Venmo allows users to send money for free when using a linked bank account or debit card. However, using a credit card incurs a 3% fee per transaction. There’s no charge for receiving funds.

2. Can I Increase My Venmo Weekly Transfer Limit?

Yes, completing identity verification is the primary way to increase your weekly transfer limit. This process raises the maximum allowable amount for both person-to-person transfers and bank account transfers.

3. How Long Does It Take for the Weekly Limit to Reset?

Venmo operates on a rolling weekly limit, which resets exactly one week after a transaction. For instance, if you sent $2,000 on a Wednesday, that portion of the limit will reset the following Wednesday.

4. Why Can’t I Send Money on Venmo Even Though I Haven’t Reached My Limit?

If your transfer is being declined despite staying within the limit, this could be due to account verification issues, insufficient balance, or temporary restrictions due to suspected fraud. Contact Venmo support for specific issues.

5. Do Venmo Transfer Limits Apply to All Transactions?

Yes, all person-to-person payments, as well as bank account transfers, count toward your weekly transfer limit. Keep in mind that these limits differ for verified and unverified accounts.

6. How Does Venmo Define a Week for Transfer Limits?

Venmo’s weekly limit is based on a rolling seven-day period, meaning each transaction counts toward the limit until seven days have passed. This structure differs from a fixed calendar week and may vary based on your specific transaction history.

7. Can I Avoid the Venmo Instant Transfer Fee?

While standard bank transfers are free and take 1-3 business days, Venmo’s instant transfer option incurs a fee of 1.75% (minimum $0.25) per transfer. To avoid fees, use the standard transfer option.

By understanding these Venmo weekly transfer limits and related considerations, users can better manage their finances, optimize the platform’s free options, and stay within allowable limits for various transactions.

How to Transfer Money from Venmo to Your Bank: A Step-by-Step Guide

Venmo, a peer-to-peer platform for payments that is increasingly popular, allows you to send money quickly between family and friends. Venmo can be used for everything from paying friends back after coffee dates, to splitting dinner bills. It is also great for purchasing online products. Venmo is a convenient solution because it does not require checks, cash, or ATM fees for transactions. Venmo allows you to send money instantly. When it is time to transfer the money back to your account, you will need to be aware of certain details.

Venmo will ask you to link your bank with Venmo as your first step. Go to “Me” and select “Transfer Balance.” You can then choose which bank account to transfer your money into. This is done either by standard transfer, which takes up to 1-3 days, or an instantaneous transaction that charges a fee. Venmo offers users the option to manually link bank accounts. However, to reduce fraud, they also send micro-transfers that are $1 or less to verify your ID and to prevent possible phishing scams. So, let’s begin and learn more about how to transfer money from bank to Venmo.


How to Transfer Money from Venmo to Bank?

Below mentioned are the steps on how to transfer money from Venmo to your bank account.

·         Open the Venmo App on your smartphone.

·         The “Me” icon is located at the bottom-right corner of the application. You will be taken to your profile.

·         Look for “Add or Transfer” on your profile page under Venmo.

·         Select “Transfer to Bank”, when prompted.

·         Enter the amount that you want to transfer to your bank account.

·         Select the account to which you would like your funds transferred. To avoid any delays, make sure the account information you provide is correct.

·         Tap “Transfer”, after reviewing the details. Once the transfer has been completed, you will get a confirmation.


How to Transfer Money from Bank to Venmo?

Follow these steps on how do you transfer money from bank to Venmo:

·         Be sure that your Venmo account is linked with your bank account before transferring. This can be done by going to Settings > Payment methods > Add Bank or card > Bank.

·         After you have linked your bank account, click on the “Me tab” and choose your Venmo balance.

·         Select the “Add Money’ option to start transferring money from your bank account to Venmo.

·         Enter the amount that you would like to add to Venmo. Venmo has a $10 minimum for transfers.

·         Venmo will begin the transfer after you double-check your details and tap “Add Money”.

·         Transfers to Venmo from your bank typically take 3 to 5 business days. There is no instant option for bank to Venmo transfers. However, by planning you can make sure your Venmo account is available when needed.


How Long Does a Venmo Transfer Take?

So how long does it take for Venmo to transfer? This is a question that users ask frequently. Answers vary depending on what type of transfer is selected and how long it takes for the bank to process the transaction. Venmo standard transfers are usually free of charge and take between 1-3 working days to complete. The transfer can take longer if it is initiated during weekends or holidays. It may take up 24 hours to show in your Venmo balance if you sent money to another email account from your Venmo.

Double-check that both parties entered the right email address and have checked for the final four digits on their bank account or credit card. Venmo charges 1.75% for instant transfers, which reach your bank in 30 minutes or less. This option is faster but may experience delays depending on your bank’s policies.


How to Transfer Venmo to PayPal Without a Bank Account?

Venmo does not currently support direct transfers from Venmo into PayPal. However, there are some alternative options if you want to transfer money between Venmo and PayPal.

·         You can transfer money using the same debit card linked to your Venmo account and PayPal account. Transfer the money first from Venmo onto the debit card and then add it to PayPal.

·         A second option is to add money to PayPal by transferring funds from Venmo into a shared account. Although it is not a direct transaction, this method offers a safe way to transfer funds between platforms.


FAQ

How long does it take to transfer money using Venmo?

Instant Venmo transfers usually take 30 minutes, while standard Venmo takes 1-3 days.

How to transfer money from bank to Venmo fast?

There is currently no option to transfer money instantly from a bank account to Venmo. Transfers usually take 3 to 5 business days.


Can I add money to Venmo without a bank account?

Venmo allows you to receive money from friends or use a debit card.


How to transfer Venmo funds to PayPal without having a bank account or credit card?

Venmo does not support PayPal direct transfers, but you can still transfer money using the linked debit card between Venmo & PayPal.


How do I transfer money from Venmo to my bank?

First of all, open the Venmo app, enter the amount and confirm to transfer money from Venmo into your bank.